
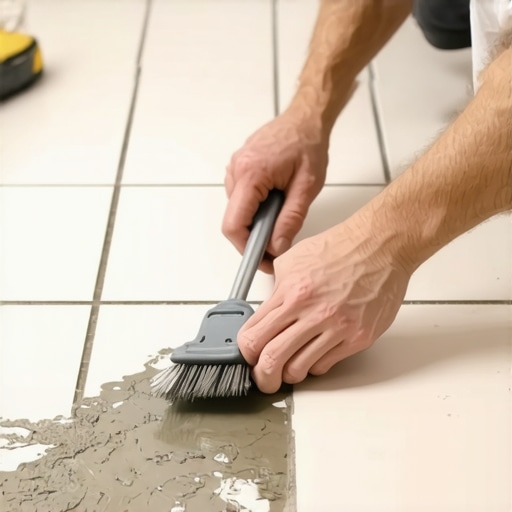
Most guys skip the leveling compound. They think the underlayment will hide the dip. It won’t. I spent three days grinding concrete on a job last month just so the floor wouldn’t click like a castanet. That same level of laziness is why you are staring at epoxy haze right now. Somebody didn’t want to do the final wash properly or they didn’t respect the pot life of the resin. I once spent a week in a high rise bathroom because the previous installer left epoxy residue on every single handmade tile. It was like trying to peel dried superglue off a porcelain doll with a toothpick. If you think a scrub brush and some soap will fix this, you are dreaming. Epoxy is not a cement product; it is an industrial strength adhesive system. When it cures, it creates a cross linked polymer chain that is effectively a layer of plastic bonded to your tile. You need to understand the physics of that bond before you try to break it, or you will end up destroying the very surface you are trying to save.
The plastic ghost that ruins your shower
Removing hardened epoxy grout residue requires specialized chemical strippers, mechanical abrasion, or thermal softening techniques. Unlike cement based grout, epoxy is a two part resin that creates a permanent chemical bond with the tile surface, making it immune to standard acidic cleaners and traditional scrubbing methods. I see this all the time in modern showers where homeowners want the durability of epoxy but the installer was too slow with the white scotch pad. The residue looks like a greasy film or a cloudy shadow that only appears when the light hits it at an angle. If you let it sit for more than twenty four hours, it is no longer just a stain. It is a structural part of the surface. You can learn more about maintaining these spaces by looking at tile cleaning tips for a sparkling bathroom in 2025 to keep things looking sharp after the heavy lifting is done.
The chemistry of the epoxy resin bond
Epoxy grout chemistry involves a chemical reaction between a base resin and a hardener that creates an exothermic cure. This process results in a non porous surface that is acid resistant and stain proof, which is why we use it in high traffic areas and wet environments. The specific molecular structure of epoxy resins, often based on bisphenol A or F, allows them to anchor into the microscopic pores of the tile glaze. This is why removing it is so difficult. You are not just cleaning a surface; you are performing a surgical strike on a polymer. In high humidity environments like Miami or the swampy regions of the south, the curing process can be unpredictable. High moisture levels can lead to something we call amine blush, a waxy film that rises to the surface and makes the haze even more resistant to standard solvents. You have to break that wax layer before you can even touch the resin underneath.
“A floor is only as good as the subfloor beneath it; deflection is the enemy of every joint.” – Master Flooring Axiom
Mechanical removal strategies that protect your tile glaze
Mechanical removal of epoxy haze involves using physical force and abrasive tools like plastic scrapers or razor blades held at a forty five degree angle. This method is highly effective for thick deposits but requires extreme precision to avoid scratching the tile glaze or damaging the baseboards surrounding the floor area. I prefer a fresh single edge razor blade, but only on porcelain. If you are working with a soft natural stone or a decorative ceramic, you will scar it for life if you use steel. For those softer surfaces, you need a stiff nylon brush or a white abrasive pad. Do not use the green ones. Green pads contain aluminum oxide which is hard enough to scratch glass. You have to match the Mohs hardness of your tool to the surface of your tile. If your tile is a 7 on the hardness scale, your tool should be a 5 or lower. It is basic physics. If you have already damaged your perimeter during the install, check out baseboards makeover ideas to elevate your space to cover up those rookie mistakes.
| Removal Method | Risk Level | Success Rate | Recommended Surface |
|---|---|---|---|
| Razor Scraping | High | 95% | Polished Porcelain |
| Chemical Stripper | Medium | 85% | Textured Ceramic |
| Heat Gun | Low | 70% | Natural Stone |
| White Scotch Pad | Minimal | 40% | All Surfaces |
Chemical solvents that actually dissolve resin
Chemical epoxy strippers utilize benzyl alcohol or proprietary solvents to swell the resin matrix and weaken the bond. These products are essential for large areas of haze where manual scraping is physically impossible and provide a uniform clean without the risk of mechanical scratching. Most people reach for vinegar or muriatic acid. That is a waste of time. Epoxy laughs at acid. You need a solvent that can penetrate the cross linked plastic. Look for a stripper specifically labeled for epoxy grout. You apply it, let it dwell for fifteen to thirty minutes, and watch for the haze to start wrinkling. That wrinkling is the sign that the solvent has broken the chemical chains. If you are trying to save a floor that looks like a disaster, you might also be interested in grout restoration secrets for long-lasting results which covers how to handle the joints after the haze is gone.
The heat gun method for stubborn residue
Thermal epoxy removal uses a high temperature heat gun to reach the glass transition temperature of the cured epoxy. By heating the resin to approximately three hundred degrees Fahrenheit, the plastic becomes pliable and can be wiped away with a coarse rag or plastic scraper. This is a delicate dance. If you heat the tile too quickly, you can cause thermal shock and crack the porcelain. You want to move the heat gun in a constant circular motion. Do not stay in one spot for more than a few seconds. This is the only way to get epoxy out of those deep, faux wood grain textures on modern plank tiles. It is tedious work, but it saves the installation. If the shower looks great but the grout is still problematic, see showers with a style trendy ideas for small bathrooms for inspiration on how to finish the room correctly.
“Epoxy is forever, unless you understand the solvent chemistry required to undo it.” – Master Flooring Axiom
Why your subfloor is lying to you
Subfloor stability is the foundation of every tile installation and directly affects the performance of epoxy grout. If the subfloor deflects or shifts, the epoxy joints may crack or delaminate, regardless of how well you removed the haze during the initial cleanup phase. I have seen guys spend days cleaning haze only for the floor to fail two months later because the joists were spaced twenty four inches on center with no blocking. The epoxy is rigid. It does not like to bend. If your subfloor moves, the epoxy will pop out in chunks. This is why we check for L/360 deflection before the first tile even hits the thin set. If you are looking to refresh an old installation without a full tear out, you should read how to refresh grout without replacing it for some practical alternatives to the nuclear option.
- Always wear a respirator when using chemical strippers or heat guns.
- Test a small inconspicuous area to ensure the solvent does not discolor the tile.
- Keep a bucket of clean water and a sponge nearby to neutralize chemicals.
- Use a plastic putty knife for the first pass of scraping.
- Inspect the work with a high lumen flashlight at a low angle.
- Wipe the surface with denatured alcohol as a final step to remove greasy residue.
The 1/8 inch that ruins everything
Precise grout joint depth and spacer placement are vital components of a clean epoxy install. If the grout is too high or the spacers are not removed, the excess material will smear across the tile face during cleanup, leading to the heavy haze that is currently plaguing your project. You have to leave room for the material to sit in the joint, not on the shoulder of the tile. I tell my apprentices that the cleanup starts before the grout bucket is even opened. You keep your tiles clean while you set them. You wipe away the thin set squeeze out immediately. If you have a clean canvas, you have a clean grout job. If you are starting with a mess, you will end with a mess. Precision is the difference between a master and a handyman. Stop looking for shortcuts and start looking at your level and your moisture meter. That is the only way to get a floor that lasts thirty years instead of three.