
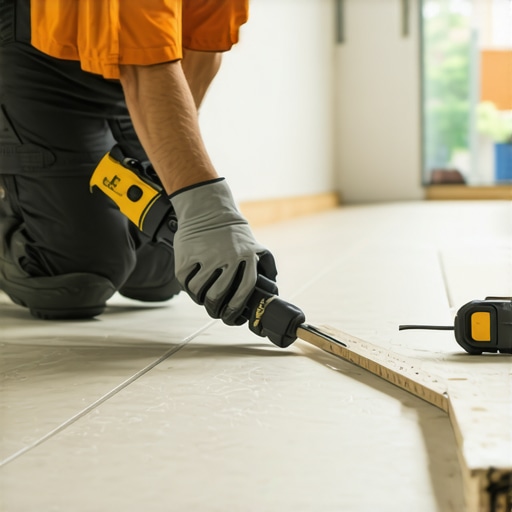
Mastering Skirting Board Installation Over Existing Tile for a Professional Finish
Most guys skip the leveling compound. They think the underlayment will hide the dip. It won’t. I spent three days grinding concrete on a job last month just so the floor wouldn’t click like a castanet. That experience taught me one thing. If you do not respect the relationship between the wall and the floor, your finish will look like garbage. I have seen fifteen thousand dollar projects ruined because an installer thought a bit of caulk would hide a half inch gap. Installing skirting boards over existing tile is not a decorative choice. It is a structural engineering task that requires an understanding of expansion gaps, adhesive chemistry, and the physics of the scribe. When you are working on a tiled surface, you are dealing with a rigid, non porous material that does not behave like a standard subfloor. You cannot just nail into it. You have to understand the bond at a molecular level.
The structural reality of tiled walls
The installation of skirting boards over a tiled floor requires a deep understanding of substrate flatness and adhesive shear strength. You must account for the expansion gap left by the original tile installer while ensuring that the baseboard material can withstand the vertical tension of the wall. Failing to address the wall-floor junction leads to cracked grout lines and loose boards. When we talk about tiles, we are talking about a material with a high thermal mass. It expands and contracts at a different rate than the timber or MDF used for skirting. This difference creates stress. If you use the wrong adhesive, that stress will eventually snap the bond. You need something that remains flexible after curing. I always reach for a silane modified polymer. It handles the movement without letting go of the glaze on the tile.
“A floor is only as good as the subfloor beneath it; deflection is the enemy of every joint.” – Master Flooring Axiom
Why your subfloor is lying to you
Every subfloor has a secret story told through its deviations in height and its surface tension. When tiles are laid, the thin-set mortar adds an extra layer of structural complexity that can create uneven vertical planes at the wall edge. To fix this, you must measure the floor levelness using a ten foot straight edge before you even think about cutting a board. I have walked onto jobs where the tile was so wavy it looked like the Atlantic Ocean. You cannot just push a straight board against a wavy floor. It will not work. You have to scribe it. Scribing is the process of mapping the floor’s imperfections onto the board. It is tedious. It is frustrating. But it is the only way to get a zero threshold look. If you skip this, you are just a handyman, not an installer.
The ghost in the expansion gap
The perimeter expansion gap is a critical structural requirement for all tiled floors to prevent tenting or cracking. When you install skirting boards over this gap, you must ensure the baseboard thickness is sufficient to cover the void without being mechanically fastened to the tile itself. If you pin the floor down with your skirting, the floor will buckle. It needs to breathe. Imagine the tile as a living thing. When the temperature rises, it grows. If you have blocked that growth with a baseboard and a pile of heavy furniture, the pressure has to go somewhere. Usually, it goes up. That is how you get tiles popping off the floor in the middle of the night. Keep your gap clear and let the skirting float just a hair above the surface.
Chemical bonding versus mechanical fastening
Choosing the right adhesive involves analyzing the surface energy of the tile glaze and the porosity of the skirting material. High performance construction adhesives like polyurethane or MS polymers provide the tensile strength necessary to hold baseboards against vertical surfaces without the need for visible nails or screws. When you are working over tile, nails are often useless because you cannot hit the studs through the tile without risking a crack. You are relying on the glue. You need to clean that tile surface like your life depends on it. Any grease, dust, or old floor wax will act as a bond breaker. I use denatured alcohol. It evaporates fast and leaves nothing behind. Then I apply the adhesive in vertical beads. Horizontal beads trap air and moisture. Vertical beads allow for airflow and better curing.
| Adhesive Type | Cure Time | Shear Strength | Best Use Case |
|---|---|---|---|
| SMP (Silane Modified) | 24 Hours | High | Non-porous tiles |
| Polyurethane | 12 Hours | Very High | Heavy timber boards |
| Water-based | 48 Hours | Moderate | MDF on porous brick |
The 1/8 inch that ruins everything
A deviation of 1/8 inch along a ten foot span can cause visible gaps that undermine the integrity of the baseboard installation. Precision in miter cuts and coping joints is mandatory to ensure the skirting boards look seamless and professional despite the rigidity of the underlying tile. If you are off by a hair, the eye will find it. I spent years perfecting the cope joint. A miter is lazy. Wood shrinks and miters open up. A coped joint is where you cut the profile of one board into the end of another. It allows the boards to slide past each other during seasonal changes. It is the mark of a master. When you are working over tile, you also have to worry about the grout lines. If your board sits on a high spot of grout, it will tilt. You have to notch the back of the board or sand the floor flat. There is no middle ground here.
Strategic tools for precision scribing
To achieve a professional finish, you must use a quality compass and a jigsaw to scribe the bottom edge of the skirting board to the contour of the tile. This technique ensures a tight fit that minimizes the need for caulking and enhances the durability of the installation in high moisture areas like showers or bathrooms. For more ideas on how to handle these transitions, you should check out baseboards makeover ideas to elevate your space. I always tell my apprentices that the scribe is where the men are separated from the boys. You set the board against the wall, open your compass to the widest gap, and drag it along the floor. The pencil marks the exact shape of the tile on the wood. Then you cut that line with a slight back bevel. It fits like a glove every time.
- Ensure the tile surface is free of wax and debris
- Use a compass to map floor irregularities onto the board
- Apply adhesive in vertical beads for moisture control
- Cope the internal corners instead of mitering them
- Leave a 1mm gap at the bottom for silicone sealant
- Check wall plumbness before applying adhesive
Baseboard designs that transform rooms in 2025
Modern interior design trends favor tall profiles and clean lines that complement large format tiles and minimalist grout lines. Selecting chic baseboard designs that offer moisture resistance is essential for maintaining a high end look in wet areas where tile cleaning occurs frequently. You can find inspiration for these styles at chic baseboard designs that transform rooms in 2025. I have seen a shift toward shadow gap profiles. They are a nightmare to install because they require a perfect subfloor, but the result is stunning. They make the wall look like it is floating above the tile. If you are going for that look, your tile needs to be dead level. Any variation will be magnified by the shadow. It is high stakes flooring.
“Tile is a rigid system; any movement in the subfloor will manifest as a failure in the bond or the grout.” – TCNA Technical Manual
Grout restoration and tile prep
Before attaching skirting, you must evaluate the condition of the grout at the wall perimeter to ensure no moisture wicking will occur behind the new boards. Utilizing grout restoration secrets can prevent mold growth and ensure the longevity of both the tile and the skirting installation. Check out grout restoration secrets for long-lasting results and also consider tile cleaning tips for a sparkling bathroom in 2025 to prepare the area. If you glue a baseboard over moldy grout, you are just burying a problem. It will come back to haunt you. The moisture will rot the back of your MDF or warp your timber. I always spray the perimeter with a microbial inhibitor. It is a five minute step that saves a five thousand dollar headache later. Clean it. Dry it. Then glue it.
The physics of the final seal
The final seal between the skirting board and the tile should be done with high grade silicone rather than acrylic caulk to allow for hydrophobic protection and elasticity. This sealant bead acts as a moisture barrier, preventing water ingress from cleaning or spills from reaching the subfloor or the adhesive bond. People use cheap caulk because it is easy to paint. But caulk gets brittle. It cracks. Silicone is a pain to work with, but it stays flexible. In a bathroom, it is the only option. You want a bead that is thin enough to be invisible but thick enough to bridge the gap. I use a soapy water spray to smooth the bead. It prevents the silicone from sticking to the tile glaze where you do not want it. It is all about the details. If you can see the silicone from across the room, you did it wrong. It should be a ghost. It is there to do a job, not to be seen.