
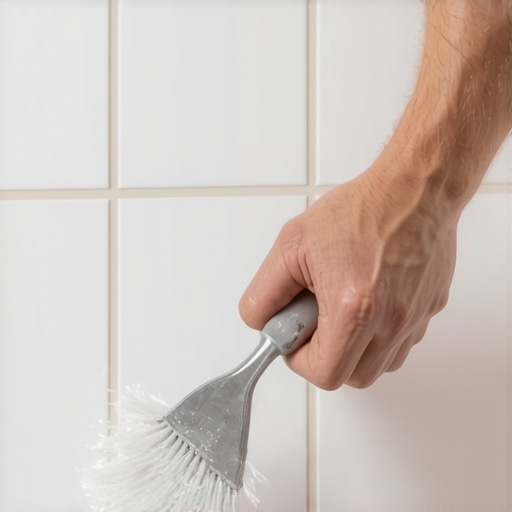
How to Remove Grout Without Damaging Your Expensive Shower Tray
I spent three days grinding concrete on a job last month just so the floor wouldn’t click like a castanet. That same precision is what stands between you and a cracked shower pan. Most guys skip the prep. They think the underlayment or the grout will hide the dip. It won’t. I once walked into a master bath where a homeowner had taken a hammer and a cold chisel to a $3,000 stone resin tray to remove some moldy grout. He didn’t just remove the grout, he sent a hairline fracture right through the drain assembly. Now he’s looking at a five-figure tear-out because he didn’t respect the physics of the bond. You cannot brute force your way through a shower renovation. You have to understand the mechanical grip of the material and the fragility of the substrate. If you want to keep that expensive tray intact, you stop thinking like a demolition contractor and start thinking like a surgeon. I’ve been on my knees with a moisture meter for twenty-five years, and I’ve seen every mistake in the book. This is how you do it without ruining your investment.
The physics of the shower tray interface
Removing grout without damaging a shower tray requires an understanding of the mechanical bond between cementitious material and acrylic or stone surfaces. You must utilize oscillating tools with diamond-grit blades held at a thirty-degree angle to ensure the vibration shatters the grout without penetrating the tray flange or the waterproof membrane beneath. This method relies on controlled friction rather than impact. Impact is the enemy of the shower pan. When you strike a grout line with a chisel, the energy transfers through the grout and into the tray. Acrylic trays are flexible, stone resin trays are brittle, and both will fail if the energy is concentrated on a single point. You need to dissipate that energy. Using an oscillating tool allows the blade to move back and forth at twenty thousand orbits per minute. This speed creates a micro-fracture environment in the grout while the high-frequency vibration is absorbed by the tray’s density without causing a structural break. If you are worried about the surface appearance, you should check out these tile cleaning tips for a sparkling bathroom in 2025 before you decide that total removal is the only option.
“A floor is only as good as the subfloor beneath it; deflection is the enemy of every joint.” – Master Flooring Axiom
Why your oscillating tool is a surgical scalpel
An oscillating multi-tool is the only acceptable power tool for removing grout near an expensive shower tray because its movement is restricted to a small arc. Unlike a rotary tool or a grinder which can easily kick or skip across the tile surface and gouge the tray, the multi-tool provides a level of precision that allows you to stop within a millimeter of the resin edge. The choice of blade is the most vital decision you will make. Do not use a serrated steel blade. You need a carbide or diamond grit edge. Diamond grit does not cut the grout as much as it sands it into a fine powder. This powder acts as a lubricant during the process, reducing the heat build-up that can melt the edges of an acrylic shower tray. I have seen guys use a Dremel with a high-speed bit and melt the plastic flange of a shower base in seconds. Heat is a byproduct of friction, and if you stay in one spot too long, you are asking for trouble. Move the tool constantly. Work in three-inch sections. This prevents the temperature from reaching the glass transition point of the tray material. If you find that the grout is simply discolored rather than failing, you might consider how to refresh grout without replacing it to avoid the risk of power tools entirely.
The chemical bonds of old Portland cement
Standard grout is a mixture of Portland cement and sand that forms a rigid crystalline structure that is significantly harder than the resin or acrylic found in modern shower trays. This hardness disparity means that any tool capable of cutting grout is more than capable of destroying your tray. You are dealing with the Mohs scale of mineral hardness. Your grout is likely a seven, while your acrylic tray is barely a three. If your blade slips, the tray loses every single time. To mitigate this, you should always leave a paper-thin layer of grout against the tray during the initial pass. You can then remove this residual film with a manual hand scraper or a nylon abrasive pad. This sacrificial layer of grout protects the tray from the high-speed vibration of the power tool. If you are dealing with epoxy grout, the situation is even more dangerous. Epoxy is a plastic-to-plastic bond when it meets a resin tray. It does not shatter, it must be softened with heat or cut with extreme precision. Most homeowners should not attempt epoxy removal near a high-end tray. It is worth looking into grout restoration secrets for long-lasting results to see if a chemical deep clean can save you the headache of a mechanical removal.
| Tool Type | Risk Level | Best Use Case | Tray Safety Rating |
|---|---|---|---|
| Oscillating Multi-Tool | Medium | Bulk Grout Removal | 8/10 |
| Manual Grout Saw | Low | Detailing and Edges | 10/10 |
| Angle Grinder | Critical | Large Floor Areas Only | 1/10 |
| Rotary Dremel | High | Precision Joints Only | 4/10 |
Perimeter expansion and the silicone lie
The joint where the tile meets the shower tray should never be filled with grout, but many builders do it anyway to save time and money. This is a mistake that leads to cracking within the first year. Because the shower tray is a separate structural element from the wall, it moves independently. When you step into the shower, the weight of your body causes a minute amount of deflection in the tray. If that joint is filled with rigid grout, the grout will crack or, worse, it will put stress on the tray flange and cause it to snap. When you are removing the grout in this area, you are actually correcting a structural error. Once the old grout is gone, you should replace it with a high-quality 100 percent silicone sealant. Silicone is flexible and can handle the movement without breaking the waterproof seal. This is especially true in showers with a style where minimalist designs rely on clean lines and hidden transitions. A thick bead of grout looks terrible and performs worse. Always check your baseboards near the shower as well. Moisture can wick through the grout lines and rot the wood behind your trim. You can find chic baseboard designs that transform rooms in 2025 that are specifically designed to handle the high humidity of a bathroom environment.
A strategy for total tray preservation
To protect your expensive shower tray during grout removal, you must mask the surface with a double layer of heavy-duty duct tape or specialized protection film. This is the step that most people skip because they are in a hurry. I spent twenty minutes masking a job last week just to do five minutes of grinding. It seems like overkill until the blade slips. The tape provides a physical barrier that can absorb a momentary strike from an oscillating blade. It gives you that split second to react before the diamond grit bites into the stone resin. You should also use a shop vacuum with a HEPA filter held directly at the point of the cut. Grout dust is abrasive. If that dust gets between your shoes and the tray, you will scratch the finish just by standing there. I have seen beautiful matte black trays ruined because the installer didn’t clean up the sand as he worked. It acts like sandpaper under your boots. Keep the area clean. Keep it protected. This is the difference between a pro and a hack. For those looking for a complete overhaul, exploring showers that wow can give you an idea of how modern trays are integrated into the wall system for better longevity.
- Tape the tray edges with three layers of painter’s tape.
- Use a vacuum to remove dust every sixty seconds.
- Hold the oscillating tool with two hands for maximum stability.
- Never use a hammer and chisel near the base.
- Wear knee pads to prevent uneven pressure on the tray surface.
- Start the tool before it touches the grout line.
The 1/8 inch that ruins everything
The most common point of failure occurs in the final eighth of an inch where the grout meets the vertical surface of the shower tray. This is the danger zone. Most people try to get the power tool all the way into the corner. That is how you nick the tray. Instead, you should stop the power tool a full half-inch away from any finished surface. Use a manual grout rake for the final bit. It is slow, it is tedious, and it is the only way to guarantee a perfect result. I’ve had my hands cramped up like a bird’s claw from hours of manual scraping, but I’ve never had to tell a client I bought them a new shower tray because I was lazy. If you are updating the bathroom, you might also consider how the floor meets the walls. Check out baseboards makeover ideas to elevate your space to ensure your new grout job matches the rest of the room’s trim. A beautiful shower with old, water-damaged baseboards is a job half-done. If you are interested in a more permanent and sustainable solution, look into eco-friendly tile solutions for sustainable homes in 2025 that prioritize durability and ease of maintenance.
“The tile assembly is a system, and the integrity of the substrate dictates the longevity of the grout joint.” – TCNA Handbook Summary
Modern grout alternatives for 2025
As we move into 2025, the industry is shifting toward high-performance pre-mixed grouts that offer the flexibility of silicone with the hardness of traditional cement. These products are much easier to remove in the future because they do not form the same brittle crystalline bond. They are essentially a polymer-based material that can be peeled out with a bit of heat and a sharp blade. If you are currently struggling with old-school cement grout, remember that this is likely the last time you will have to do this if you choose the right replacement. While most people want the thickest underlayment or the hardest grout, too much rigidity actually causes the locking mechanisms on modern installations to snap under pressure. You need a balance of strength and flexibility. If you are unsure about which materials to choose for your specific region, you should contact us for a professional consultation. We specialize in navigating the complex chemistry of modern adhesives and sealants to ensure your bathroom stays waterproof for decades. Don’t let a simple grout repair turn into a structural nightmare. Follow the physics, respect the materials, and keep the power tools under control.