
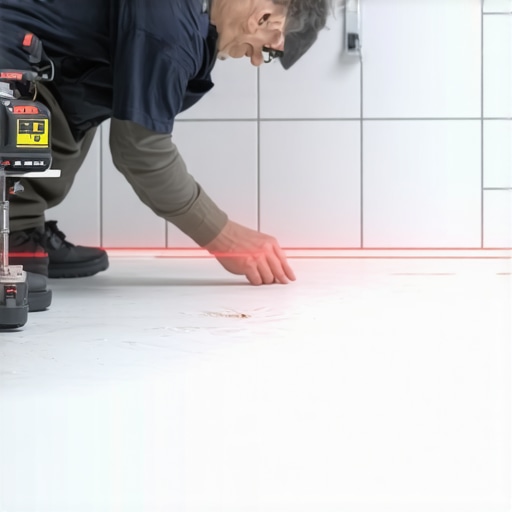
I spent three days grinding concrete on a job last month just so the floor would not click like a castanet. Most guys skip the leveling compound. They think the underlayment will hide the dip. It won’t. My hands were vibrating for four hours after I turned off the grinder, and the dust was so thick it felt like I was breathing a sidewalk. But when I clicked that green laser on, the line was a perfect, unwavering horizon across the entire room. That is the difference between a floor that lasts thirty years and one that fails in three. I have seen fifteen thousand dollar walnut floors cup until they looked like potato chips because the installer ignored the physics of the slab. I have seen showers that wow turn into moldy disasters because the slope was eyeballed instead of measured with a beam of light. A bathroom is a wet, high-stress environment where physics never sleeps. If you think you can level a five-foot shower wall with a three-foot spirit level, you are already inviting gravity to ruin your reputation. I am a mechanic with sawdust under my nails, and I am here to tell you that the laser level is the only thing standing between you and a callback that costs more than the original job.
The myth of the flat concrete slab
A laser level reveals that most concrete slabs are actually rolling landscapes of peaks and valleys that are invisible to the naked eye. Using a laser level allows you to map the high spots and low spots of a subfloor with sub-millimeter precision before a single tile is laid. This ensures that the thin-set mortar has a consistent bed depth across the entire surface. Concrete is a porous, shifting material that cures with internal stresses that often cause it to bow or dip. When you place a rigid tile over a dip, you create a hollow point. That hollow point is a structural failure waiting to happen. Every time someone steps on that spot, the tile flexes. Eventually, the bond fails, the grout cracks, and the tile pops loose. This is not a cosmetic issue. It is a structural engineering failure caused by a lack of initial precision. I have seen installers try to compensate by using more thin-set, but that creates its own set of problems. Thick-bed mortar shrinks as it cures. If one side of the tile is on an eighth of an inch of mortar and the other side is on a half-inch, the mortar will pull the tile as it dries, creating lippage. You cannot fix lippage once the mortar is set. You can only avoid it by starting with a plane that is perfectly level. If you want to see how to maintain these surfaces once they are actually flat, check out these tile cleaning tips for a sparkling bathroom in 2025 to keep that precision work looking sharp.
“A floor is only as good as the subfloor beneath it; deflection is the enemy of every joint.” – Master Flooring Axiom
The 1/8 inch that ruins everything
Professional tiling standards require a floor to be flat within one-eighth of an inch over ten feet to prevent structural failure. A laser level is the only tool that can consistently verify this standard over large spans or complicated bathroom layouts. When you are dealing with large format tiles, which are any tiles where one side is longer than fifteen inches, the tolerance for error drops to almost zero. If the floor has a slight crown, a large tile will teeter-totter on that crown. If you force it down, you create tension in the ceramic or porcelain. Heat fluctuations from the bathroom shower will cause the tile to expand and contract. Without a perfectly flat bed, that tension will eventually snap the tile or the bond. This is why many people who think they have waterproof floors find water leaking into their subfloors. The movement breaks the seal at the grout lines. People often look for grout restoration secrets for long-lasting results, but the best secret is to never let the grout move in the first place. If your subfloor is level, your grout is safe. If your subfloor is a rollercoaster, your grout is doomed. I use a 360-degree cross-line laser to establish a datum line around the entire room. This line becomes my absolute truth. I measure down from it to find the high point of the floor, and that high point dictates where the entire installation begins. It is a game of millimeters, and the laser is the only referee that does not lie.
| Feature | Spirit Level | Red Laser Level | Green Laser Level |
|---|---|---|---|
| Visibility Range | Limited to tool length | 30-50 Feet | 100+ Feet |
| Precision | Visual estimation | 1/16 Inch at 30 feet | 1/32 Inch at 30 feet |
| Hands-Free Use | No | Yes | Yes |
| Ambient Light Performance | High | Low | Excellent |
The ghost in the expansion gap
Expansion gaps are the breathing room for your floor and their precision is dictated by the levelness of the adjacent walls. Using a laser level to project a vertical plumb line ensures that your floor tiles stay perfectly square as they approach the walls and baseboards. Most bathrooms are not actually square. The framing is often done by someone in a hurry, and the drywall adds another layer of unevenness. If you start your tile layout against a crooked wall without a laser guide, your entire floor will be skewed. By the time you reach the other side of the room, you will be cutting slivers of tile that look amateur and ugly. A laser allows you to snap a digital chalk line that is perfectly perpendicular to your main entrance. This ensures that the baseboards will cover the expansion gap evenly. If the floor is not level, the baseboard will show a gap at the bottom that no amount of caulk can hide. For those looking for baseboards makeover ideas to elevate your space, remember that the best baseboard is one that sits flush against a perfectly level floor. When the floor is level, the trim work becomes easy. When the floor is wavy, the trim work becomes a nightmare of scribing and filling. I have spent too many hours with a block plane trying to fit baseboards to a bad floor because some installer was too lazy to use a laser.
Why your subfloor is lying to you
Subfloors often appear flat to the eye while hiding significant structural deflection that only a laser beam can reveal. This deflection can cause the locking mechanisms on modern flooring to snap or the mortar bonds on showers to shear over time. We often talk about Janka hardness or wear layers, but the chemistry of the adhesive bond is what matters most in a bathroom. When you use a laser, you can see if a floor is sloping toward a wall. If that wall is where your shower is located, you have a drainage problem before you even start. Water follows gravity. If your bathroom floor slopes away from the drain because the subfloor was not leveled, you will have standing water in the corners of your room. This leads to rot in the wall plates and baseboards. I always check the slope of the subfloor toward the shower pan. The TCNA guidelines are very specific about the pitch required for proper drainage. A laser level with a slope function allows me to set a precise 2 percent grade. This ensures that every drop of water from those showers with a style actually goes down the drain instead of into the floor joists. It is about moisture management at a molecular level. If the substrate is wrong, the whole system fails.
- Calibrate your laser level every morning before the first tile is laid.
- Use a tripod to keep the laser above the dust and debris of the work site.
- Set a benchmark height on a permanent fixture to check for settling.
- Use target plates for high-visibility in bright bathrooms.
- Verify plumb for all wall tiles to ensure corner grout lines are straight.
The chemistry of the perfect bond
Adhesive chemistry relies on a uniform thickness to cure at a consistent rate and provide maximum shear strength. A laser level ensures that the substrate is prepared so the thin-set mortar is never too thick or too thin. In the world of high-end tiling, we use modified thin-sets with polymers that create a flexible yet incredibly strong bond. However, these polymers are sensitive to the thickness of the application. If you have a deep pocket in the floor and fill it with mortar, the center of that pocket will stay wet longer than the edges. This creates differential shrinkage. It literally pulls the tile downward, creating an uneven surface. I have seen guys try to use cardboard or extra layers of underlayment to fix these dips. That is a recipe for disaster. While most people want the thickest underlayment, too much cushion actually causes the locking mechanisms on LVP to snap under pressure. For tile, you want a rock-solid, perfectly flat surface. If the floor is not flat, the tile acts like a bridge. A bridge that is not supported in the middle will eventually fail. I use self-leveling underlayment for almost every bathroom job now. I set my laser, find my high point, and pour the compound until it just kisses the laser line at every corner. It is the only way to be sure. If you are interested in a sustainable approach, you can even find eco-friendly tile solutions for sustainable homes in 2025 that work perfectly with these leveling techniques.
The final word on precision
I do not use a laser level because I am a tech geek. I use it because I am tired of fixing other people’s mistakes. I use it because I want my work to stand for thirty years. When you look at a bathroom where the grout lines are perfectly straight and the showers drain perfectly, you are looking at the result of a laser level. It is about respect for the craft and the materials. If you are going to spend thousands of dollars on beautiful stone or porcelain, do not ruin it by being cheap with the tools. Precision is not an option in flooring. It is the requirement. If the floor is not level, nothing else matters. The baseboards will look bad, the showers will leak, and the tiles will crack. Take the time to grind the concrete. Take the time to set the laser. Your knees, your back, and your reputation will thank you. If you ever find yourself in a situation where the grout has already failed due to poor installation, you might need to know how to refresh grout without replacing it, but it is always better to do it right the first time. For more information on professional installation standards, you can visit our contact us page or review our privacy policy. If you are planning a renovation, look into chic baseboard designs that transform rooms in 2025 to finish off your perfectly level floor. Precision is the foundation of beauty. Without it, you are just making a mess. Clear the dust, set the beam, and build something that lasts. “