
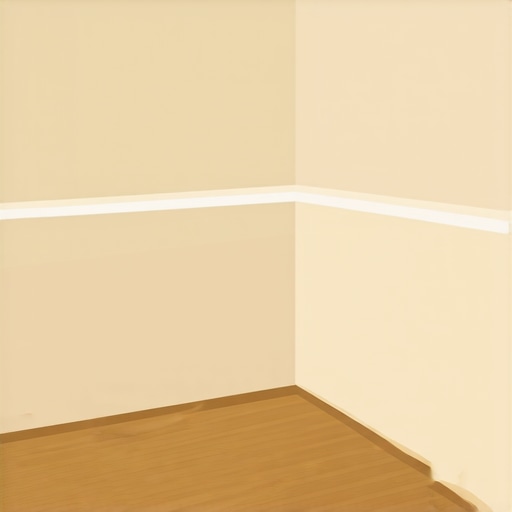
The primary way to seal baseboards in a small half-bath involves using a 100 percent silicone sealant at the floor-to-wall junction to create a waterproof barrier. This prevents capillary action from pulling liquid under the trim where it can rot the drywall and the subfloor over time. Most installers ignore the bottom edge, but that is where the real structural failure begins. If you are not sealing the interface between the tile and the wood, you are inviting mold to colonize your wall cavity.
Most guys skip the leveling compound. They think the underlayment will hide the dip. It won’t. I spent three days grinding concrete on a job last month just so the floor wouldn’t click like a castanet. That same job had a half-bath where the previous contractor used cheap MDF baseboards and zero sealant. The bottom of the trim looked like a wet sponge. It had wicked up moisture from every floor cleaning and every stray splash. The drywall behind it was black. You cannot fix that with a coat of paint. You have to understand the physics of moisture to prevent it. A small bathroom is a high-pressure environment for materials. Every time someone washes their hands or mops the floor, water finds the path of least resistance. That path usually leads right under your baseboards.
The structural reality of the half bath floor
Waterproofing the perimeter of a bathroom requires a deep understanding of surface tension and the molecular properties of liquid water. When water hits a hard surface like tile, it does not just sit there. It moves toward the edges. If there is a gap between your floor and your wall, the water will be pulled into that gap by capillary action. This is the same force that allows trees to pull water from their roots to their leaves. In a bathroom, this force pulls dirty water and cleaning chemicals into your subfloor. This leads to the degradation of the adhesive bond and the eventual rot of any organic materials. To prevent this, you must create a mechanical break in that pathway.
Why your subfloor is lying to you
The subfloor is the foundation of every successful installation, yet it is the most neglected component. If your subfloor is concrete, it is breathing. Concrete is porous and constantly moves moisture vapor from the ground into your home. If you seal a baseboard against a floor that has high moisture emission, you might trap that vapor. This leads to the floor bubbling or the baseboard paint peeling. You need to use a moisture meter to check the relative humidity of the slab before you even think about trim. If the slab is pushing out more than three pounds of moisture per 1,000 square feet, you have a problem that a bead of caulk cannot fix. You need a vapor barrier. When you look at chic baseboard designs that transform rooms in 2025, remember that the prettiest trim will fail on a wet subfloor.
“A floor is only as good as the subfloor beneath it; deflection is the enemy of every joint.” – Master Flooring Axiom
The chemical failure of cheap acrylic caulk
Acrylic caulk is for bedrooms and crown molding, not for the base of a bathroom wall. Most people buy the cheapest tube at the hardware store. That acrylic material shrinks as it cures. Within six months, a tiny hairline crack will develop. That crack is all water needs to start the rotting process. You need a sealant with a high elongation rating. I prefer a 100 percent silicone or a high-performance hybrid polymer. These materials do not shrink. They remain flexible, allowing the floor and the wall to move independently without breaking the seal. This is the difference between a floor that lasts five years and one that lasts fifty. When you are looking for tile cleaning tips for a sparkling bathroom in 2025, you will realize that aggressive cleaning agents will eat through cheap caulk. Silicone stands up to the chemicals.
The physics of capillary moisture migration
Water molecules are polar. They want to stick to things. In a tight space like the gap under a baseboard, the water will actually climb upward against gravity. If your baseboards are made of MDF, which is essentially compressed sawdust and glue, they will act like a wick. The moisture travels up the back of the board where there is no paint to protect it. Within a year, the board swells. The paint cracks. The mold starts. To stop this, you should back-prime your baseboards. Paint the back and the bottom edge before you install them. This creates a hydrophobic barrier that prevents the wood fibers from absorbing liquid. It takes more time, but it is the only way to guarantee the trim won’t rot in a wet environment like a bathroom.
| Material | Moisture Resistance | Expansion Rate | Best Use Case |
|---|---|---|---|
| MDF | Very Low | High | Dry areas only |
| Solid Pine | Medium | Moderate | General residential |
| PVC | High | Low | Wet rooms and baths |
| Solid Oak | Medium-High | Low | High-end custom builds |
Material science and the death of MDF trim
Medium Density Fiberboard is the enemy of the modern bathroom. I have seen thousands of feet of this stuff ruined because a homeowner wanted to save a few dollars. In a half-bath, you are better off using PVC or a solid wood that has been properly sealed. PVC is inert. It cannot rot. It cannot grow mold. It looks exactly like wood once it is painted. If you insist on using wood, go with a finger-jointed pine that has been factory primed on all four sides. This provides a level of protection that site-applied primer cannot match. If you are planning baseboards makeover ideas to elevate your space, prioritize the material over the profile. A simple PVC profile is better than an ornate MDF one every single time.
How to apply the perfect bead of silicone
The secret to a waterproof seal is the preparation of the joint. You cannot just squirt silicone over old dust and expect it to stick. You must clean the area with denatured alcohol. This removes any oils or construction dust that will interfere with the bond. Use a high-thrust ratio caulk gun to get a steady flow. Cut the tip of the tube at a 45-degree angle, making the opening the same width as the gap you are filling. Push the bead into the joint rather than pulling it. This ensures the sealant makes contact with both the floor and the baseboard. Use a gloved finger dipped in a little soapy water to smooth the bead. This creates a concave shape that sheds water away from the wall. This is a technical skill that requires patience. If you mess it up, you have to scrape it all out and start over. Silicone does not stick to silicone.
Why grout restoration matters for perimeter seals
If your floor tile has crumbling grout at the edges, your sealant will fail. Sealants need a stable substrate. If the grout is turning to powder, the silicone will pull away, taking the grout with it. This is why grout restoration secrets for long-lasting results are so important. You must remove any loose material before applying your perimeter seal. In many cases, I prefer to leave the grout out of the perimeter joint entirely. This is called an expansion gap. It allows the tile floor to expand and contract without cracking the grout. You then fill this gap with a color-matched 100 percent silicone sealant. This provides the look of grout with the performance of a high-end elastomer.
- Remove all old caulk and loose grout from the joint
- Clean the area with denatured alcohol to remove contaminants
- Back-prime the bottom edge of the baseboards with an oil-based primer
- Install the baseboards with a 1/16 inch gap from the floor
- Apply a continuous bead of 100 percent silicone sealant
- Tool the bead to ensure a watertight bond and smooth finish
The 1/8 inch that ruins everything
Most installers slam the baseboard down tight against the tile. This is a mistake. When the house shifts or the humidity changes, the floor moves. If the baseboard is pinned tight, the pressure will either crack the tile or cause the baseboard to buckle. Leave a small gap. This gap is what you fill with your sealant. It acts as a shock absorber. This is the same logic we use in large commercial installations. You need room for the materials to live. If you don’t give them room, they will make room by breaking. If you are looking for how to refresh grout without replacing it, remember that the perimeter is the most likely place for cracks to appear. Using silicone instead of grout in these areas prevents those cracks from returning.
The hidden danger of bathroom condensation
In a small half-bath, there is often poor ventilation. When someone takes a hot shower nearby or even just uses the sink, the humidity in the room spikes. This moisture condenses on the cold surface of the baseboards. It then runs down the face of the board and collects at the bottom. This is why the top edge of the baseboard also needs a seal. A simple bead of paintable caulk at the top prevents moisture from getting behind the board from above. This creates a fully encapsulated piece of trim. If you ignore the top, you are only doing half the job. For those looking into showers with a style trendy ideas for small bathrooms, remember that even a half-bath near a shower area needs these extreme moisture-proofing measures.
“Deflection is the silent killer of tile installations. If your subfloor flexes, your seal will break regardless of the caulk quality.” – TCNA Handbook Insight
The chemistry of the bond
Silicone works because of its siloxane backbone. This molecular structure is resistant to UV light, heat, and moisture. Unlike organic polymers, it does not provide a food source for mold. This is why it is the gold standard for bathrooms. When you apply it, a chemical reaction occurs with the moisture in the air. This is called curing. During this time, the sealant forms a covalent bond with the surface of the tile and the wood. If the surface is dirty, that bond never happens. You are left with a flap of rubber that offers zero protection. I have seen floors ruined because someone used a wet rag to “clean” the joint before caulking. The moisture from the rag stayed in the wood, preventing the silicone from sticking. You must use a solvent that evaporates quickly, like alcohol or acetone.
Final thoughts on structural integrity
Building a floor that lasts is about managing the transition between different materials. The baseboard is the bridge between the horizontal plane of the floor and the vertical plane of the wall. If that bridge is weak, the whole room suffers. Take the time to select the right materials. Avoid MDF. Use high-quality silicone. Respect the expansion gaps. If you follow these steps, you will never have to deal with the heartbreak of a rotting bathroom floor. If you need more help with your project, feel free to contact us for expert advice on material selection. Protecting your home starts at the floor level. Don’t let a small half-bath become a massive structural headache because you skipped a ten-dollar tube of sealant.