
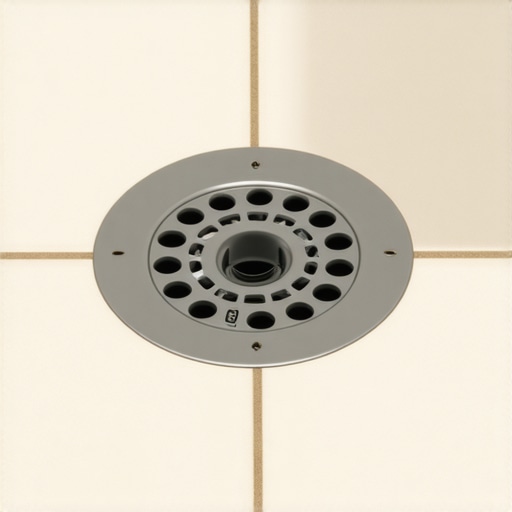
Most guys skip the leveling compound. They think the underlayment will hide the dip. It won’t. I spent three days grinding concrete on a job last month just so the floor wouldn’t click like a castanet. The previous installer had left a massive belly in the slab right where the shower pan was supposed to sit. The drain was sitting high, the floor was low, and the physics of water drainage were being ignored. Tiling around a round shower drain is the ultimate test of an installer’s patience and technical grasp of compound slopes. If you get it wrong, you don’t just have an ugly floor. You have a structural liability that will eventually lead to standing water, mold growth, and a complete system failure.
The geometry of water management
Tiling around a round shower drain requires a precise 2 percent slope and radial envelope cuts to ensure water moves toward the waste pipe without pooling. You must calculate the transition from the flat bathroom floor to the sloped shower pan, ensuring the tile thickness and thin-set bed align perfectly with the height of the drain flange. Failure to dry fit your layout will result in jagged edges that trap debris and compromise the integrity of the waterproof membrane. When I walk into a bathroom and see a square tile roughly hacked around a round cover, I know the installer didn’t respect the math. You need to understand that the drain is the lowest point of a three dimensional funnel. Every cut you make must respect that downward trajectory while maintaining enough surface area for a solid bond.
“A floor is only as good as the subfloor beneath it, deflection is the enemy of every joint.” – Master Flooring Axiom
The technical reality of a shower floor involves more than just aesthetics. You are dealing with hydrostatic pressure and the capillary action of water. If your grout lines are too wide or your cuts are sloppy, water will find its way under the tile. While the waterproofing membrane is there to catch it, you want as much water as possible to exit through the drain immediately. This is why I prefer using smaller tiles for shower floors, such as 2×2 mosaics. They follow the curve of the slope much more naturally than large format tiles. If you are dead set on using large tiles, you have to use the envelope cut method. This involves cutting the tile diagonally from the corners of the drain to the corners of the shower, effectively creating four triangular planes that tilt toward the center. It is more work, but it avoids the lippage that occurs when you try to force a flat piece of stone to bend.
Why your subfloor is lying to you
Subfloors often hide significant structural deviations that can ruin a shower installation if they are not addressed with a long straightedge and a moisture meter. Before a single tile is laid, you must verify that the substrate is within the TCNA tolerance of 1/8 inch over 10 feet. If you find a dip, you grind. If you find a hump, you grind. There is no middle ground here. I have seen countless homeowners try to hide subfloor issues by using extra thin-set. This is a recipe for disaster. Thin-set is meant for bonding, not for leveling. As the water in the mortar evaporates, the thin-set shrinks. If your bed is too thick, the shrinkage will be uneven, and your tiles will crack or delaminate. This is especially true near the drain where the stress of the slope is most concentrated.
When preparing the area, consider the moisture content of the wood or the vapor drive of the concrete. For those interested in [showers with a style trendy ideas for small bathrooms](https://elegantfloorz.com/showers-with-a-style-trendy-ideas-for-small-bathrooms), the foundation is the same regardless of the look. You need a rock solid base. If you are working on a wood subfloor, you must ensure the joist spacing is sufficient to prevent deflection. If the floor bounces when you walk on it, the tile will crack. Period. It is not a matter of if, but when. You might need to add a layer of 3/8 inch plywood or use a high quality uncoupling membrane to manage the lateral movement of the building. My hands are scarred from years of fixing these mistakes because people wanted to save $200 on prep work.
Cutting a perfect circle in a square world
Achieving a clean radius around a round drain cover demands a continuous rim diamond blade and a steady hand to avoid chipping the porcelain glaze. You don’t use a wet saw for the final radius cuts. You use a 4 inch angle grinder. I hold the tile firmly and score the circular line first. I don’t try to cut all the way through on the first pass. I make a series of shallow scores, slowly deepening the groove. This manages the heat build up and prevents the tile from shattering. Once the circle is cut, I use a diamond sanding pad to smooth the edges. It should feel like glass. If you leave a sharp edge, it will catch on the grout sponge later, and eventually, it will catch on a barefoot. That is a callback I never want to deal with.
The chemistry of the bond is just as important as the cut. For shower floors, I always use a high performance, polymer modified thin-set that meets ANSI A118.15 standards. These mortars have higher bond strengths and better flexibility. This is vital because the shower floor undergoes rapid thermal expansion when you turn on the hot water. The tile expands, the grout expands, and the thin-set has to be able to absorb that movement without breaking the bond. If you use a cheap, unmodified mortar, you are basically asking for the floor to fail. I have seen tiles pop off like bottle caps because the installer used the wrong mud. For more on maintaining these surfaces, see [tile cleaning tips for a sparkling bathroom in 2025](https://elegantfloorz.com/tile-cleaning-tips-for-a-sparkling-bathroom-in-2025).
| Tile Material | Cutting Tool | Bond Strength Requirement | Slope Compatibility |
|---|---|---|---|
| Porcelain | Diamond Blade Grinder | High (ANSI A118.15) | Excellent for Envelope Cuts |
| Ceramic | Manual Snap Cutter | Medium (ANSI A118.4) | Good for Mosaics |
| Natural Stone | Wet Saw with Guide | Variable (Back-buttering) | Requires Regular Sealing |
| Glass | Specialized Glass Blade | High (Lateral Flex) | Challenging for Slopes |
The 1/8 inch that ruins everything
Small errors in the spacing between the tile and the drain cover can lead to grout failure and water infiltration behind the drain assembly. You should leave a consistent 1/8 inch gap between the edge of the tile and the metal or plastic rim of the drain cover. This gap is not for grout. It is for 100 percent silicone sealant. Grout is rigid. The drain assembly is often made of a different material than the tile, meaning they expand and contract at different rates. If you grout right up to the metal, the grout will crack and fall out within months. By using a color matched silicone, you create a flexible gasket that moves with the house. This keeps the water where it belongs, in the pipe.
I also pay close attention to the [baseboards makeover ideas to elevate your space](https://elegantfloorz.com/baseboards-makeover-ideas-to-elevate-your-space) when finishing the perimeter. Even in a wet area, how the tile meets the wall and the baseboard affects the longevity of the install. You should never jam the tile tight against the wall. You need an expansion gap. If the house settles or the wood frame swells in the summer humidity, that gap allows the floor to move. Without it, the floor will tent in the middle, and your beautiful work around the drain will be destroyed. I’ve seen 40 foot spans of tile lift 6 inches off the floor because someone forgot a 1/4 inch expansion gap at the perimeter. It sounds like a gunshot when it happens.
- Verify subfloor levelness with a 6-foot straightedge before starting.
- Dry lay all tiles around the drain to check the slope and visual alignment.
- Use a 100 percent silicone sealant for the joint between the tile and the drain.
- Ensure the mortar coverage is at least 95 percent for wet area installations.
- Clean the drain weep holes to prevent water from backing up under the tile.
The chemistry of the waterproof barrier
The relationship between the tile, the thin-set, and the waterproofing membrane is a molecular partnership that must be respected to prevent leaks. Whether you are using a liquid applied membrane or a sheet membrane like Schluter Kerdi, the bond depends on the cleanliness of the surface. Dust is the enemy. I vacuum the subfloor three times before I apply any primer or membrane. If there is a layer of drywall dust or sawdust, the membrane is just sticking to the dust, not the floor. It will eventually peel up, taking your tile with it. I once saw a whole shower floor lift up like a carpet because the installer didn’t wipe down the slab after grinding.
“Waterproofing is not an option; it is the fundamental requirement of every wet area assembly.” – TCNA Handbook Standards
For those looking into [eco friendly tile solutions for sustainable homes in 2025](https://elegantfloorz.com/eco-friendly-tile-solutions-for-sustainable-homes-in-2025), keep in mind that recycled materials often have different absorption rates. This affects how much water they pull out of the thin-set. If you are using a very porous recycled tile, you might need to damp the back of the tile before setting it to prevent it from sucking the moisture out of the mortar too quickly. This is called ‘burning in’ the tile. It ensures that the chemical hydration process of the cement happens at the correct speed, resulting in a rock hard bond. If you skip this, the tile will sound hollow when you walk on it, a sign of poor coverage and a weak bond.
Precision at the finish line
The final stage of tiling a round drain involves the meticulous application of grout and the cleaning of the internal drain threads. After the thin-set has cured for at least 24 hours, I remove any spacers and scrape out any thin-set that squeezed into the joints. If the thin-set is too high in the joint, the grout will be too thin and will eventually flake off. You want the grout to be the full depth of the tile for maximum strength. I use a high density sponge and as little water as possible during cleanup. Too much water will wash out the pigments and weaken the cement structure of the grout, leading to a splotchy, soft finish. If your grout is already looking tired, you might need to [how to refresh grout without replacing it](https://elegantfloorz.com/how-to-refresh-grout-without-replacing-it) to bring it back to life.
Finally, always check the drain cover itself. Before the final grout or silicone sets, ensure the screws for the drain cover are accessible and that the cover sits flush. I’ve seen guys tile themselves into a corner where they can’t actually get the cover back on because the tile is 1/16 of an inch too far into the circle. That is when the grinding starts again, and that is how you ruin a Friday afternoon. Take your time, measure twice, and respect the physics of the water. If you do, that floor will outlive the house. If you don’t, I’ll be the guy you call in three years to rip it out and start over. If you need professional advice, you can always [contact us](https://elegantfloorz.com/contact-us) for a consultation on your next project.