
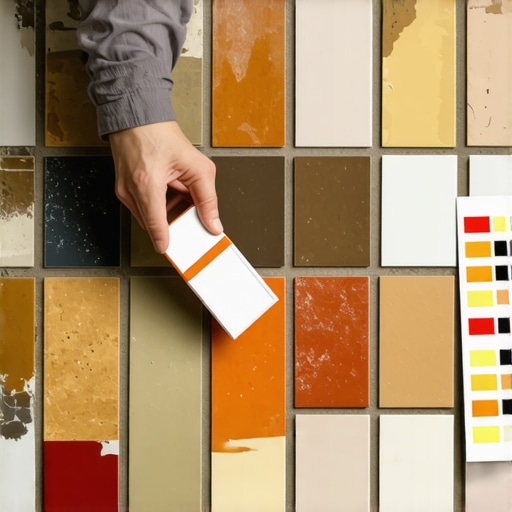
Most guys skip the leveling compound. They think the underlayment will hide the dip. It won’t. I spent three days grinding concrete on a job last month just so the floor wouldn’t click like a castanet because the substrate was as wavy as the Atlantic. That is the reality of flooring. It is not about what you see on the surface. It is about the structural integrity of the slab and the chemical bond of the materials you use. When you are looking at old tile, the grout is the first thing to fail. It cracks, it stains, and it loses its original pigment. Most homeowners think they can just buy a bag of ‘Grey’ and call it a day. They are wrong. Matching old grout is a forensic operation that requires understanding the physics of cement and the way minerals react to decades of foot traffic and cleaning chemicals. If you do not get the color right, the floor looks like a patchwork quilt of mistakes.
The hidden chemistry of grout degradation
Grout color matching for aged tile requires an understanding of pigment leaching, efflorescence, and structural hydration within the cementitious matrix. To find a matching grout color, one must identify the original binder type, whether sanded or unsanded, and account for organic staining that has permanently altered the chroma and value of the joint. Old grout is a porous network of Portland cement and sand. Over time, the calcium silicate hydrate structures in the grout absorb minerals from mop water and dirt from boots. This creates a new color that exists nowhere on a manufacturer’s swatch. You are not matching the grout they installed in 1994. You are matching thirty years of atmospheric exposure and chemical interaction. If you want a floor that looks right, you have to look at the microscopic level of the joint.
“A floor is only as good as the subfloor beneath it; deflection is the enemy of every joint.” – Master Flooring Axiom
The scraper test and the wet sample method
Successful grout matching involves the mechanical removal of the top layer of oxidation to reveal the protected pigment beneath the surface. Using a carbide-tipped grout saw or a manual scraper allows the installer to see the core color of the cement matrix before environmental contaminants altered its appearance. Once you scrape away the top millimeter of grime, you see the truth. Take that dust and those small chunks to a professional flooring supply house, not a big box store. Those discount retailers do not have the spectrum of colors needed for restoration. You need a place that stocks forty shades of beige because that is where the real work happens. Even then, the dry powder in the bag looks nothing like the cured product. You must mix a small batch and let it dry on a piece of cardboard for twenty four hours. Water changes everything. The minerals in your local tap water can even shift the color of the grout as it cures. Use distilled water if you are chasing a perfect match in a high end shower.
The physics of the expansion gap
Expansion gaps are the non negotiable perimeter voids required for thermal movement in tile installations and hardwood flooring systems. These gaps must be integrated with baseboards to prevent tenting or buckling when relative humidity fluctuations cause the substrate to expand. Many people think they can just shove grout into every corner. That is a recipe for disaster. Grout is rigid. It does not move. When the house settles or the humidity spikes, that rigid grout will crack or pop the tile right off the thin-set. You need to use color matched caulk for any change of plane. That means where the floor meets the wall or where the tile meets the tub. If you are working on a bathroom, check out these showers that wow modern designs for 2025 to see how professional transitions should look. A real pro knows that a bead of silicone in a matching color is the difference between a job that lasts and one that fails in six months.
| Grout Type | Composition | Pros | Cons |
|---|---|---|---|
| Sanded Grout | Portland Cement and Silica | Best for joints over 1/8 inch | Porous and prone to staining |
| Unsanded Grout | Portland Cement and Polymers | Ideal for narrow joints and polished stone | Shrinks in large gaps |
| Epoxy Grout | Resin and Hardener | Waterproof and chemical resistant | Extremely difficult to install |
The truth about grout pens and stains
Grout colorants and epoxy stains are topical treatments designed to penetrate the pores of cementitious grout to provide a uniform aesthetic finish. These products act as a permanent pigment barrier that prevents moisture absorption and hides permanent discoloration in old tile joints. Sometimes the old grout is structurally sound but looks like a crime scene. In those cases, you do not want to dig it out. Digging out grout is a nightmare that often ends with a chipped tile. Instead, you use a high quality colorant. This is not a ‘pen’ you buy at a craft store. This is a professional grade epoxy based stain. It bonds to the cement on a molecular level. Before applying it, you must use an acid based cleaner to open up the pores of the old grout. If the grout is sealed, the stain will just sit on top and peel off like a sunburn. You can find more grout restoration secrets for long lasting results on our site. It is about preparation, not just painting over the problem.
The 1/8 inch that ruins everything
Joint width consistency is the primary factor in the structural longevity of a tile floor or wall assembly. A 1/8 inch variation in subfloor levelness can lead to lippage and premature grout failure due to uneven stress distribution across the tiled surface. If your subfloor has a dip, the tile will bridge that gap. When you walk on it, the tile flexes. Grout cannot flex. It will turn into powder. I have seen guys try to fill a 1/4 inch gap with unsanded grout because they liked the smooth look. It cracked within a week. You must follow the TCNA guidelines. If you are looking to update your trim while fixing the floor, these chic baseboard designs that transform rooms in 2025 can help hide the necessary expansion gaps at the edges. Never underestimate the power of a clean transition.
“Cementitious grout requires a specific water-to-powder ratio to achieve maximum density; over-watering leads to soft joints and color shading.” – TCNA Installation Handbook
Regional moisture and the hydration cycle
Regional humidity levels dictate the evaporation rate of the grout hydration process, which directly impacts the final color density and structural hardness of the mortar joint. In arid climates like Phoenix, premature drying leads to chalky grout, while coastal humidity in places like Miami can extend cure times and cause efflorescence. If you are in a dry area, you might need to mist your grout joints with water to keep them from drying too fast. If it dries too fast, the chemical reaction stops, and you are left with a weak, off-color mess. In a humid basement, you might be fighting mold before the grout even sets. If you need help with the maintenance side, check out these tile cleaning tips for a sparkling bathroom in 2025. Proper cleaning prevents the need for forensic color matching in the first place.
The bottom line on restoration
Grout maintenance and color matching are essential components of long term flooring durability and home value preservation. By identifying the subfloor conditions and chemical properties of the existing grout, an installer can seamlessly integrate new repairs with old tile installations. Do not trust the plastic sticks in the store. Trust the scrape test. Trust the wet sample. And for the love of all things holy, make sure your subfloor is level before you even think about the color of your joints. If you need professional help or have questions about a specific project, feel free to contact us. We have seen every failed floor imaginable and we know how to fix them right the first time. Flooring is a science of millimeters. If you ignore the small things, the big things will fail you. Keep your joints tight, your subfloor flat, and your pigments matched by the core, not the crust.
- Identify the grout type by checking the joint width.
- Scrape the top layer to find the original cured color.
- Mix a test batch and allow it to dry for 24 hours.
- Use distilled water to avoid mineral shifts in the pigment.
- Check the subfloor for deflection before repairing joints.
- Apply a high quality sealer once the match is complete.