
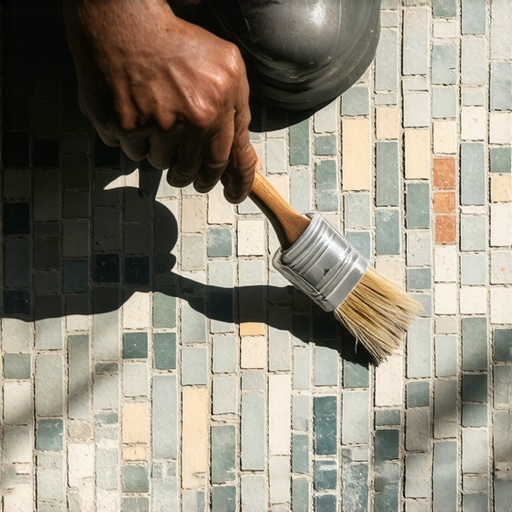
Sealing tiny grout lines in mosaic tiles requires a deep understanding of molecular surface tension and the physical properties of unsanded grout. Most homeowners think a quick spray of a generic product is enough. They are wrong. If you want a floor or wall to survive more than a season without becoming a petri dish for mold, you must treat the grout as a structural barrier. This guide breaks down the engineering requirements for protecting those hair-thin joints in mosaics, showers, and backsplash installations.
The subfloor secret that ruins every mosaic project
Most guys skip the leveling compound and think the underlayment will hide the dip. It won’t. I spent three days grinding concrete on a job last month just so the floor wouldn’t click like a castanet. If your substrate is not perfectly flat, those tiny mosaic grout lines will crack under the slightest deflection. A mosaic sheet is only as strong as the bond beneath it. When the subfloor has a valley, the grout in those 1/16 inch gaps will pop out as soon as someone walks over it. You cannot seal a crack. You must first ensure the substrate is rigid and planar before the first tile ever touches the thin-set. Most tile failures start with a lazy installer who refuses to use a moisture meter on the concrete slab.
“A floor is only as good as the subfloor beneath it; deflection is the enemy of every joint.” – Master Flooring Axiom
The capillary action trap
Tiny grout lines in mosaic tile are susceptible to capillary action where liquids are pulled deep into the porous structure of unsanded grout. Because mosaic grout lines are typically 1/16 of an inch or smaller, we use unsanded grout which lacks the silica sand aggregate found in larger joints. This makes the grout more porous and thirsty. A penetrating sealer works by lowering the surface energy of the grout particles. It uses fluoropolymers to create a hydrophobic barrier. If you fail to seal these lines properly, every drop of dirty water or shampoo in your showers will find its way into the cement matrix. Once a stain is locked inside that tiny gap, you will be looking for how to refresh grout without replacing it within months.
Chemistry over aesthetics
The choice between a solvent-based and a water-based sealer depends on the pore size of your grout and the density of your mosaic material. Solvent-based sealers have smaller molecular structures, allowing them to penetrate deeper into the tightest joints. This is crucial for dense mosaics like porcelain or glass. Water-based sealers are easier to apply but often sit on the surface of tiny grout lines rather than soaking in. You need a product that chemically bonds with the calcium silicate hydrate in the cement. I always recommend a high-quality impregnator for showers that wow modern designs for 2025 because the constant moisture exposure requires a permanent crystalline barrier within the grout itself.
| Sealer Property | Solvent-Based Penetrator | Water-Based Impregnator |
|---|---|---|
| Molecular Size | Ultra-Small | Small to Medium |
| VOC Levels | High | Low to Zero |
| Dry Time | Quick (1-2 hours) | Moderate (4-6 hours) |
| Odor Profile | Strong Chemical | Mild to None |
| Surface Finish | Natural / No Sheen | Natural / No Sheen |
The 1/8 inch that ruins everything
Precision in sealing starts with the removal of all excess adhesive that has squeezed up into the grout joints during the tile setting process. If thin-set occupies half of that tiny 1/16 inch gap, there is not enough grout to hold the sealer. You end up with a thin, brittle layer of grout that will flake away. I see this in every botched mosaic job. The installer was too fast with the trowel and did not clean the lines. Before sealing, you must take a nylon brush and ensure those lines are clear. This is especially true when working around chic baseboard designs that transform rooms in 2025 where the transition from floor to wall creates a natural stress point for the grout.
The myth of the waterproof grout joint
Grout is not waterproof and never will be regardless of how many coats of sealer you apply. Sealer is a retardant, not a permanent shield. It buys you time to wipe up a spill before it penetrates. In a shower environment, the grout is constantly saturated. The sealer prevents the water from carrying minerals and soap scum deep into the grout where they cause discoloration. If you are serious about longevity, you should check out grout restoration secrets for long-lasting results to understand how maintenance cycles work. Even the best fluoropolymer sealers break down over time due to the pH levels in cleaning agents.
Application protocols for hair-thin lines
Sealing mosaics is a game of patience because you have hundreds of tiny intersections that all need individual attention. Do not just pour the sealer on the floor. Use a foam applicator or a small brush. You want to saturate the grout without leaving a residue on the tile surface, especially if you are using unglazed porcelain or natural stone. If the sealer dries on the face of the tile, it will leave a hazy film that is a nightmare to buff off later. This is why I prefer the “apply and wipe” method where you work in small sections of five square feet at a time.
- Thoroughly vacuum the tile surface to remove all dust and microscopic debris.
- Ensure the grout has cured for at least 48 to 72 hours before sealing.
- Apply the sealer using a precision applicator to minimize waste.
- Wait 5 minutes for the sealer to penetrate the grout pores.
- Wipe the entire surface with a clean, dry microfiber cloth to remove excess.
- Perform a water bead test after 24 hours to verify the seal.
The ghost in the expansion gap
Every mosaic installation requires an expansion gap at the perimeter where the tile meets the wall or baseboards. If you grout this gap instead of using a color-matched 100 percent silicone caulk, the grout will crack and the sealer will be useless. Expansion and contraction are the primary killers of mosaic floors. When the house shifts or the temperature changes, that tile assembly needs room to move. Using baseboards makeover ideas to elevate your space is a great way to hide these necessary 1/4 inch gaps while maintaining a professional look. Never seal over caulk, as the sealer will not bond to the silicone and will create a sticky mess.
Why your subfloor is lying to you
A subfloor might look flat to the naked eye, but a 10-foot straightedge will reveal the truth of its contours. If you have more than 1/8 inch of variation over 10 feet, your mosaic tiles will experience lippage. This creates uneven grout lines that catch dirt and make sealing impossible to do evenly. I always tell my clients that the money spent on self-leveling underlayment is the best insurance policy they can buy. It ensures that every tiny grout line is at the same elevation, allowing the sealer to form a continuous, unbroken barrier across the entire surface. This is particularly vital in wet areas, so make sure to follow tile cleaning tips for a sparkling bathroom in 2025 to keep that leveled surface looking pristine.
“Deflection is the silent killer of mosaic installations; if the substrate moves, the grout fails.” – TCNA Technical Manual
Maintenance of the crystalline barrier
Stop using harsh acidic cleaners on your sealed grout if you want the protection to last more than a month. High-pH cleaners or acidic vinegar solutions will strip the sealer right out of those tiny grout lines. Use a neutral pH cleaner. If you notice water stops beading on the grout, it is time for a reseal. For high-traffic areas or small bathrooms with showers with a style trendy ideas for small bathrooms, this might mean sealing every year. In a guest backsplash that sees little action, you might go five years. Trust your eyes and the water test. The chemistry is simple, if the water soaks in, the protection is gone. If you’re looking for sustainable options, check eco-friendly tile solutions for sustainable homes in 2025 for sealers that have low environmental impact.