
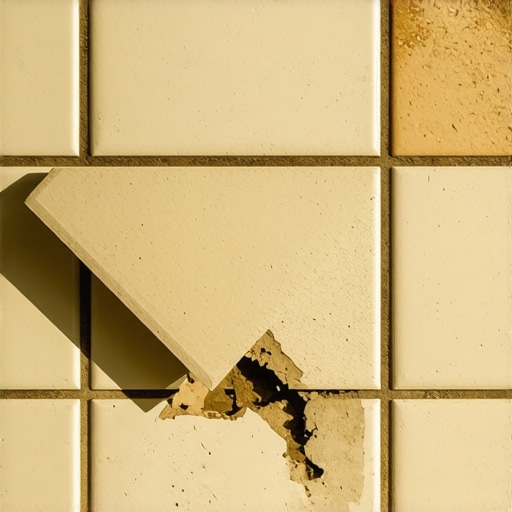
Most guys skip the leveling compound. They think the underlayment will hide the dip. It won’t. I spent three days grinding concrete on a job last month just so the floor wouldn’t click like a castanet. When you walk across a kitchen and hear that empty, drum like thud, it is not just an annoying noise. It is a structural cry for help. A hollow tile is a tile that has detached from its substrate, meaning the bond that was supposed to last decades has failed within months. This failure usually traces back to the very moment the trowel hit the floor. If you want a floor that survives, you have to look past the surface and understand the physics of the subfloor.
The anatomy of a hollow sound
Hollow tiles occur when there is an air pocket between the tile and the substrate, usually caused by poor mortar coverage or subfloor deflection. These voids prevent the tile from becoming a single unit with the house. When you step on a tile with a void underneath, the ceramic or porcelain flexes into that empty space. Since tile is a rigid material with zero elasticity, that flex eventually leads to a crack. This is the physical reality of a bad install. Most homeowners notice the sound first, especially when tapping with a coin or a broom handle. That sound is the resonance of air trapped in a cementitious cage. To understand why this happens, we have to look at the mechanical bond. Mortar works by growing microscopic crystals that hook into the pores of your tile and the pores of your concrete or backer board. If those crystals have nothing to grab, you get a hollow sound. [image_placeholder_1]
Why subfloor preparation is non negotiable
A subfloor must be flat within one eighth of an inch over a ten foot radius to prevent hollow spots and lippage. If the floor has a dip, the mortar cannot bridge that gap effectively without becoming too thick. When mortar is applied too thick, it shrinks as the water evaporates, pulling away from the tile and creating the very air pocket you are hearing now. I have seen installers try to compensate for a wavy floor by adding extra thin-set in the low spots. This is a amateur move. Standard thin-set is not designed for build up. It is designed for a thin layer. For deeper dips, you need a dedicated self-leveling underlayment or a medium bed mortar designed for large format tiles. If the subfloor is wood, it must meet the L over 360 deflection standard, which means the floor should not bend more than the length of the span divided by 360 when under load. If your joists are too far apart, your tile will pop loose and sound hollow within weeks.
The chemistry of the bond coat
The chemical bond between tile and substrate depends on the polymer content of the thin-set and the hydration rate of the cement. Many installers use the wrong type of mortar for the specific tile. For example, large porcelain tiles have a very low absorption rate, meaning they do not soak up water. If you use a cheap, unmodified mortar, it cannot chemically grip the porcelain. You need a high polymer modified thin-set that creates a suction bond. There is also the issue of skinning over. If an installer spreads too much mortar at once, the top layer starts to dry before the tile is set. This creates a thin, dry film that prevents the tile from ever sticking. It looks like it is stuck, but it is actually just resting on top of the ridges. Over time, the vibration of footsteps breaks what little contact existed, and you are left with a hollow floor. Using grout restoration secrets for long-lasting results can help identify these issues early, as grout will often crack right over a hollow void.
| Mortar Type | Best Use Case | Bond Strength |
|---|---|---|
| Unmodified Thin-set | Saltillo and high absorption ceramic | Moderate |
| Polymer Modified | Porcelain and natural stone | High |
| Large Format Mortar | Tiles over 15 inches on any side | Exceptional |
| Epoxy Mortar | Chemical resistant commercial floors | Industrial |
Mortar coverage and the eighty percent rule
The National Tile Council of North America requires at least eighty percent mortar coverage in dry areas and ninety five percent in wet areas. To achieve this, the trowel must be held at a consistent forty five degree angle, and the ridges must be combed in a straight line. Never use the spot bonding method, which is placing five dots of mortar on the corners and center. This leaves massive air gaps under the tile. When air is trapped, the tile is unsupported. Straight ridges allow the air to escape when the tile is collapsed into the mortar. I always back butter my tiles, which means I spread a thin, flat layer of mortar on the back of the tile before setting it. This ensures that even if the floor has a slight imperfection, there is a mechanical connection between the tile and the thin-set bed. Without this, you are just gambling with your flooring investment.
“A floor is only as good as the subfloor beneath it; deflection is the enemy of every joint.” – Master Flooring Axiom
How showers and wet areas accelerate failure
In wet environments, hollow tiles are a precursor to mold growth and water damage behind the walls. If a tile in a shower sounds hollow, water is likely sitting in that void. This is common in showers that wow modern designs for 2025 where large tiles are used without proper slope. Water seeps through the grout and collects in the air pockets under the tile. Since the water has nowhere to go, it sits there and degrades the adhesive bond further. This leads to the eventual collapse of the tile or the rotting of the wall studs. This is why the ninety five percent coverage rule is so vital in bathrooms. You cannot afford to have a single air pocket where moisture can stagnate. If you are noticing hollow sounds in your shower, it is time to check the integrity of your waterproofing membrane immediately.
Grout and the indicators of structural failure
Grout is the first part of the floor to show signs of a hollow tile, often appearing as fine hairline cracks or powdery residue. Grout is rigid, and when the tile underneath it moves, the grout must break. Many people think they just have a grout problem and look for how to refresh grout without replacing it, but if the tile is hollow, new grout will just crack again. You have to solve the movement issue first. If the tile is loose, it must be pulled up, the old mortar must be scraped away, and it must be reset. If you ignore the hollow sound and just patch the grout, you are inviting moisture to get under the neighboring tiles, which will cause a chain reaction of delamination across your entire room.
Baseboards and the perimeter pressure points
Baseboards that are pinned too tightly against the tile can prevent the natural expansion and contraction of the floor. Every floor needs an expansion gap at the perimeter, usually about a quarter of an inch. If the tile is installed tight against the wall and then the baseboards are smashed down on top of it, the floor has nowhere to go when the house shifts or the temperature changes. This pressure can cause the tiles to tent, which is when they lift off the floor in a V shape. This always starts with a hollow sound. If you are looking for baseboards makeover ideas to elevate your space, ensure your installer understands the need for a movement joint. A floor is a living thing that moves with the seasons, and if you choke it at the edges, it will snap in the middle.
- Check subfloor levelness with a straight edge before starting.
- Always use a primer on porous concrete to prevent the mortar from drying too fast.
- Mix thin-set to the consistency of peanut butter, not soup.
- Back butter every tile larger than twelve inches.
- Comb mortar ridges in straight lines, never swirls.
- Maintain a consistent expansion gap at all walls and vertical surfaces.
The final verdict on your flooring investment
A hollow sound is the symptom of a deeper disease in the installation process. Whether it was a dusty subfloor, the wrong trowel size, or a failure to back butter, the result is the same. You have a floor that is not fully attached to your home. If the problem is limited to one or two tiles, you can often pop them out and reset them. If the entire floor sounds like a drum, you are looking at a full tear out. It is a hard truth to hear, but flooring does not forgive shortcuts. If you are concerned about the state of your installation or need professional guidance on a repair, you should contact us to evaluate the structural integrity of your surface. Do not let a hollow sound turn into a cracked floor. Address the bond failure before it becomes a safety hazard or a total loss.