
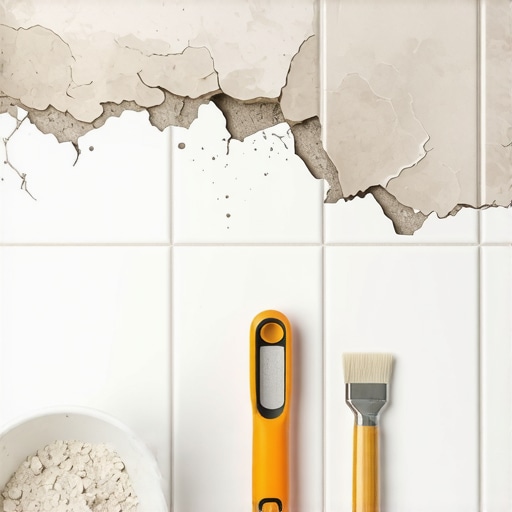
The chemical betrayal of excess water
To fix grout mixed with too much water, you must remove the weakened material, vacuum the joints, and re-apply a properly hydrated batch. Excess water creates porous structures and efflorescence that compromise the compressive strength of the installation. A carbide scraper or oscillating tool is required for effective removal. Most guys skip the leveling compound. They think the underlayment will hide the dip. It won’t. I spent three days grinding concrete on a job last month just so the floor wouldn’t click like a castanet. The same logic applies to grout. If the foundation is soft, the surface fails. I once walked into a luxury master bath where a contractor had mixed the grout to the consistency of pancake batter. Two weeks later, the homeowner could scratch the joints out with a fingernail. It was a $20,000 tile job turned into a powdery mess because someone wanted the grout to flow easier. This is the structural reality of Portland cement. It requires a specific molecular ratio of water to achieve its crystalline lattice. When you add too much, that water takes up space. When it evaporates, it leaves behind a network of microscopic voids. You are left with a sponge, not a stone. It will buckle. It will crack. It will fail.
“A floor is only as good as the subfloor beneath it; deflection is the enemy of every joint.” – Master Flooring Axiom
The physics of the soup grout failure
Excessive hydration in cementitious grout leads to a phenomenon known as segregation. The heavy aggregates and pigments sink to the bottom of the joint while the water and fine cement particles float to the top. This results in a floor that looks blotchy and feels soft. If you are working in the swampy humidity of Houston, this problem is magnified. The moisture in the air prevents the excess water from leaving the joint quickly, which keeps the cement in a suspended state for too long. This prevents the formation of ettringite crystals, which are the backbone of grout strength. When the water finally does leave, it carries soluble salts to the surface. This is why you see that white, chalky film known as efflorescence. It is not just an aesthetic issue. It is a sign that the internal structure of the grout is hollow. You cannot simply paint over this. You cannot seal it. You must mechanically remove the compromised material. For more detailed maintenance once you have fixed the mess, see our tile cleaning tips for a sparkling bathroom in 2025. A common mistake is thinking a sealer will harden soft grout. It will not. A sealer is a raincoat, not a skeleton.
The 1/8 inch that ruins everything
The depth of a grout joint is as vital as the mix. If you only scrape off the top layer, the new grout will not have enough body to bond. You need to remove at least 1/8 inch of the old material to create a mechanical key. If you are dealing with showers with a style that uses thin mosaic tiles, this becomes a surgical operation. You have to be careful not to nick the edges of the porcelain or stone. I prefer a manual carbide rake for the edges and an oscillating tool for the center of the joint. Use a vacuum with a HEPA filter simultaneously. Dust is the enemy of the new bond. If any dust remains in the channel, the new grout will sit on top of it like a scab rather than becoming part of the floor. This is where many DIYers fail. They get tired after ten minutes of scraping and try to shortcut the prep. In the dry heat of Phoenix, this dust dries out the new grout too fast, leading to more cracking. You have to dampen the joints slightly before re-grouting to ensure the old thin-set does not suck the moisture out of your new mix instantly.
| Correct Mix (Peanut Butter) | High | Uniform | Low | 20+ Years |
| 10% Excess Water | Moderate | Slight Blotching | Medium | 5-7 Years |
| 25% Excess Water (Soup) | Failed | Heavy Efflorescence | High | <1 Year |
The ghost in the expansion gap
Grout is not a flexible material. It is rigid. Most people think grout holds the tiles together. It does not. It fills the gaps to prevent debris from entering and to provide a finished look. The real work is done by the thin-set underneath. However, if the grout is too wet, it shrinks significantly during the curing process. This shrinkage pulls away from the tile edges, creating micro-gaps. These gaps are where mold starts. In showers that wow, these gaps are the first step toward a leaking pan. You also have to consider the perimeter. Every room needs an expansion gap covered by baseboards. If you grout the floor tight against the wall, the floor has nowhere to go when the house shifts. The grout will crack regardless of how well you mixed it. For those looking to finish the look properly, check out these chic baseboard designs that transform rooms in 2025. While most people want the thickest underlayment, too much cushion actually causes the locking mechanisms on LVP to snap under pressure. In tile, too much deflection in the subfloor causes the grout to pulverize into dust. You have to ensure the floor meets the L/360 deflection standard before you even open a bag of grout.
- Check the hardness of existing grout with a flathead screwdriver.
- Remove at least 50 percent of the joint depth for a lasting repair.
- Vacuum all debris using a shop vac with a brush attachment.
- Mix the new grout by hand to avoid whipping air into the paste.
- Allow the grout to slake for ten minutes before the final stir.
- Use a microfiber sponge and minimal water for the final cleanup.
Why your subfloor is lying to you
Before you re-apply grout, you must verify the subfloor is stable. If the original grout cracked because of excess water, the fix is easy. If it cracked because the plywood is bouncing, no amount of perfect mixing will save you. I once saw a job where the installer used a high-quality epoxy grout but the subfloor was only 1/2 inch OSB. The grout held, but the tile itself snapped. You need a solid foundation. If you are restoring an older home, you might need to grout restoration secrets for long-lasting results to bring the life back to the room. But always check for movement first. Press your weight onto a tile and watch the joint. If you see any movement, you have a structural problem. You might need to add a layer of cement board or a decoupling membrane like Ditra. The chemistry of the grout is only half the battle. The physics of the load-bearing surface is the other half. When you finally mix your new batch, aim for the consistency of heavy peanut butter. It should hang on your margin trowel without falling off. If it drips, it is too wet. If it clumps and falls, it is too dry. There is a narrow window of perfection. For more on modern upgrades, look at baseboards makeover ideas to elevate your space. Precision is the difference between a floor that lasts and a floor that becomes a weekend chore every six months. If the damage is localized, you can find help on how to refresh grout without replacing it, but for soup-mixed grout, total removal of the soft areas is the only professional path. Done right, the floor becomes a monolithic surface that handles the stresses of daily life without a single grain of sand coming loose.