
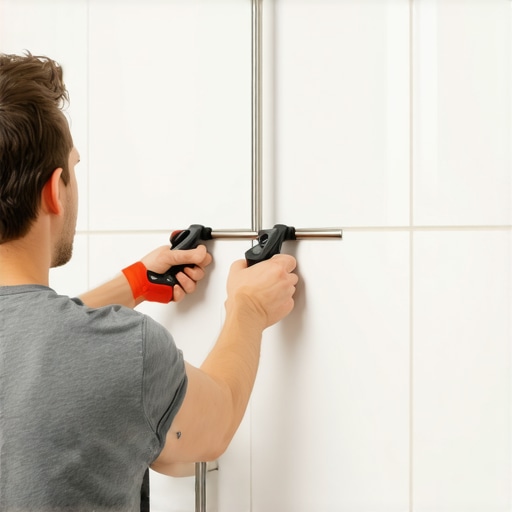
I spent three days last month grinding concrete on a job just so the floor wouldn’t click like a castanet, but the bathroom was an even bigger mess. Most guys skip the leveling compound and the proper blocking behind the wall. They think the underlayment or the tile will hide the dip or support the weight. It won’t. I walked into a master suite where a fifteen hundred dollar custom tile job was failing because a grab bar had been installed with cheap plastic anchors. The homeowner leaned on it once, and the leverage of their body weight pulled the anchor right through the cement board, cracking two tiles and turning the grout into powder. This is what happens when you treat structural safety as an afterthought or a DIY weekend project without understanding the physics of shear force and the chemistry of moisture barriers. You have to understand that a shower is a high stress environment where moisture, heat, and physical leverage meet. If that grab bar is loose, it is not just a nuisance, it is a ticking clock that will eventually lead to a catastrophic wall failure or a serious injury. We are going to look at why these bars fail and how to fix them using methods that would satisfy the toughest inspector.
The structural failure of hollow wall anchors
Securing a loose shower grab bar requires anchoring into solid wood blocking or using specialized heavy duty toggle bolts designed for wet environments. Standard plastic expansion anchors fail because tile and cement board are brittle, meaning they cannot withstand the constant vibration and leverage exerted by a human pulling on a handle. When an anchor loosens, it allows moisture to bypass the grout line and enter the wall cavity, which eventually rots the studs and causes the tile substrate to delaminate. You need to identify if you have access to a stud or if you are working with a hollow cavity, then select a fastener with a high shear strength rating to ensure the repair lasts for the life of the bathroom. This is as much about water management as it is about mechanical fastening. If you ignore the seal, you are just inviting mold to live behind your beautiful tile. For those looking for aesthetic inspiration before they start their repair, checking out showers with a style trendy ideas for small bathrooms can give you an idea of how modern hardware should be integrated into a functional space.
“A floor is only as good as the subfloor beneath it; deflection is the enemy of every joint.” – Master Flooring Axiom
The physics of shear force in a wet environment
Shear force represents the downward pressure applied to a fastener while tension refers to the pulling force away from the wall. In a shower, a grab bar is subjected to both, meaning the hardware must be able to resist the weight of a person without deforming the tile or the backing board. Most installers fail to realize that ceramic tile has a high compressive strength but very low tensile strength, so any movement in the fastener will cause the tile to spiderweb. To prevent this, the hole must be drilled with a diamond tipped bit to avoid micro-fractures. You are not just making a hole, you are creating a precision portal for a structural component. The friction of a standard masonry bit generates enough heat to weaken the tempered surface of the tile, which is why a constant water cooling method is required during the drilling process. Once the tile is breached, the focus shifts to the substrate, whether it is green board, cement board, or a modern foam system like Kerdi. Each requires a different approach to sealing. If you find your grout is also failing around the area, you might need to look into grout restoration secrets for long lasting results to ensure the entire assembly remains waterproof after the bar is tightened.
The danger of the hollow wall cavity
Hollow walls without internal wood blocking are the most common cause of loose grab bars because the cement board cannot support a concentrated load. If your bar was originally installed with simple screws into the wallboard, it was doomed from the day it was mounted. A proper fix in a hollow wall requires a toggle system that expands behind the substrate to distribute the load over a larger surface area, usually four to six square inches. This prevents the fastener from pulling through the brittle cement board under stress. I always prefer to open the wall from the backside if possible to install 2×6 blocking between the studs. This creates a solid wood foundation that allows you to use three inch stainless steel lag screws. If you cannot access the back of the wall, you are forced to use a Wingit or a Snaptoggle bolt. These are the only hollow wall fasteners I trust. They use a stainless steel channel that flips flat against the back of the wall, creating a metal to metal connection that is far superior to any plastic plug. While you are working on the wall, it is a good time to inspect the surrounding area for maintenance needs, such as tile cleaning tips for a sparkling bathroom in 2025 to keep the surface prep clean for the new silicone seal.
| Fastener Type | Substrate Requirement | Max Load Capacity | Moisture Resistance |
|---|---|---|---|
| Stainless Lag Screw | Solid Wood Blocking | 500+ lbs | High |
| Wingit Anchor | Hollow Tile/Cement Board | 300 lbs | Medium |
| Plastic Plug | Drywall Only | 25 lbs | Low |
| Toggle Bolt | Hollow Wall | 150 lbs | Medium |
The chemical necessity of 100 percent silicone
Applying 100 percent RTV silicone to the mounting plate and the screw holes is the only way to prevent subfloor rot and wall cavity mold. Many people make the mistake of using acrylic caulk or cheap kitchen and bath sealants that contain fillers. These fillers shrink over time as the moisture evaporates, leaving microscopic gaps where water can seep in. In my experience, a loose grab bar is often accompanied by dark stains in the grout lines, which is a sign of water ingress. You must clean the area with denatured alcohol to remove any soap scum or mineral deposits before applying the silicone. If the surface is not chemically clean, the silicone will not bond, and the seal will fail within months. This is the same principle I use when teaching guys about how to refresh grout without replacing it. The bond is only as good as the prep work. When you tighten the mounting plate, you should see a small bead of silicone squeeze out from the edges. This confirms that the entire perimeter is sealed. Don’t wipe it away immediately. Let it skin over for ten minutes so you don’t smear it across the tile surface, then clean the excess with a plastic tool. This prevents the moisture from the shower from ever touching the internal hardware or the sub-wall materials.
- Identify the internal wall structure using a high quality stud finder or by tapping the tile.
- Remove the loose grab bar and inspect the existing holes for water damage or rot.
- Drill new holes if the old ones are wallowed out, using a diamond hole saw bit and water.
- Vacuum out all dust from the wall cavity to ensure a clean seat for the anchors.
- Inject silicone into the hole before inserting the toggle or the screw.
- Tighten the hardware until it is snug, but do not over-torque and crack the tile.
- Apply a final bead of silicone around the decorative flange of the bar.
The 1/8 inch that ruins everything
The gap between the tile surface and the structural stud is often exactly 1/8 inch too wide for standard screws, leading to a weak connection. If your screw only bites into the wood by half an inch because of the thickness of the tile and the thin-set, it will eventually pull out. You need a minimum of 1.5 inches of thread engagement into solid wood for a grab bar to meet safety standards. I have seen countless DIY jobs fail because they used the screws that came in the box, which are almost always too short for a tiled wall. I throw those away and buy stainless steel 304 or 316 grade screws from a local supply house. You want something that won’t rust and won’t snap when you drive it into a kiln dried stud. Rusting screws expand, which can actually crack your grout from the inside out. If you are dealing with baseboards near the shower that are showing water damage, you might want to look into baseboards makeover ideas to elevate your space to see how to replace them with moisture resistant materials that complement your newly secured hardware. A floor and a wall are a system. If one part is loose, the rest will follow. Use the right length, the right metal, and the right seal.
“Every penetrations in a wet area is a potential leak; treat every screw like a dam.” – TCNA Installation Manual Reference
The final inspection of the mounting assembly
Testing the grab bar requires applying a steady load in multiple directions to ensure there is no movement or clicking sounds. If you hear a click, it means the hardware is moving against the tile, which will lead to a crack. This is the same reason I hate cheap click-lock floors on uneven subfloors. Movement equals failure. After the silicone has cured for a full 24 hours, give the bar a firm pull. It should feel like it is part of the house. If there is any flex, you need to rethink your anchoring strategy. This level of detail might seem like overkill for a simple handle, but when a person is slipping in a shower, that bar is the only thing standing between a minor scare and a trip to the hospital. While you are ensuring the safety of your bathroom, you may also want to explore showers that wow modern designs for 2025 to see how to keep your space looking updated and safe. Always remember to check your local codes, as some regions require specific heights and load ratings for grab bars in rental or commercial properties. A secure bar is a silent protector of your home’s integrity.