
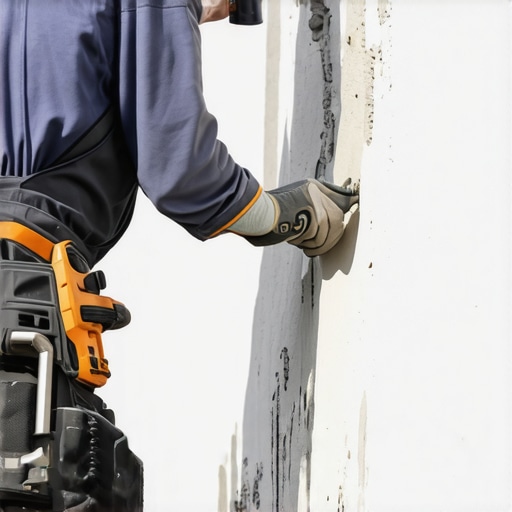
The Trick to Grouting Vertical Surfaces Without It Slumping
I spent three days grinding concrete on a job last month just so the floor wouldn’t click like a castanet, but the real nightmare started when we moved to the walls. Most guys skip the proper sub-surface prep and think the grout will hide their mistakes. It won’t. I walked into a site recently where a $20,000 marble shower looked like a melting candle. The installer had mixed his grout like he was pouring a sidewalk, and the material was literally sliding out of the vertical joints, leaving voids that would eventually lead to water intrusion. My hands are permanently stained with the dust of a thousand jobs, and I can tell you that gravity is the most unforgiving supervisor you will ever have on a job site. If you do not respect the physics of vertical adhesion, your tile project is doomed before the first sponge touches the wall.
The gravity of the situation
Grouting vertical surfaces without slumping requires maintaining a low water-to-powder ratio and understanding the rheology of the mixture. By using polymer-modified grout and allowing the mix to slake, you create a thixotropic bond that resists gravity and prevents the material from sagging out of tile joints during application. When you work on a floor, gravity is your assistant, helping the grout settle into the depths of the joint. On a wall, gravity is an active adversary. The weight of the wet cementitious material pulls at itself, seeking the lowest point. To win this fight, you must change how you think about the liquid state of your materials. It is not just about making it wet enough to spread, it is about the specific gravity of the hydrated mass. Professional showers with a style require a level of precision that builders usually ignore. We are talking about the molecular tension between the edge of the tile and the grout aggregate.
Physics of the thixotropic bond
A thixotropic substance is one that becomes fluid when agitated but returns to a semi-solid or gel-like state when at rest. This is the secret to vertical success. When you are pushing the grout into the joint with your float, you are applying shear force. This force makes the grout flow. The second you lift the float, the grout must instantly regain its structure to stay put. This is achieved through the chemical interaction of polymers and methylcellulose ethers within the dry mix. If you add too much water, you drown these polymers, and they can no longer form the microscopic web needed to hold the sand particles in suspension. The result is a slump. I have seen guys try to fix this by adding more dry powder to a wet bucket. That is a rookie move. It creates lumps and inconsistent color. You mix it right the first time, or you throw the bucket away. This is especially true when working with showers that wow, where every joint line is under intense scrutiny. [image-placeholder]
“A floor is only as good as the subfloor beneath it; deflection is the enemy of every joint.” – Master Flooring Axiom
Water is your enemy and your friend
The hydration of Portland cement is a chemical reaction, not a drying process. Most people think they are waiting for the water to evaporate. They are wrong. The water is being consumed to grow crystals that lock the sand and pigment together. On a vertical surface, if the tile is highly porous, it will suck the water out of the grout too fast, causing it to shrink and crack. If the tile is non-porous, like glass or polished porcelain, there is nowhere for the moisture to go, increasing the risk of the material sliding down the wall. You need to find the sweet spot. I use a scale to weigh my water. I do not just pour from a jug. I want a consistency that stays on my margin trowel even if I turn it upside down and shake it once. That is the only way to ensure it stays in the wall joints. If you fail here, you will be looking for grout restoration secrets for long lasting results much sooner than you think.
Choosing the right aggregate for the wall
The size of the sand particles in your grout dictates how well it will stack in a vertical environment. Coarser aggregates provide more internal friction, which helps prevent slumping in wider joints. Fine, unsanded grouts rely almost entirely on chemical additives to stay in place. If you are dealing with a joint wider than 1/8 inch on a wall, you must use a sanded product or a high-performance cementitious grout that is engineered for high-sag resistance. While most people want the thickest underlayment, too much cushion actually causes the locking mechanisms on LVP to snap under pressure, and a similar logic applies to grout. Too much volume without enough structural support leads to failure.
| Grout Type | Vertical Sag Resistance | Best Use Case |
|---|---|---|
| Sanded Grout | High | Wide joints in shower stalls |
| Unsanded Grout | Medium | Polished marble or narrow joints |
| Epoxy Grout | Very High | Commercial kitchens and steam rooms |
| High Performance | Excellent | Large format vertical porcelain |
Surface preparation before the float hits the tile
You cannot grout a dirty wall. If there is thin-set squeezed out into the joints, the grout will be too thin in those spots and will flake off. I spend more time with a utility knife and a vacuum than I do with a grout float. You need a clean, deep pocket for the grout to sit in. This creates mechanical a key. If the joint is shallow, the grout has nothing to grab onto, and gravity will win every time. This is also why I avoid using spacers that are left in the wall. They create weak points. Take them out. Clean the joints. Ensure the substrate is solid. If the backer board flexes, the grout will pop out. Deflection is the silent killer of vertical tile installations.
- Verify backer board is secured every 8 inches to prevent deflection.
- Vacuum all dust from the joints to ensure a mechanical bond.
- Mix grout to a consistency resembling stiff peanut butter.
- Allow the mixture to slake for exactly ten minutes.
- Use a dedicated wall float with a sharper edge.
The science of the slake
Slaking is the most skipped step in tile work, and it is why so many DIY jobs fail. After you mix the grout, you must let it sit for ten minutes. During this time, the water is fully penetrating the polymers and dry chemicals. If you skip this, the grout will feel stiff, you will add more water to make it workable, and you will ruin the chemical balance. After the slake, you remix it briefly without adding more water. This breaks the initial set and makes the grout creamy and ready for the wall. It will feel like a different material. It will stick to the tile edges like glue. If you are looking to how to refresh grout without replacing it, you usually find that the original installer skipped the slake, leading to soft, powdery joints that washed away over time.
“Cementitious grout for vertical applications must meet ANSI A118.6 standards to ensure the shear bond strength exceeds the gravitational pull on the material weight.” – TCNA Technical Manual
The timing of the wash
Washing grout on a wall is a dance. If you go too soon, you pull the grout out of the joints with your sponge because it hasn’t set enough to resist the suction. If you wait too long, you are scrubbing with a green pad and risking scratching the tile. On vertical surfaces, I start at the top and work my way down. This prevents dirty water from running over the fresh joints you just cleaned. Use a sponge that is barely damp. If you see water running down the tile, your sponge is too wet. That water will run into the joints, dilute the pigment, and cause efflorescence, those white salty stains that ruin the look of dark grout. This is a common issue when people try to match their grout to new chic baseboard designs or high-end tile. Precision is the only way to avoid a callback.
Baseboards and the vertical transition
The most difficult part of any vertical grouting job is the transition to the floor or the baseboard. You should never grout the change of plane. Where the wall meets the floor or where the tile meets the baseboards makeover ideas, you must use a color-matched caulk. Houses move. They breathe. The joint between the wall and floor is a moving joint. If you put hard grout there, it will crack within six months. I have seen it a thousand times. Use a 100 percent silicone sealant. It has the elongation needed to handle the movement while maintaining a waterproof seal. This is the hallmark of a professional who knows that a building is a living, shifting structure, not a static box. If you want a clean look, tape off both sides of the joint before caulking. It takes longer, but the result is a perfect line that looks like it was factory-made.
Ensuring long term durability
Once the grout is in and washed, the job isn’t over. You need to keep the site controlled. No fans blowing directly on the wall, as this causes uneven drying and shade variation. In very dry climates like Phoenix, I sometimes have to mist the walls with water to slow down the hydration process so the grout reaches its full strength. If it dries too fast, it becomes brittle. It is all about managing the moisture. If you treat the grout with respect, it will last for forty years. If you treat it like an afterthought, you will be looking for tile cleaning tips just to hide the mold growing in the cracks. Do it right, keep your water ratio low, and never underestimate gravity. It is the only way to build a shower that stands the test of time.”, “image”: {“imagePrompt”: “A close-up of a professional tiler’s hands using a rubber grout float to apply thick, grey grout to a vertical subway tile wall in a modern shower.”, “imageTitle”: “Professional Vertical Grouting Technique”, “imageAlt”: “Close up of grout being applied to vertical shower tile”}, “categoryId”: 1, “postTime”: “2025-05-15T10:00:00Z”}