
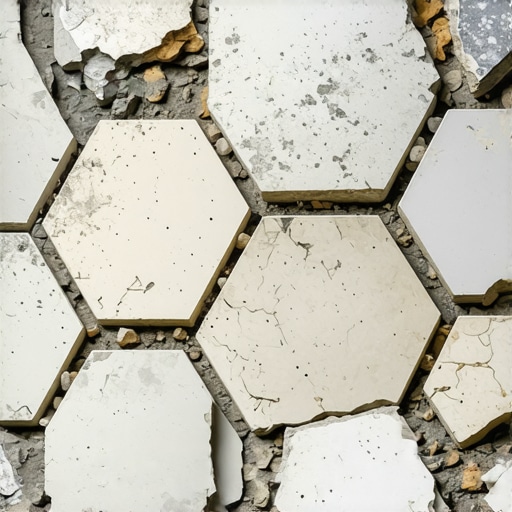
Hexagons are the final boss of the flooring world. I spent three days grinding concrete on a job last month just so the floor wouldn’t click like a castanet. Most guys skip the leveling compound because they think the underlayment will hide the dip. It won’t. When you lay a hexagon over a hump, the three-way intersection of the grout lines opens up like a hungry mouth. This is the geometry of a failure. Hexagon tiles look like a messy grid because of subfloor irregularities, inconsistent grout spacing, and a lack of center-point layout. If the substrate is not flat to within 1/8 inch over 10 feet, the hexagonal points will shift, creating lippage and crooked lines. You can’t fight the math. You have to prepare the slab with an obsession for precision that most builders simply don’t possess. I have seen fifteen thousand dollar installations ruined because the installer didn’t realize that a hexagon has three axes of alignment, not two. If you are off by a hair on the first row, you are off by an inch by the time you reach the far wall.
The geometry of a failure
Hexagon tiles look like a messy grid because the substrate lacks the necessary flatness, causing the points to drift during installation. When the subfloor has even a minor birdbath or hump, the tile must tilt to follow the contour. Because a hexagon has six sides and three meeting points, this tilt forces the grout joint to widen or narrow to compensate. This drift is cumulative, meaning the error grows larger with every row laid. You cannot simply eye-ball a hex pattern. You need a laser and a plan. Most homeowners assume that the tile itself is perfect, but manufacturing tolerances mean that even expensive porcelain can vary by a fraction of a millimeter. This is called caliber variation. If you mix calibers without adjusting your grout spacers, your grid will look like a jigsaw puzzle put together by someone in the dark. You must verify the caliber of every box before you thin-set a single piece to the floor.
The subfloor secret
The secret to a perfect grid is not in the hands of the setter but in the preparation of the concrete or plywood beneath. I don’t care how good your trowel technique is if your floor has a 1/4 inch dip. I always use a self-leveling underlayment (SLU) on hex jobs. I want that floor to be as flat as a pool table. We are talking about the physics of deflection. If your joists have too much give, the grout will crack and the tiles will pop. The National Wood Flooring Association and the Tile Council of North America have strict rules about this.
“A floor is only as good as the subfloor beneath it; deflection is the enemy of every joint.” – Master Flooring Axiom
You need to calculate the L over 360 rating for ceramic or L over 720 for stone. If the floor bounces when you walk, your hexagon grid will never stay straight. It will shift and groan until the bond breaks. I’ve spent decades on my knees with a moisture meter and a level. I know that if the moisture vapor transmission rate is too high, the adhesive will never reach its full chemical strength. You will end up with a floor that sounds hollow, and a hollow floor is a failing floor.
The math of the center line
You never start a hexagon floor at the wall. Walls are never straight. If you follow a crooked wall, your entire grid will be crooked. You must find the center of the room and snap two perpendicular chalk lines. Then, you dry lay your tiles. This is the stage where most people fail. They want to start sticking tile immediately. No. You dry lay. You check your cuts at the edges. You make sure you don’t end up with a tiny sliver of tile at the baseboard. If you’re planning showers that wow, this layout phase is even more vital. You have to account for the drain. A hexagon tile meeting a square drain is a mathematical nightmare if you haven’t pre-planned the layout. You want the drain to be centered perfectly within the hex pattern, or at least symmetrical. If it is off-center by half an inch, the whole shower floor looks like an accident. Always use a center-point methodology to ensure the pattern radiates out evenly to the perimeters.
| Technical Metric | ANSI Standard | Residential Requirement |
|---|---|---|
| Subfloor Flatness | A108.02 | 1/8 inch per 10 feet |
| Mortar Coverage | A108.5 | 80% Dry / 95% Wet |
| Lippage Tolerance | A108.02 | Less than 1/32 inch |
| Grout Joint Width | A108.02 | 3x Tile Variation |
The chemistry of the bond
The bond between the tile and the substrate is a molecular interaction. We use polymer-modified thin-set because the plastic molecules cross-link during the hydration process. This creates a bridge that can handle the microscopic expansion and contraction of the home. If you use cheap, builder-grade mastic, you are asking for trouble. Mastic is basically glue. It never truly hardens in the way cement does. For a hexagon pattern, you need a high-performance mortar with non-sag properties. This ensures that once you set the tile into the ridges, it stays there. It doesn’t slump into a dip or slide out of alignment. I always back-butter every single hex tile. You take the flat side of the trowel and skin a thin layer of mortar onto the back of the tile before placing it. This ensures 100 percent coverage. Without back-buttering, you leave air pockets. Air pockets are where tiles crack. If you drop a heavy pot on a tile with an air pocket, it will shatter. If the coverage is solid, the tile is as strong as the concrete beneath it.
Grout lines that lie
Grout is more than just a filler. It is a structural component that locks the tiles into a monolithic surface. But grout is also a visual trick. If you use a high-contrast grout, like black grout with white hex tiles, every tiny mistake will be magnified. I tell my clients that if they want a perfect grid, they should choose a grout color that closely matches the tile. This softens the lines and hides the minor variations in the tile caliber. If you must use high contrast, your spacing must be perfect to the tenth of a millimeter. I use horseshoe spacers because they are easier to pull out and don’t compress. Never use those cheap cross spacers that you leave in the grout. They will eventually telegraph through and ruin the look. You should also look at grout restoration secrets for long lasting results if you have an older floor that has started to look muddy. Keeping those lines clean is the only way to maintain the geometric integrity of the hexagon pattern. Dirt and grime are the enemies of geometry. They blur the lines and turn a crisp grid into a messy smear.
The ghost in the expansion gap
Every floor needs to move. Wood moves, concrete moves, and tile moves. If you install your hexagon tiles tight against the wall, the floor will eventually buckle. This is called tenting. The tiles have nowhere to go when the house settles or the temperature changes, so they push against each other and lift off the floor. You must leave a 1/4 inch expansion gap around the entire perimeter. This gap is the ghost in the machine. It is necessary but invisible once the finish work is done. This is where baseboards makeover ideas to elevate your space come into play. Your baseboard or shoe molding covers that ugly gap and allows the floor to slide underneath as it breathes. If you’ve got chic baseboard designs that transform rooms in 2025, you can hide a significant expansion joint while making the room look finished. Never caulk that gap with hard grout. Use a color-matched 100 percent silicone sealant. Silicone is flexible. Grout is brittle. Brittle things crack when they move.
- Check subfloor flatness with a ten-foot straight edge.
- Calculate the center point and snap perpendicular lines.
- Dry lay tiles to check for caliber consistency and edge cuts.
- Use a high-quality, polymer-modified thin-set for maximum bond.
- Back-butter every hexagon to ensure no air pockets remain.
- Maintain a consistent 1/4 inch expansion gap at all walls.
The 1/8 inch that ruins everything
Lippage is the technical term for when one edge of a tile is higher than the adjacent tile. On a hexagon floor, lippage is a disaster. Because there are so many corners meeting at one point, even a 1/16 inch height difference can create a tripping hazard and a shadow line that makes the grid look crooked. The TCNA allows for very little lippage, but I allow for even less. I use a tile leveling system. These are plastic clips and wedges that pull the tiles into the same plane while the mortar sets. Some old-school guys think they are a crutch. I think they are a necessity for modern large-format hexagons. If you want a floor that feels smooth under your feet, you cannot rely on your thumb to judge height. You need a mechanical system to lock those tiles in place. This is especially vital if you are installing eco-friendly tile solutions for sustainable homes in 2025, as many modern recycled materials have different expansion rates. Precision is the only way to avoid the messy grid syndrome. If you don’t have the patience for the prep, you shouldn’t be laying hexagons. Stick to square tiles or call a professional who knows how to handle the math.
The drainage trap in the shower
When you are working in showers with a style suited for small bathrooms, the hexagon is a popular choice because it handles the slope to the drain better than large square tiles. But this is also where the grid often falls apart. The slope of the shower pan can cause the hexagon points to