
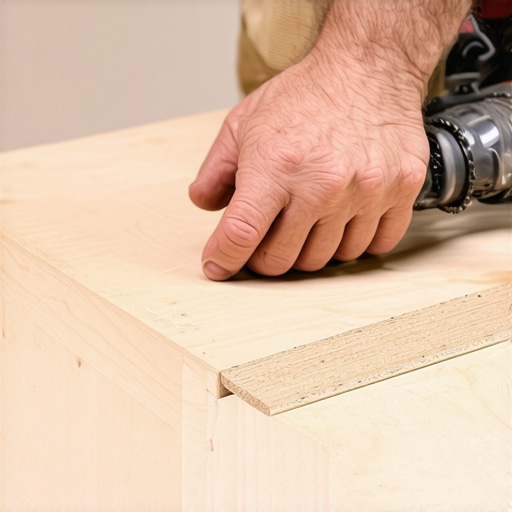
I once walked into a house where a $15,000 wide-plank walnut floor was cupping so bad it looked like a potato chip because the installer didn’t check the crawlspace humidity. That same job had baseboards with gaps in the corners big enough to hide a nickel. It was a disaster. I have spent twenty-five years with sawdust under my nails and a level in my hand, and I can tell you that a floor is only as good as the trim that finishes it. People think baseboards are just decorative sticks of wood or MDF. They are wrong. Baseboards are the final structural seal of a flooring system, hiding the necessary expansion gaps that allow your floor to breathe. If you mess up the miter, you aren’t just looking at an ugly gap, you are looking at a failure to respect the geometry of the room. The secret to a perfect corner isn’t a better saw. It is understanding that your walls are lying to you.
The geometry of the imperfect room
A perfect 45 degree cut rarely works because most house corners are not actually 90 degrees. Drywall mud buildup and framing shifts create angles like 89 or 91 degrees. You must measure the actual angle with a protractor to determine the true miter required for a tight fit. Most guys just slap the saw at 45 and pray. Then they wonder why the outside corner has a massive beak at the tip. When you look at a corner, you are looking at the accumulation of every mistake made by the framer, the drywaller, and the painter. The drywall mud is the biggest offender. It builds up in the corners, creating a hump that pushes the back of the baseboard out. This turns a 90 degree corner into something else entirely. If you want a tight joint, you have to find the actual angle. I use a dedicated digital protractor. If the corner is 91 degrees, your cut is 45.5 degrees. It sounds small, but that half-degree is the difference between a professional finish and a homeowner special. You can see more about the visual impact of trim at baseboards makeover ideas to elevate your space. Precision is the only way to avoid the shame of a wood-filler filled gap.
“A floor is only as good as the subfloor beneath it; deflection is the enemy of every joint.” – Master Flooring Axiom
The physics of the corner and the drywall hump
The drywall hump is a physical reality caused by layers of joint compound applied to the corner bead or the inside tape line. This buildup creates a non-linear surface that forces the baseboard to sit at an angle rather than flush against the wall. You have to account for this by either shaving the drywall or back-beveling the baseboard. When you press a piece of trim against a wall, the bottom plate of the framing might be recessed while the drywall mud is protruding. This creates a tilt. If your board is tilting, your 45 degree miter is now a compound miter. This is why your corners open up at the top or bottom. I often take a utility knife and carve out the excess mud behind where the baseboard will sit. It is messy, it is loud, and it is the only way to get the wood to sit flat. If the wood does not sit flat against the framing, the miter will never close. You are fighting the physics of the wall itself. This is especially true when transitioning from hardwood to wet areas like showers with a style where moisture might have already slightly swelled the bottom of the studs.
Calibration of the miter saw and blade mechanics
Miter saw calibration is the process of ensuring the blade is perfectly square to the fence and the table. Even a brand-new saw out of the box can be off by a fraction of a degree, which ruins long miter cuts. You need to use the five-cut method to check your square. I use a high-tooth count carbide blade, usually 80 to 100 teeth, to prevent tear-out. If the blade is dull, it will heat up the wood fibers and cause them to compress rather than cut. This compression leads to a joint that looks tight when you nail it but opens up as the wood relaxes. You also have to consider the kerf of the blade. The kerf is the width of the cut itself. If you are not accounting for the kerf by cutting on the waste side of your line, your board will be 1/8 inch short every single time. I’ve seen guys get frustrated and start kicking the saw. The saw isn’t the problem. The lack of calibration is the problem. You need to check your fence for straightness too. If the fence is bowed, your board will rock during the cut, and your 45 will look like a wavy line. For those looking for inspiration on how these cuts look in high-end designs, check out chic baseboard designs that transform rooms in 2025.
The back-cut and the microscopic gap
A back-cut is a technique where the saw is tilted slightly to remove more material from the back of the miter than the front. This ensures that the visible front edges of the baseboard touch first and stay tight during seasonal movement. I usually set my bevel to about 1 degree when making a miter cut. This creates a hollow space behind the joint. Why? Because wood is a biological material. It moves. It breathes. It reacts to the humidity in your house. If the joint is perfectly flat, the slightest expansion will push the whole thing apart. But if the front edges are the only part touching, they act like a hinge. They stay locked together even when the wall shifts. This is the difference between a craftsman and a handyman. The craftsman knows that the house is alive. The handyman thinks it is static. When dealing with moisture-prone areas where you might be worried about how to refresh grout, the baseboard needs this extra precision to prevent water from wicking into the end grain through a failed miter joint.
| Condition | Actual Corner Angle | Required Miter Cut | Correction Technique |
|---|---|---|---|
| Standard Square | 90.0 Degrees | 45.0 Degrees | Zero adjustment needed |
| Drywall Buildup | 88.5 Degrees | 44.25 Degrees | Shave drywall mud |
| Framing Out | 91.5 Degrees | 45.75 Degrees | Back-cut 1 degree |
| Severe Out of Square | 93.0 Degrees | 46.5 Degrees | Coping recommended |
Adhesive chemistry and mechanical fastening
Modern adhesives like cyanoacrylate glue paired with an activator allow for miters to be chemically bonded before they are even nailed to the wall. This creates a single unit that resists opening up during the winter months. I don’t just rely on finish nails. Nails pull. Wood shrinks. I glue my miters. I apply a bead of wood glue or a CA glue to one side, spray the activator on the other, and hold them together for ten seconds. Now that corner is one solid piece of wood. When I nail it to the wall, I am not trying to hold the miter together. I am just holding the assembly against the studs. You have to be careful with the nail placement too. If you nail too close to the edge without a pilot hole, you will split the grain. I use a 23-gauge pin nailer for the actual miter joint and an 18-gauge brad nailer for the wall studs. This ensures the mechanical fasteners are nearly invisible. It is a fundamental part of the process that many skip because they are in a hurry. Speed is the enemy of quality in trim work.
The baseboard interaction with tile and showers
When baseboards meet tile floors or shower curbs, they must be protected from moisture wicking through the bottom edge. A small gap should be left and filled with a color-matched sealant rather than grout to allow for movement. I’ve seen beautiful tile jobs ruined because the baseboard was jammed tight against the tile. When the floor shifts, it cracks the tile or pops the baseboard off the wall. You need to treat that junction with the same respect you give the miter. Use a 1/8 inch spacer during installation. Then, run a bead of high-quality caulk. If you are working in a bathroom, the moisture levels are higher, and the wood will move more. This is why precision miters are even harder in these rooms. The steam from the shower acts like a wood steamer, trying to warp your work. You must seal the back of the boards before they even go on the wall. For more on maintaining these wet areas, look at tile cleaning tips for a sparkling bathroom in 2025.
- Check the moisture content of the baseboard before installation.
- Calibrate the miter saw fence using a machinist square.
- Test the angle with two scrap pieces before cutting the final board.
- Apply wood glue to every miter joint.
- Use a 23-gauge pin nail to lock the outside corner tips.
- Back-cut the joint by 1 degree to ensure front-edge contact.
The Cope versus Miter debate
Coping is the process of cutting the profile of one baseboard into the face of another for inside corners. This technique is superior to mitering for inside corners because it allows for wall expansion and contraction without showing a gap. While we are talking about miters, you should only really be mitering outside corners. For inside corners, miters are a fool’s errand. A coped joint is essentially a nesting joint. One board runs straight into the corner. The other board is cut to follow the exact shape of the first board’s face. If the walls move or the wood shrinks, the coped board just slides slightly along the face of the first board. The gap never opens. To do this, you cut a 45 degree miter to expose the profile, then use a coping saw or a grinder to remove the waste wood following that line. It takes longer. It requires more skill. But it is the only way I will do an inside corner. Miters are for outside corners where you have no other choice. If you want a floor that lasts decades, you don’t take shortcuts on the joints. You do it right the first time so you don’t have to do it again in five years when the house settles.
“Precision in the trim is the signature of a master; anyone can lay a field, but the edges tell the story.” – Master Flooring Axiom