
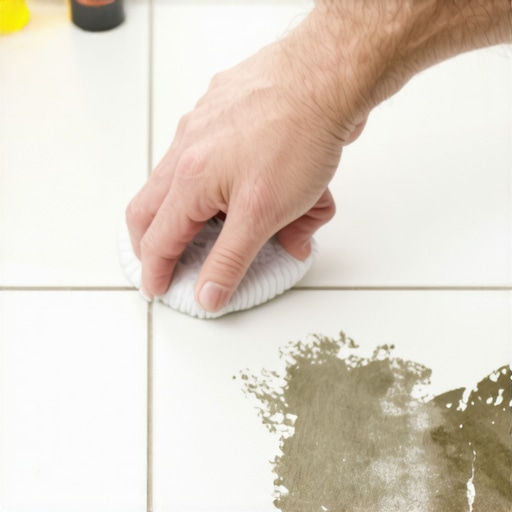
The microscopic trap of epoxy resin
Most guys skip the leveling compound. They think the underlayment will hide the dip. It won’t. I spent three days grinding concrete on a job last month just so the floor wouldn’t click like a castanet. That job was a masterclass in frustration because once we got the subfloor right, the helper left a thick film of epoxy grout haze across 400 square feet of porcelain. Epoxy grout haze removal requires specialized solvents like benzyl alcohol to break the cross-linked polymer chains of the cured resin. Because epoxy is a two-part thermosetting plastic, simple water based cleaners cannot penetrate the cured film once the exothermic reaction is complete. You need to understand that epoxy is not like cement grout. Cement dries through evaporation and hydration. Epoxy cures through a chemical reaction that creates a plastic bond. If you wait more than twenty four hours, that plastic becomes part of the tile. I have seen guys try to scrub it with a wire brush. All they did was scratch the glaze on a three thousand dollar shower. You have to be smarter than the chemical. You have to attack the molecular bond without eating into the tile surface. It is a delicate balance of chemistry and elbow grease. If you are struggling with a smaller bathroom, you might find some relief in general tile cleaning tips for a sparkling bathroom in 2025, but epoxy requires a much heavier hand.
Why your standard scrub brush failed
Standard nylon scrub brushes fail against epoxy haze because they lack the mechanical abrasion necessary to disrupt the tensile strength of the resin film. You need white abrasive pads or specialized grout sponges that can hold chemical emulsifiers against the surface for extended dwell times. Most homeowners think they can just scrub harder. They can’t. The bond is too strong. The physical reality of epoxy is that it fills the microscopic pores of the tile. Even if the tile feels smooth to your hand, it has a texture at the micron level. The resin settles in those valleys and hardens. To get it out, you have to soften the resin. I always tell my apprentices that if they aren’t sweating, they aren’t doing it right. But even with sweat, you need the right tool. Using a black pad is too aggressive. It will leave swirl marks on your tile that you will see every time the sun hits the floor. Stick to the white pads. They are designed to be firm enough to move the chemical but soft enough to protect the finish. For those looking to maintain their work long term, understanding grout restoration secrets for long lasting results is essential for keeping that fresh look after the haze is gone.
“The chemistry of epoxy grout requires a rigid adherence to the manufacturer’s cleaning window or the resin will form a permanent bond with the substrate.” – Master Flooring Axiom
The chemistry of the haze removal process
Chemical removal of dried epoxy involves using emulsifiers and heavy duty strippers that contain alkaline agents or organic solvents to soften the epoxide functional groups. These chemicals work by penetrating the cured matrix and expanding the polymer, which allows it to be lifted from the ceramic or porcelain substrate. It is a process of patience. You apply the cleaner and let it sit. You do not let it dry. If it dries, you are back to square one. I have seen guys try to use vinegar. Vinegar is an acid. It does nothing to epoxy. Epoxy is resistant to acids. That is why we use it in commercial kitchens. You need a high pH or a specific solvent. I prefer the gel-based cleaners. They stay where you put them. If you are working on a vertical surface like showers, a liquid cleaner just runs down to the drain. A gel clings. It eats into that plastic layer while you wait.
Impact of temperature and humidity on epoxy curing
High ambient temperatures and relative humidity accelerate the curing profile of epoxy resins, shortening the pot life and making the removal of haze significantly more difficult. In humid climates, the moisture vapor transmission rate of the subfloor can also affect how the epoxy bonds to the tile edges. I have worked in Florida where the humidity is eighty percent inside a house without AC. The epoxy kicks in fifteen minutes. You have to work in tiny sections. If you don’t, you are left with a mess that feels like dried superglue. In dry climates, you have a bit more time, but the resin can become brittle. Understanding the environment is part of the engineering. A floor is not a static object. It reacts to the air around it.
Choosing the right removal agent
| Cleaner Type | Active Ingredient | Best Use Case | Risk Level | | — | — | — | — | | Solvent Based | Benzyl Alcohol | Fully cured, thick haze | High (needs ventilation) | | Alkaline Gel | Potassium Hydroxide | Vertical shower walls | Moderate (skin irritant) | | Citrus Emulsifier | D-Limonene | Light haze, fresh curing | Low (pleasant scent) | | Mechanical Heat | Thermal energy | Isolated thick drips | Moderate (tile cracking) |
The 1/8 inch that ruins everything
Precise expansion gaps and perimeter joints are often the places where epoxy haze accumulates most heavily, often hidden behind baseboards or under thresholds. If the resin is allowed to pool in these gaps, it can create a rigid bridge that prevents the floor from expanding, leading to tile tenting or cracking. You have to clean your edges. Don’t think the baseboard will hide your sins. If that epoxy hardens against the wall, your floor is no longer floating or flexible. It is locked. When the house shifts or the temperature changes, something has to give. Usually, it is the tile that snaps. I spend as much time cleaning the perimeter as I do the main field. It is the hallmark of a pro. If you are updating your trim, look into chic baseboard designs that transform rooms in 2025 to ensure your new floor has the right finish.
Step by step guide to epoxy haze removal
- Identify the type of epoxy used and its cure time.
- Apply a test patch of solvent to an inconspicuous area.
- Allow the chemical to dwell for at least 15 to 30 minutes.
- Agitate the surface using a white nylon scrub pad in circular motions.
- Wipe the emulsified resin away with a clean, lint free cloth.
- Rinse the area thoroughly with clean water to neutralize the chemicals.
- Check for remaining residue using a high angle light source.
The ghost in the expansion gap
Residual epoxy in the interfacial zone between the tile and the wall can cause structural failure if not addressed during the cleaning phase. This area must be kept clear to allow for movement joints as specified by TCNA Handbook standards. If you find your grout is already ruined, you might need to know how to refresh grout without replacing it before you start over. I have seen entire floors pop up like a mountain range because someone let epoxy fill the expansion gap. It is a common mistake for DIYers. They want it to look full. They don’t realize the floor needs to breathe.
“A floor is only as good as the subfloor beneath it; deflection is the enemy of every joint.” – Master Flooring Axiom
Managing shower installations and moisture barriers
In showers, the presence of a waterproof membrane behind the tile means that haze removal chemicals must be used carefully to avoid chemical migration into the substrate. Strong solvents can sometimes degrade the polyethylene membranes if they seep through the grout joints. This is why you don’t saturate the floor. You target the haze on the face of the tile. If you are planning a renovation, check out these showers with a style trendy ideas for small bathrooms. Proper installation starts with the right plan. You want to avoid the haze problem from the start by cleaning as you go. But if you’re reading this, it’s probably too late for that. You’re in the rescue phase now.
Final inspection and surface protection
Once the haze is gone, the surface tension of the tile should be uniform, with no refractive index changes when viewed under light. Any remaining scum or film will attract dirt and oils, making the floor impossible to keep clean. You worked hard to get that haze off. Don’t skip the final rinse. You need to remove every trace of the stripper. If you leave the chemical on the floor, it will eat into the grout joints you just worked so hard to install. It will make them soft and chalky. Use a pH neutral cleaner for the final pass. It should be squeaky clean. If you can’t hear your finger slide across the tile, there is still residue there. Get back on your knees and finish the job. If you have questions about specific materials, you can always contact us for more technical advice.