
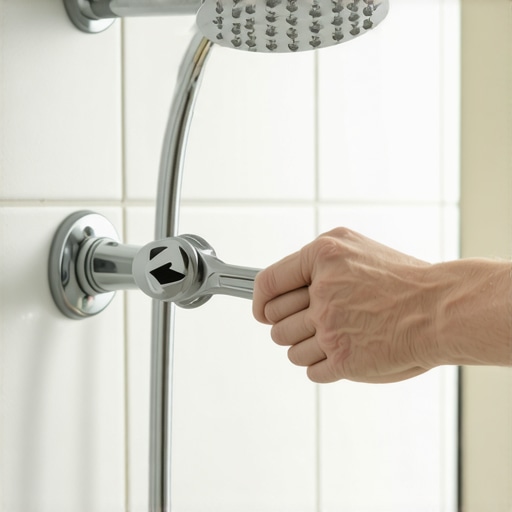
I spent three days grinding concrete on a job last month just so the floor wouldn’t click like a castanet. Most guys skip the leveling compound and think the underlayment will hide the dip. It won’t. I apply that same logic to plumbing. I once walked into a luxury bathroom where the homeowner was complaining about a rattle. That rattle was a loose shower head pipe vibrating against the back of a $40 per square foot Italian porcelain tile. Within six months, the grout had turned to powder. The vibration of the pipe, every time the water was toggled between hot and cold, was acting like a miniature jackhammer. If your shower head feels loose inside the wall, you are not just looking at a plumbing annoyance. You are looking at the slow motion destruction of your shower’s structural integrity. A floor is only as good as the subfloor beneath it; deflection is the enemy of every joint. This rule applies to walls too. If the pipe moves, the tile will eventually fail.
The hidden physics of the shower arm drop ear elbow
A loose shower head is typically caused by a failure of the drop ear elbow to be properly secured to the internal wooden blocking. This brass fitting is the terminal point where your vertical supply line turns 90 degrees to face the shower. It features two small holes, or ears, designed for screws. When a builder gets lazy, they leave this pipe floating or held only by the friction of the drywall or backer board. The weight of a heavy modern rainfall shower head creates a lever effect. Every time you adjust the spray angle, you apply torque to a pipe that has zero structural support. Over time, this movement widens the hole in your tile and allows moisture to bypass the escutcheon plate. You can find more about the visual impact of these components at showers that wow modern designs for 2025. The vibration also causes fatigue in the solder joints if you have copper pipes. If you have PEX, the flexibility of the plastic actually makes the rattle worse because the pipe can whip against the studs. This creates a rhythmic thumping known as water hammer which can eventually lead to a pinhole leak behind your tile.
The 1/8 inch that ruins everything
Precision in the depth of the pipe fitting is the difference between a professional finish and a leaking mess behind the wall. If the drop ear elbow is set too deep, the shower arm will not have enough threads to create a watertight seal. If it is too shallow, the decorative escutcheon plate will not sit flush against the tile. You are looking for a sweet spot where the elbow is about 1/2 inch behind the finished surface of the tile. I have seen guys try to fix this by stacking three layers of teflon tape. That is a recipe for a flood. You need to stabilize the pipe so that it cannot move even a fraction of a millimeter. When I install blocking, I use kiln dried 2×4 lumber. I do not use scrap wood because moisture in the wood causes it to shrink as it dries. This shrinkage can pull the pipe back or push it forward. We are talking about the chemistry of wood fibers and the physics of thermal expansion. In a humid region like Florida or the Gulf Coast, that wood needs to be sealed before it goes into the wall to prevent rot. If the wood rots, your screws lose their bite and the pipe starts dancing again. This is why tile cleaning tips for a sparkling bathroom in 2025 often mention checking for mold around the plumbing fixtures. Mold is a sign that movement has broken your waterproof seal.
“A floor is only as good as the subfloor beneath it; deflection is the enemy of every joint.” – Master Flooring Axiom
Stabilization methods for different wall access scenarios
Accessing the loose pipe requires either removing a portion of the shower wall or cutting through the drywall in the room behind the shower. If you have access from the back, you are in luck. You can install a new 2×4 block between the studs and screw the drop ear elbow directly into it. If you have to go through the front, you are looking at a tile repair job. This is the time to look at how to refresh grout without replacing it once the structural fix is complete. You must ensure that the screws you use are stainless steel or brass. Standard zinc screws will rust within years due to the condensation that forms on cold water pipes. This rust eventually bleeds through the grout and stains your beautiful tile. I have seen $20,000 bathrooms ruined by two cents worth of cheap screws. It makes my skin crawl. The chemistry of corrosion is relentless. When you have two dissimilar metals, like a steel screw and a brass elbow, you get galvanic corrosion. Using a stainless steel screw with a rubber washer is the only way to ensure that the connection stays solid for thirty years.
| Pipe Material | Vibration Risk | Expansion Rate | Stability Requirement |
|---|---|---|---|
| Copper | High | Low | Rigid Blocking |
| PEX | Very High | High | Continuous Support |
| CPVC | Medium | Low | Adhesive Bonding |
| Galvanized | Low | Minimal | Threaded Support |
The internal checklist for a vibration free shower
- Verify the pipe type to select the correct mounting hardware.
- Locate the nearest vertical studs using a high density sensor.
- Install horizontal 2×4 blocking exactly 1/2 inch behind the backer board plane.
- Use #10 stainless steel screws to secure the drop ear elbow ears.
- Apply 100 percent silicone sealant around the pipe penetration before tiling.
- Pressure test the line for twenty four hours before closing the wall.
Restoring the tile and grout after the repair
Once the pipe is rigid and the wall is closed, the focus shifts to the masonry and the aesthetic transition. You cannot just slap some grout into the hole and call it a day. Grout is porous. It is a cementitious product that breathes. If the pipe has any residual micro vibration, the grout will crack. This is why I always recommend using a high quality silicone caulk that matches the color of your grout for the area immediately surrounding the shower arm. This provides a flexible gasket that absorbs the kinetic energy of the water flow. If you find that the surrounding grout looks dingy after the repair, check out grout restoration secrets for long lasting results. You should also consider the height of your baseboards if you had to cut into the wall behind the shower. If you are doing a full wall repair, it might be the right time to look at baseboards makeover ideas to elevate your space. Matching the trim to the new tile work creates a unified architectural look. Most people treat these as separate projects, but a master installer knows they are all part of the same moisture management system.
Thermal expansion and the regional climate factor
The geographic location of your home dictates how much your plumbing and walls will move throughout the year. In the dry heat of Phoenix, the wooden studs in your walls will shrink significantly. This can loosen the screws holding your plumbing. In the swampy humidity of Houston, the wood expands. This constant cycling is what eventually causes a secure pipe to become a loose one. If you are in a high humidity zone, you must use a vapor barrier behind your cement board. This prevents the moisture from the shower from reaching the wooden blocking you just installed. I have seen guys skip the vapor barrier because they think the tile is waterproof. Tile is not waterproof. Grout is not waterproof. They are water resistant. Water molecules are small enough to migrate through the crystalline structure of the grout. If that moisture hits your 2×4 blocking, the wood swells, the screws pull, and your shower head starts rattling again. This is why professional standards from the TCNA are so strict about moisture management. It is not about the look. It is about the chemistry of the house. Even if you are looking for showers with a style trendy ideas for small bathrooms, you cannot ignore the bones of the wall. A stylish shower that leaks is just an expensive disaster waiting to happen. Always use high quality materials and never trust a builder who says a little movement is normal. Movement is the enemy of longevity. Keep your pipes tight and your grout dry.