
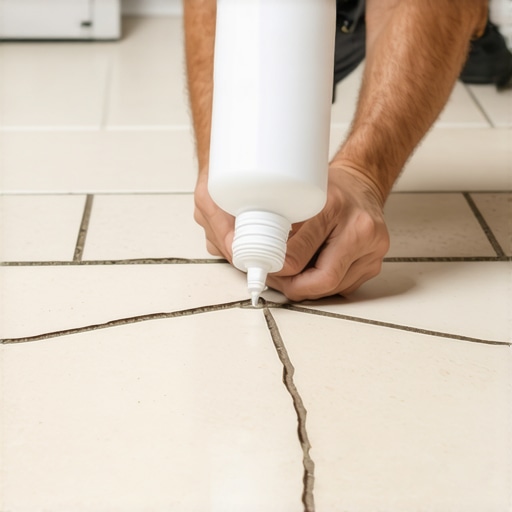
Expert Methods for Fixing a Cracked Tile Without Total Removal
Most guys skip the leveling compound. They think the underlayment will hide the dip. It won’t. I spent three days grinding concrete on a job last month just so the floor wouldn’t click like a castanet. That experience taught me one thing. If you ignore the subfloor, the tile will eventually fail. When a homeowner calls me about a single cracked tile, they usually expect a full tear out. But if the structural integrity of the surrounding area is sound, we can look at microscopic repair strategies. Repairing a tile without removal is an exercise in chemistry and patience. It requires understanding why the fracture occurred in the first place. Was it a point-load impact? Or was it a result of subfloor deflection? If it was deflection, a cosmetic fix is just a bandage on a gunshot wound. You have to address the movement.
The physics of the fracture and subfloor stability
Fixing a cracked tile without removal involves using high-grade epoxy resins or acrylic fillers to bridge the gap and restore the surface tension of the ceramic. This method works best for hairline fractures where the tile is still firmly bonded to the thin-set. If the tile sounds hollow when tapped with a screwdriver handle, the bond has failed. In those cases, you are not just fixing a crack, you are trying to re-engineer a bond from the top down. This is where we talk about the L over 360 standard. The Tile Council of North America states that a floor must not deflect more than 1/360th of its span. If your joists are bouncy, that tile is going to crack again no matter how much epoxy you shove into it. You have to ensure the environment is stable before you start the aesthetic repair.
“A floor is only as good as the subfloor beneath it; deflection is the enemy of every joint.” – Master Flooring Axiom
The chemistry of epoxy resin injection
Epoxy resins are the primary tool for non-removal tile repair because they possess high tensile strength and the ability to mimic the refractive index of the tile glaze. When you mix a two-part epoxy, you are initiating a chemical reaction between a resin and a hardener. For tile work, we use low-viscosity resins that can seep into the fracture through capillary action. You have to clean the crack first with denatured alcohol. Any dust or grease will prevent the epoxy from biting into the porcelain. Once the crack is clean, you use a fine-tipped syringe to apply the resin. This is not a rushed job. You have to let gravity do the work. If you are dealing with eco-friendly tile solutions, ensure the resin is compatible with the specific minerals used in the tile body. Some recycled materials have different porosity levels that affect how the resin cures.
The invisible art of color matching and pigment loading
Matching the color of a fired ceramic tile requires a set of universal tints and a deep understanding of the color wheel to account for the secondary tones in the glaze. Most people think a white tile is just white. It is not. It is a mix of blues, yellows, or even slight pinks depending on the factory run. When I am on a job, I mix my pigments on a scrap piece of glass. I hold it against the tile under the actual lighting of the room. Natural light from modern shower designs will make colors look different than LED overheads. You have to over-pigment slightly because epoxy often clears out as it cures. Use a toothpick to drag the color into the crack. If you do it right, the human eye cannot track the break from a standing height. This is where the artistry of the mechanic meets the precision of the chemist.
Addressing the grout and perimeter expansion
Grout is often the first sign of a deeper structural issue and must be repaired alongside the tile to maintain the moisture barrier. If the crack extends into the grout line, do not just smear more grout on top. You need to scrape out the old material. I recommend looking at grout restoration secrets for techniques on matching the existing sand texture. Grout is porous. If you have a crack in a wet area, water will seep behind the tile and rot the backer board. This is especially true near baseboards where the floor meets the wall. That junction should always be a soft joint with 100 percent silicone caulk, never hard grout. Movement happens at the perimeter. If you lock the floor in with grout against the wall, something has to give. Usually, it is the tile in the center of the room.
| Repair Material | Bond Strength | Drying Time | Best Use Case |
|---|---|---|---|
| Two-Part Epoxy | Very High | 24 Hours | Structural fractures and heavy traffic areas |
| Acrylic Filler | Medium | 4 Hours | Hairline cracks in low-traffic wall tiles |
| Grout Pen | Low | 1 Hour | Discoloration and micro-fissures in grout lines |
| UV Resin | High | Instant | Quick cosmetic fixes with UV light curing |
The role of moisture and environmental variables
Moisture content in the subfloor can reach levels that cause the thin-set to lose its grip, leading to the hollow sounds and eventual cracking of the surface. I always carry a pinless moisture meter. If I see a crack, I check the slab. If the moisture vapor transmission rate is too high, the epoxy fix is temporary. The vapor pressure will eventually push the repair out. In regions with high humidity, like the coastal south, tiles expand. If there is no expansion gap hidden under the chic baseboard designs, the floor will tent. Tenting is when the tiles lift off the floor in a V-shape. At that point, you are past the point of a simple crack repair. You are looking at a full re-install. Proper maintenance is also key. Using tile cleaning tips that avoid harsh acids will preserve the integrity of your repair and the surrounding glaze.
“Deflection is the silent killer of porcelain; if the joist moves, the tile screams in the form of a crack.” – Master Flooring Axiom
- Inspect the crack for depth and width using a magnifying glass.
- Clean the area with denatured alcohol to remove all surfactants.
- Mix the epoxy resin with precise pigment loading for an exact match.
- Apply the resin using a syringe to ensure deep penetration into the tile body.
- Level the repair with a razor blade once the resin reaches a leathery state.
- Check the surrounding grout for stability and refresh if necessary.
- Ensure the perimeter expansion joints are not filled with hard debris.
The contrarian truth about underlayment thickness
Most homeowners and even some rookie installers think that adding a thicker underlayment or a double layer of plywood will solve all their cracking problems. This is a fallacy. Too much cushion actually causes the locking mechanisms on modern floating floors to snap, and in the case of tile, it creates a trampoline effect. The goal is rigidity, not softness. You want a subfloor that is dead flat. Not level, but flat. A floor can be slanted and still be fine for tile, but if it has humps and dips, the tile will snap. This is why I spend so much time with the grinder. Fixing a crack without removal is only possible when the rest of the system is immobile. If you have movement, you are just painting over a problem that will return in six months. Always prioritize the mechanical bond over the cosmetic finish. If you need help with a specific layout or design, you can always contact us for a professional consultation on your flooring project.
The final Polish and long term durability
Achieving a professional finish on a tile repair requires mechanical polishing of the cured resin to match the sheen of the surrounding ceramic glaze. After the epoxy has cured for a full twenty four hours, it will likely be slightly higher than the tile surface. Use a series of diamond polishing pads, starting at 800 grit and moving up to 3000 grit, to bring back the shine. If the tile is matte, you might need to knock the gloss down with a fine steel wool. This process ensures that when you walk across the room, you do not feel a bump. It also seals the repair against dirt. A rough repair will trap grime and turn black over time. For those working on small bathroom showers, this detail is vital because soap scum and hard water will attack any imperfection in the repair. If you manage the chemistry and the physics, a non-removal repair can last as long as the house itself. It will buckle if the foundation moves, but the bond you created will hold firm. Keep an eye on your grout refreshing needs as well, as a cohesive look makes the repair disappear into the larger design. Floor work is a trade of millimeters. Respect the 1/8 inch gap and the 1/8 inch of deflection. It is the difference between a floor that lasts a century and one that fails in a season.