
The Structural Reality of the Loose Shower Handle
I spent three days grinding concrete on a job last month just so the floor wouldn’t click like a castanet because the previous installer thought the underlayment would hide a half inch dip in the slab. It did not. This same lazy philosophy of hiding structural flaws behind a pretty surface is exactly why you are staring at a shower handle that wobbles when you try to turn on the hot water. A loose shower handle is not an aesthetic problem. It is a failure of the mechanical bond between the plumbing valve and the framing of your home. If that handle has play, the valve body behind the tile is shifting. Every time you turn that handle, you are putting torque on the copper or PEX connections. Eventually, that torque leads to a hairline fracture, a slow leak, and a wall full of black mold. Most homeowners assume they just need to tighten a screw. Usually, they are wrong. The failure starts deep in the wet wall, where the blocking is missing or the grout has allowed moisture to compromise the substrate.
The structural lie of the wiggling valve
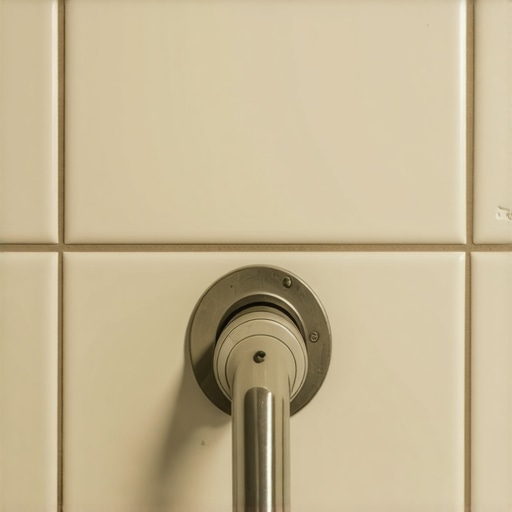
A loose shower handle occurs when the internal mixing valve is not properly anchored to wood blocking or when the tile substrate has delaminated from the wall studs. This movement creates a lever effect where the handle pulls against the tile surface, eventually cracking the grout or the tile itself. In a professional installation, the valve should be fastened with galvanized screws to a horizontal 2×4 brace that is toe-nailed into the studs. When that brace is missing, the only thing holding your valve in place is the tension of the plumbing pipes and the friction of the decorative trim plate against the tile. [IMAGE_PLACEHOLDER] This is a recipe for long term disaster because pipes are not structural members. They are conduits for fluid. Expecting a copper pipe to resist the daily physical force of a human hand cranking a handle is like expecting a straw to hold up a brick. You need a rigid connection to the house frame to ensure the handle remains stationary for decades.
The physics of the shower handle lever
Consider the handle as a simple machine. It is a lever. When you apply five pounds of pressure to the end of a four inch handle, you are generating significant torque at the fulcrum, which is the valve stem. If the valve body is not secured to a wood block, that force is transferred directly to the solder joints. Over time, the vibration and movement cause work hardening in the copper. Work hardening makes the metal brittle. Once the metal is brittle, the thermal expansion and contraction of the hot water will finish the job. You will end up with a pinhole leak that sprays water inside your wall every time the shower is on. This is why the TCNA (Tile Council of North America) emphasizes the rigidity of the substrate. If the wall moves, the tile fails. If the valve moves, the plumbing fails. You cannot have one without the other in a wet environment. Any movement in the handle indicates that the internal support system has either rotted out or was never installed in the first place.
“A floor is only as good as the subfloor beneath it; deflection is the enemy of every joint.” – Master Flooring Axiom
This axiom applies to walls just as much as it applies to a wide-plank oak floor. Deflection in a shower wall leads to grout cracking. Once the grout cracks, the moisture barrier is the only thing protecting your studs. If the installer was sloppy enough to skip the valve blocking, they likely skipped the proper waterproofing too. This is how you end up needing grout restoration secrets or, more likely, a full tear out of the wet area.
The chemistry of failed grout and moisture
Grout is a porous material. Even when it is sealed, it exists in a state of constant chemical battle with the minerals in your water and the humidity in your bathroom. When a shower handle is loose, it creates a gap between the escutcheon plate and the tile. This gap is a highway for water. Gravity pulls the water behind the plate and into the raw edges of the tile and the grout lines. If your bathroom uses standard cementitious grout, it will act like a wick. It pulls the moisture deep into the thin-set. We are talking about capillary action at a molecular level. The water molecules find their way into the microscopic voids of the cement matrix. If that moisture reaches the wooden blocking or the studs, the wood begins to swell. Swelling wood pushes against the backer board. The backer board pushes against the tile. This cycle of wetting and drying causes the tile to lose its bond with the thin-set. Now you don’t just have a loose handle, you have a loose wall. This is a common sight in showers with a style that prioritizes looks over the boring, gritty details of structural integrity.
The ghost in the expansion gap
Every material in your bathroom has a different coefficient of thermal expansion. The brass valve expands at one rate, the ceramic tile at another, and the wooden studs at a third. Without a proper expansion gap filled with 100 percent silicone caulk, these materials will fight each other. When you run a hot shower, the valve body grows by a fraction of a millimeter. If it is locked tight against the tile without a buffer, it will eventually crack the tile or push itself away from the wall. This is the same reason we leave gaps at the perimeter of a hardwood floor. In the flooring world, we use chic baseboard designs to hide those necessary gaps. In a shower, the escutcheon plate hides the gap. But that gap must be there, and it must be sealed with a flexible material, not hard grout. If you see grout packed tight around the valve stem, you are looking at an amateur mistake. That grout will inevitably crack and fall out, leaving the valve unsupported and the wall vulnerable to leaks.
Comparing structural support methods
| Support Method | Rigidity Rating | Longevity | Common Failure Point |
|---|---|---|---|
| 2×4 Horizontal Blocking | High | 50+ Years | Non-galvanized fasteners rusting |
| Copper Strap Only | Medium | 15 Years | Strap stretching or snapping |
| Plastic C-Clips | Low | 10 Years | Plastic becoming brittle and cracking |
| Friction Fit (No Blocking) | Zero | 2 Years | Total valve movement and pipe fatigue |
The 1/8 inch that ruins everything
In my 25 years of experience, I have learned that precision is the difference between a floor that lasts a lifetime and a floor that ends up in a landfill. The same applies to tile. If your valve is set even 1/8 of an inch too deep into the wall, the handle will not engage the stem properly. You might think it is loose, but really, it is just barely hanging on to the splines of the valve. On the flip side, if the valve is too shallow, the trim plate will not sit flush against the tile. Installers often try to fix this by gobbling up the gap with mounds of caulk. It looks like garbage and fails within months. You need the valve to be perfectly plumb and perfectly depth-set. I tell my apprentices that if they don’t use a level on the valve body, they might as well not show up to the job. We are building machines, not just tiling walls. The handle is the interface between the human and the machine. It has to be solid. If you are doing a baseboards makeover, you worry about the miters. If you are doing a shower, you worry about the valve depth. It is that simple.
Why your subfloor logic applies to bathroom walls
People think walls are different from floors because you don’t walk on them. But gravity and water don’t care about your perspective. A shower wall is a vertical subfloor. It must be flat, rigid, and dry. Most guys skip the leveling compound on a floor, and they skip the shimming on a wall. If your studs are bowed, your tile will be under constant tension. Add a loose shower handle to that equation, and the vibration from the plumbing will eventually pop tiles off the wall. I have seen entire bathrooms where the grout was the only thing holding the tile up because the thin-set didn’t have 95 percent coverage. You need to check for eco friendly tile solutions that also offer superior bonding strength. But no adhesive in the world can compensate for a valve that is flapping around like a flag in the wind. You have to open the wall from the back if possible, or carefully remove tiles to install the proper blocking.
“Deflection of the substrate should not exceed L/360 for ceramic tile and L/720 for natural stone installations.” – TCNA Handbook Standards
The technical fix for a loose handle
If you have determined the handle is loose because the valve is moving, you have two choices. You can tear out the tile, which is the right way, or you can go through the wall from the backside. If the back of the shower is a closet or a bedroom, you are in luck. You cut a hole in the drywall, install a 2×4 block, and secure the valve with heavy-duty straps. If you are stuck going through the front, you need to be surgical. Removing a single tile without breaking the neighbors is an art form. You use a multi-tool to remove the grout, then slowly pry the tile. Once you have access, you can inject structural foam or, better yet, use specialized repair brackets designed for this exact failure. Just don’t think a little more refresh of the grout will fix the mechanical wobble. It won’t.
Pre-Tile structural integrity checklist
- Valve body is secured to 2×4 blocking with stainless steel or galvanized screws.
- Waterproofing membrane is integrated with the valve flange or the escutcheon gasket.
- The valve stem is perfectly perpendicular to the wall plane.
- Expansion gaps are maintained around all plumbing penetrations.
- Thin-set coverage exceeds 95 percent in all wet areas to prevent water pockets.
- Grout is mixed to the exact manufacturer specifications to ensure maximum density.
Maintaining the wet area for the long haul
Once you have fixed the structural movement, you need to maintain the surface. This means regular tile cleaning tips and checking the caulk lines. If the caulk around the handle plate starts to peel, replace it immediately. That caulk is your last line of defense. In the same way you wouldn’t let water sit on a hardwood floor, don’t let it sit behind your shower trim. If you want showers that wow, you have to appreciate the engineering that happens before the first tile is ever set. A solid handle is a sign of a solid home. Don’t settle for builder-grade shortcuts. Fix the blocking, seal the gaps, and respect the physics of the wet wall. If you have questions about the specific adhesives or sub-structure requirements for your region, contact us to speak with a specialist who knows more than just how to spread mud. We understand the chemistry of the bond and the physics of the house. Your shower handle should be as rock-solid as the foundation of your home.