
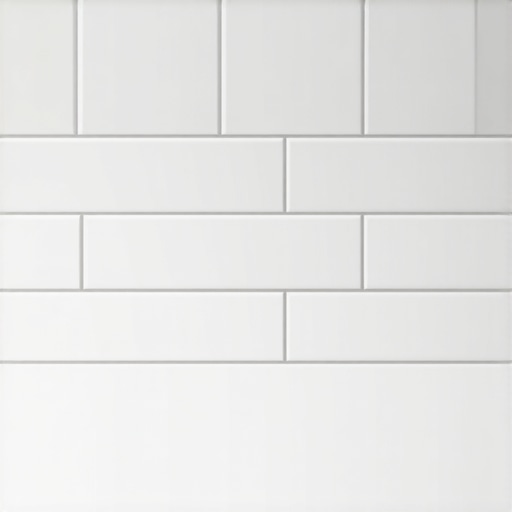
I spent three days grinding concrete on a job last month just so the floor would not click like a castanet. Most guys skip the leveling compound because they think the underlayment will hide the dip. It won’t. I carry that same obsession into every tile project I touch. You see a box of fifteen cent subway tile from a big box store and think it looks cheap. I see a blank canvas of silica and clay that is waiting for a master to handle the physics of the installation. A cheap tile installed with surgical precision beats an expensive marble tile installed by a hack every single time. My hands are rough from years of mixing mortar and my clothes always smell like wet saw mist and oak dust, but my lines are straight and my joints are tight. Making cheap tile look custom is not about the material cost, it is about the structural integrity of the substrate and the geometric perfection of the layout.
The math of a perfect layout
To make cheap subway tile look custom you must focus on layout symmetry, thin grout lines, and color matched materials to create a high end aesthetic. Achieving a professional result requires planning the center point of the wall to avoid sliver cuts at the corners. This geometric balance ensures the eye perceives the installation as a bespoke architectural feature rather than a rushed renovation project. I have seen countless showers ruined because the installer started with a full tile in the corner and ended with a half inch strip on the other side. That is a hallmark of an amateur who does not understand spatial planning. You have to find the center of your focal wall and strike a plumb line. Every measurement you take from that point determines the visual success of the entire room. If you are working on showers with a style that demands excellence, you cannot afford to eyeball your starting point. You calculate the width of the tile plus the grout joint, then divide the wall width by that number. If the remainder is less than half a tile, you shift your starting point. This prevents those ugly slivers that scream budget remodel. We are aiming for a structural masterpiece here, not a slapdash backsplash.
“A floor is only as good as the subfloor beneath it; deflection is the enemy of every joint.” – Master Flooring Axiom
The secret of microscopic substrate preparation
Substrate preparation for tile requires a surface that is flat within one eighth of an inch over ten feet to prevent lippage and bond failure. You cannot hide a hump in a wall with more thinset because as the mortar cures, it shrinks and pulls the tile into the hollows of the wall. This creates shadows that highlight every imperfection in your cheap tile. I treat every wall like a structural engineering challenge. Before a single piece of ceramic touches the wall, I am there with a six foot level and a plane. If the studs are bowed, I sister them or shim them out. I use cement backer board or high density foam boards like Kerdi or GoBoard because they provide a stable, waterproof foundation. If you are designing showers that wow, you have to realize that the beauty is only skin deep. The real work is in the waterproofing. I apply liquid membranes or sheet membranes with a precision that would make a surgeon jealous. Every overlapping seam must be five inches. Every fastener must be covered. This level of detail prevents the moisture from reaching the framing, which is how you avoid the rot that kills most bathroom remodels in five years. You are not just laying tile, you are building a moisture management system.
| Material Type | Water Absorption Rate | Common Use Case | Installation Difficulty |
|---|---|---|---|
| Ceramic Subway | Over 0.5 percent | Backsplashes and Walls | Low |
| Porcelain Subway | Under 0.5 percent | Showers and High Moisture | Medium |
| Glass Subway | Zero percent | Accents and Luxury Walls | High |
The chemistry of grout and adhesive
Choosing the right grout color and adhesive chemistry is the most effective way to elevate the appearance of inexpensive subway tile immediately. Using a grout color that matches the tile exactly creates a monolithic look that hides the individual units and makes the surface look like a solid piece of stone or glass. Conversely, a high contrast grout like charcoal on white tile highlights the pattern, but it also highlights every tiny mistake in your spacing. I prefer to use high performance epoxy grouts or pre mixed resins because they are stain resistant and do not require sealing. This is where the physics of the bond comes into play. You need a polymer modified thinset that meets ANSI A118.15 standards to ensure that the tile stays put for fifty years. When you mix your thinset, you have to let it slake for ten minutes. This allows the chemicals to fully hydrate. If you skip this, your mortar will be weak and brittle. I have seen guys mix it and go, only to have the tiles pop off the wall two weeks later because they did not understand the molecular process of cement hydration. If you need grout restoration secrets for an old job, you will realize that the original installer probably used the wrong water to powder ratio. Precision is everything.
- Use 1/16 inch spacers for a tight, modern look.
- Always back butter every tile to ensure 95 percent coverage in wet areas.
- Check for plumb every three rows using a laser level.
- Miter the corners instead of using plastic trim for a high end finish.
- Seal your grout joints if using traditional cementitious products.
The architecture of transitions and baseboards
High end tile installations utilize mitered edges or metal profiles rather than bulky plastic bullnose to create clean architectural transitions between surfaces. When you reach the edge of a subway tile run, how you finish that edge tells the world if you are a pro or a DIYer. I hate the look of unfinished ceramic edges. They look like a mistake. I use a wet saw with a diamond blade to miter the edges at a forty five degree angle, creating a seamless return. If a miter is not possible, I use sleek stainless steel or anodized aluminum L-profiles that disappear into the design. This attention to detail extends to the baseboards makeover ideas you might be considering. The transition between the tile floor and the wall base should be tight and caulked with a color matched 100 percent silicone. Never use grout in a change of plane. The house will move and the grout will crack. It is a law of physics. If you want chic baseboard designs, you should look at taller profiles that anchor the room and provide a sturdy contrast to the delicate lines of the subway tile. It is the framework that holds the entire vision together. A floor is a performance surface and the baseboard is the bumper that protects the wall from the realities of daily life.
“The Council recommends that the maximum allowable deflection for a floor system under total design load shall not exceed L over 360 for ceramic tile.” – TCNA Installation Handbook
Advanced patterns and the ghost in the expansion gap
Integrating complex patterns like herringbone or vertical stacking can make basic subway tile look significantly more expensive and architecturally intentional. A standard running bond is classic, but a vertical stack bond creates a mid century modern feel that looks custom. If you choose a herringbone pattern, you are increasing your labor time by three hundred percent, but the visual payoff is immense. You have to be careful with expansion gaps at the perimeter. Every tile installation needs a movement joint every twenty to twenty five feet, or at every change of plane. If you lock the tile tight against the walls, the expansion of the house will cause the tile to tent and crack. I leave a quarter inch gap and hide it under the baseboard or fill it with flexible sealant. This is the structural breathing room the system requires. For those interested in eco-friendly tile solutions, look for ceramic made from recycled content. The installation process remains the same, requiring a steady hand and a deep understanding of the materials. If you ever find your grout looks dingy, you can learn how to refresh grout to bring back that original custom look. Maintain your surfaces by following tile cleaning tips that avoid harsh acids which can eat away at the cement. Treat your tile like the engineering marvel it is, and it will last a lifetime. If you have questions about specific installations, you can always contact us for professional guidance. We also keep a privacy policy to ensure your project details remain secure. Building a custom look on a budget is possible if you respect the trade and the physics of the install.