
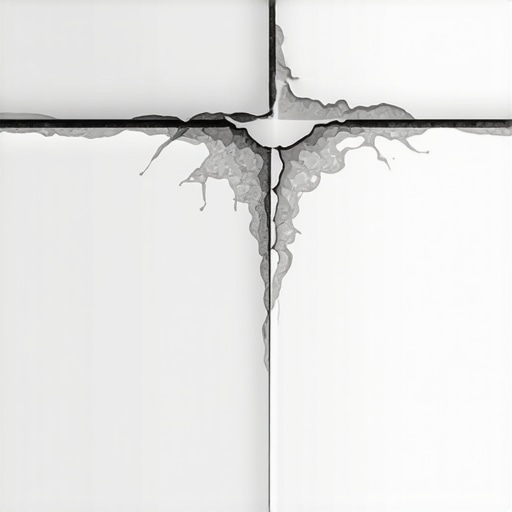
The structural lie of the rigid corner
Shower corner caulk cracks because the house is a living organism that moves while your tile is a rigid shell. When you see a split in the corner bead of your shower, you are witnessing the physics of differential movement. The wall on the left moves independently of the wall on the right. If those walls are tied together with rigid grout or cheap acrylic caulk, the bond will snap. I spent three days grinding concrete on a job last month just so the floor wouldn’t click like a castanet, and showers require that same level of substrate obsession. I once walked into a house where a five thousand dollar marble shower looked like a spiderweb of cracks because the builder used grout in the change of plane. It is the most common failure in the industry. You cannot fight the house moving. You can only accommodate it. Every time you step into a tub, the weight of the water and your body causes the basin to deflect. If that basin is not supported by a rock-solid mortar bed, it pulls away from the wall tile. The caulk is the only thing standing between your subfloor and a slow-motion flood. Most guys skip the leveling compound and they skip the structural backing. They think a fat bead of goo covers a world of sins. It does not. It only hides them for a few months until the first season change hits. To understand why your caulk is failing, we have to look at the chemistry of the bond and the structural integrity of the studs behind the board.
The physics of differential movement in wet rooms
Differential movement occurs when two different materials or two different structural planes expand and contract at varying rates. In a shower, you have vertical wall studs meeting a horizontal floor system. These wood members are sensitive to the humidity levels in your home. If you live in a high-humidity area like Florida or a dry climate like Arizona, your house is constantly breathing. Wood framing shrinks as it dries and swells as it absorbs moisture. Tile, however, is thermally stable. When the wood moves and the tile does not, the joint in the middle takes the entire load. This is why the TCNA (Tile Council of North America) is so adamant about movement joints.
“Movement joints are not optional; they are structural requirements for the longevity of a tile installation.” – Master Tile Practitioner
If you filled your shower corners with grout, it will crack. Grout has zero elasticity. It is essentially a thin line of concrete. When the walls move even a fraction of a millimeter, grout fails. You must use a 100 percent silicone sealant that can handle at least 25 percent movement. Anything less is just a temporary patch. I have seen homeowners try to save five dollars by buying the cheap painters caulk. They end up spending thousands later on mold remediation because water seeped through those tiny cracks into the wall cavity. You have to respect the movement of the building. For more on maintaining these surfaces, check out tile cleaning tips for a sparkling bathroom in 2025 to keep the surface ready for bonding.
The chemistry of silicone versus acrylic latex
Pure silicone is a non-porous elastomer that maintains its flexibility for decades while acrylic latex dries out and becomes brittle. The difference between these two materials is the difference between a rubber band and a piece of string. Acrylic caulk, often sold as siliconized, is mostly water and polymers. As it cures, the water evaporates, causing the bead to shrink. This shrinkage puts immediate stress on the bond line. In a wet environment like showers that wow modern designs for 2025, you need a material that does not shrink. Pure silicone is RTV, which means room temperature vulcanizing. It turns into a solid piece of rubber through a chemical reaction with moisture in the air. It does not shrink. It stays flexible. If you used a product that smelled like vinegar when you applied it, that is acetoxy-cure silicone. It is the gold standard for shower corners because it bites into the glazed surface of the tile and the metal of the drain. Many people hate working with it because it is sticky and hard to clean up, but that stickiness is exactly why it works. It creates a molecular bond. If your caulk is peeling off in a long string, it was likely an acrylic hybrid that never truly bonded to the tile. You need that chemical grip to handle the stress of daily temperature swings from hot water hitting a cold wall.
The three point bonding failure
Three point bonding occurs when caulk sticks to the two sides of the joint and the back of the joint simultaneously. This is a technical error that ruins most DIY projects. When a sealant is bonded to three sides, it cannot stretch. It is locked in place. When the joint moves, the sealant cannot elongate, so it tears down the middle or pulls away from the side. To prevent this, professional installers use a backer rod or ensure the joint is deep enough that the caulk only touches the two sides of the tile. This allows the bead of silicone to act like a bridge that can stretch and compress. Imagine a rubber band glued to a piece of paper. If you glue the whole band down, it breaks when you pull the paper. If you only glue the ends, it stretches. This is why the depth of your grout line matters. If you are struggling with old material, you might look into how to refresh grout without replacing it before you tackle the caulking. But for the corners, it is all about the bond geometry. If your joint is too shallow, the silicone has no room to flex. It will snap every single time. Most people think a thinner bead looks better. In reality, a bead that is too thin lacks the mass to handle the structural load of the house shifting.
| Material Type | Elasticity Rating | Moisture Resistance | Expected Lifespan |
|---|---|---|---|
| Standard Grout | 0% | Low (Porous) | 2 to 5 Years |
| Siliconized Acrylic | 10% to 15% | Medium | 1 to 3 Years |
| 100% Pure Silicone | 25% to 50% | High (Waterproof) | 10 to 20 Years |
| Polyurethane Sealant | 30% | High | 5 to 10 Years |
Why your tub is sinking away from the wall
Tub deflection happens when the weight of the water causes the bathtub to drop slightly, pulling the caulk away from the wall tile. A standard bathtub can hold 40 to 60 gallons of water. Water weighs about 8.3 pounds per gallon. Add a 180 pound human, and you have over 600 pounds of pressure pushing down on the floor. If the tub was installed on a weak subfloor or without a mortar bed, it will sink. If you caulk the tub while it is empty, you are setting yourself up for failure. As soon as you fill it up, the tub drops, and the caulk bead stretches to its breaking point. The pro trick is to fill the tub with water before you apply the silicone. This pre-stresses the joint. You apply the caulk while the tub is at its lowest point. You leave the water in the tub until the silicone has fully cured, usually 24 hours. When you drain the water, the tub rises slightly, putting the caulk into compression. Silicone handles compression much better than tension. This simple step is what separates a master plumber from a handyman. It is about anticipating the load. If you are also dealing with baseboard issues near the tub, see chic baseboard designs that transform rooms in 2025 for ideas on how to finish the transition from the wet area to the rest of the bathroom.
Grout restoration secrets for long lasting results
Properly preparing the surface is the only way to ensure that new caulk or grout actually stays put. You cannot put new caulk over old caulk. The oils in the old silicone will prevent the new material from ever sticking. I see this mistake on half the repair jobs I take. People just layer it on like they are icing a cake. You must remove every trace of the old material. This involves a razor blade, a stiff brush, and a chemical softener if necessary. Once the old stuff is gone, you have to kill any mold spores hiding in the gap. If you trap mold behind new silicone, it will eat the bond from the inside out. Use denatured alcohol to wipe down the joint right before you apply the new bead. This removes any skin oils or soap scum. If the surface isn’t surgically clean, the silicone is just sitting on top of the dirt. For those looking to fix the surrounding areas, grout restoration secrets for long lasting results provides the technical roadmap for getting the rest of the floor up to par.
“A floor is only as good as the subfloor beneath it; deflection is the enemy of every joint.” – Master Flooring Axiom
This applies to the walls of your shower just as much as the floor. If the wallboard is loose, the caulk will fail.
The math of expansion and contraction
Every material has a coefficient of thermal expansion that dictates how much it grows when it gets hot. When you turn on a hot shower, the tile and the substrate expand. The temperature might jump from 65 degrees to 105 degrees in seconds. This thermal shock is brutal on adhesives. If you have a large shower, the cumulative expansion can be significant. A ten foot wall of tile can move 1/32 of an inch just from the heat. That doesn’t sound like much until you realize that your grout joint is only 1/16 of an inch wide. You are asking the sealant to compress by 50 percent of its width. This is why the expansion gap at the corners must be at least 1/8 of an inch. If the tiles are butt-jointed against each other in the corner, there is no room for the caulk to live. The tiles will literally crush the sealant. You need a reservoir for the silicone to sit in. I always tell my apprentices that if they can’t fit a nickel in the corner joint, it is too tight. You need volume for the elastomer to work its magic. Without that space, the physics of the material simply cannot cope with the movement.
The checklist for a permanent shower seal
- Remove every microscopic scrap of old caulk using a sharp plastic scraper to avoid scratching the tub.
- Scrub the joint with a toothbrush and bleach to kill deep-seated fungal spores.
- Wipe the entire area with denatured alcohol or 90 percent isopropyl alcohol to remove soap film.
- Ensure the joint is completely dry; use a hair dryer to blow out moisture trapped behind the tile.
- Apply a backer rod if the gap is deeper than 1/4 inch to avoid three-point bonding.
- Fill the bathtub with water to simulate the weight load of a user.
- Apply a continuous bead of 100 percent RTV silicone without stopping in the middle of a run.
- Tool the joint with a dry finger or a specialized tool; avoid using soapy water which can contaminate the bond.
- Wait a full 24 hours before draining the tub or using the shower.
If you follow these steps, you won’t be looking at cracks in six months. It is about respecting the chemistry of the sealant and the reality of a moving house. While you are at it, consider how your floors meet your walls. Check out baseboards makeover ideas to elevate your space to ensure your entire bathroom looks as professional as your new shower corners. Low-quality work always fails at the transitions. Whether it is a baseboard or a shower corner, the transition is where the engineering matters most. Don’t let a ten dollar tube of caulk ruin a ten thousand dollar bathroom. Do the prep work. Use the right chemistry. Respect the movement. It will save your subfloor from a slow and expensive rot.