
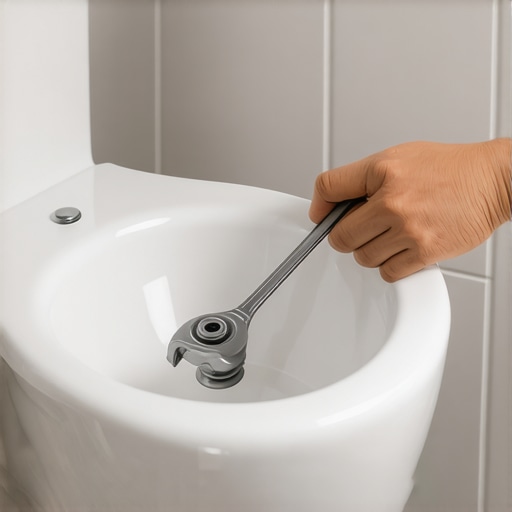
A rocking toilet is not just a nuisance. It is a ticking time bomb for your subfloor. When you feel that slight shift under your feet, you are feeling the literal failure of the mechanical connection between your waste line and your porcelain fixture. Most homeowners ignore it until the ceiling in the kitchen below starts to bubble. By then, the damage is done. I have spent twenty-five years on my knees in bathrooms. I have seen what happens when people try to ‘fix’ a loose toilet by just cranking down on the bolts. They end up with a cracked flange or a shattered tile. You do not fix a wobble with force. You fix it with physics and proper shimming. I remember a job last year where a client had a ‘handyman’ tighten the bolts on a high-end Kohler. The guy didn’t realize the subfloor had a 1/8 inch dip. He snapped the porcelain base like a dry cracker. I spent three days grinding concrete on a job last month just so the floor wouldn’t click like a castanet. This guide will show you how to stabilize your toilet without costing you a new tile floor.
The rocking chair in your bathroom
To secure a loose toilet without breaking the tile, you must first identify if the wobble is caused by an uneven subfloor or a loose flange. Use plastic shims to fill the gap between the toilet base and the tile. Tighten the nuts only to a snug fit. Finish by applying a bead of grout or 100 percent silicone around the base. This method prevents the porcelain from moving while protecting the brittle tile underneath from localized pressure points. Most guys skip the leveling compound. They think the underlayment will hide the dip. It won’t. If your floor is not flat within 1/8 inch over 10 feet, your toilet will never sit right. You are fighting the laws of structural engineering. When you sit down, you are applying a concentrated load of 150 to 250 pounds onto a small surface area. If there is a void under that porcelain, the pressure will find the weakest point. Usually, that is the tile or the wax seal.
Why your subfloor is lying to you
The subfloor is the foundation of every bathroom installation and determines the longevity of your tile and grout. If the plywood is thin or the joists are spaced too far apart, the floor will deflect under the weight of a person. This movement eventually breaks the bond of the wax ring and causes the toilet to rock. I have walked into countless houses where the subfloor was just 1/2 inch CDX plywood. That is garbage for a bathroom. You need at least 1 1/8 inches of total subfloor thickness for a stable tile installation. Without it, the floor bounces. That bounce is what loosens your toilet. When you walk across the room, the tile moves, but the heavy cast iron or PVC waste pipe does not. This creates a shearing force. Over time, this force shears the wax seal. You might not see a leak yet, but the moisture is already soaking into the wood. This leads to rot. Rot leads to a toilet that eventually falls through the floor. It is a slow, wet disaster. If you want to avoid this, you need to ensure your tile is bonded to a rock-solid surface. If the floor feels like a trampoline, no amount of shimming will save you in the long run.
The physics of a failing flange
The closet flange is the ring that connects the toilet to the sewer pipe and holds the closet bolts in place. If the flange is sitting too low relative to the finished tile floor, the wax ring cannot create a proper seal. A loose flange is the primary reason why bolts spin and toilets wobble. Ideally, the bottom of the flange should sit flush on top of the finished tile. Most ‘builder-grade’ homes have the flange installed directly on the subfloor. Then they tile around it. This leaves the flange 1/4 inch or 1/2 inch too low. When you set the toilet, the wax ring has to bridge a massive gap. It eventually collapses. You need to inspect the flange before you do anything else. If it is broken, you need a repair ring. If it is too low, you need a flange extender. Do not try to double up on wax rings as a permanent fix. It is a lazy man’s shortcut. Double wax rings are prone to blowouts if you ever have to use a plunger with any real force. The hydraulic pressure will push the wax right out of the way.
“A floor is only as good as the subfloor beneath it; deflection is the enemy of every joint.” – Master Flooring Axiom
The danger of overtightening closet bolts
Overtightening the closet bolts is the most common way to break a tile or crack a toilet base during a repair. Porcelain is a ceramic material that is incredibly strong under compression but very weak under tension. When you tighten a bolt against a hollow space, you are creating a tension force that snaps the material. You should only ever use your fingers to tighten the nuts initially. Then, use a small wrench to turn them an extra quarter or half turn. If you feel resistance, stop. If the toilet still wobbles, do not keep tightening. This is where the shims come in. You are not trying to pull the toilet down into the floor. You are trying to marry the two surfaces together. If there is a gap, you fill the gap. You do not try to close the gap by bending the porcelain. That is a fool’s errand. I have seen $800 toilets ruined in five seconds by a guy with an 18-inch pipe wrench. Use your head, not your muscles. If the bolt keeps spinning, the slot in the flange is likely stripped or broken. You will need a flange repair kit before you can proceed.
Selecting the right shim material
Not all shims are created equal and using the wrong material will lead to a recurring wobble within months. Wood shims will rot because bathrooms are high-humidity environments. Soft rubber shims can compress too much under weight. Hard plastic shims are the only professional choice. These shims are designed to be stacked and snapped off. They do not compress, and they do not decay. When you insert them, you want to place them in the areas where the toilet has the most lift. Usually, this is at the back or the sides. You slide them in until they are snug. You do not hammer them in. If you hammer them, you risk lifting the other side of the toilet and breaking the wax seal you just worked so hard to establish. Once the shims are in place and the toilet is rock solid, you can tighten the bolts slightly. This creates a sandwich effect where the toilet is held between the bolts and the shims.
| Shim Material | Durability | Compression Resistance | Recommendation |
|---|---|---|---|
| Wood Shims | Very Low | Low | Never Use |
| Soft Rubber | Medium | Medium | Not Recommended |
| Hard Plastic | Very High | High | Industry Standard |
| Composite | High | High | Acceptable |
The chemical bond of grout and silicone
Finishing the base of the toilet with a sealant is a structural requirement, not just an aesthetic one. Many plumbers prefer 100 percent silicone because it is flexible and waterproof. However, some pros prefer using grout to match the existing floor. If you use silicone, it acts as a secondary adhesive. It helps keep the toilet from shifting laterally. This protects the flange from stress. If you prefer the look of grout, make sure you use a high-quality polymer-modified version. Grout is more rigid than silicone, which is great for stability, but it can crack if there is any micro-movement in the floor. A trick I use is to grout most of the base but leave a small gap at the very back. This ‘weep hole’ allows you to see if the wax ring ever leaks. If you seal the toilet 100 percent around the base, a leak will stay trapped under the toilet and rot your subfloor for years before you ever see a drop of water on the tile. By the time you notice, you’ll be replacing the baseboards and the joists.
Step by step stabilization process
Stabilizing a toilet requires a methodical approach to ensure you do not compromise the waterproof seal. Follow these steps to ensure a professional result that lasts for decades.
- Inspect the base of the toilet and identify the exact points of movement by rocking it gently by hand.
- Loosen the closet nuts slightly to allow for the insertion of shims without putting tension on the porcelain.
- Slide plastic shims into the gaps until the rocking motion stops completely.
- Check the toilet for level in both directions. A toilet that leans forward or to the side is uncomfortable and prone to clogs.
- Snug the closet nuts down with a wrench. Do not over-torque.
- Score the shims with a utility knife and snap them off so they sit flush or slightly recessed from the toilet base.
- Clean the area thoroughly with rubbing alcohol to ensure a good bond for the sealant.
- Apply a bead of caulk or grout around the base, leaving a small opening at the rear for leak detection.
The ghost in the expansion gap
Tile floors require an expansion gap at the perimeter to allow for the natural movement of the building structure. If your tile was installed tight against the toilet flange or the walls, it has nowhere to go when the temperature and humidity change. This pressure can actually cause the tile to tent or the grout to crumble. When you are fixing a loose toilet, look at how the tile was cut around the flange. If the tile is touching the flange, it can transfer vibrations from the plumbing directly into the tile. This can cause the tile to crack over time. A professional installation leaves a small gap that is filled with a flexible sealant. This is the same logic used when installing chic baseboard designs. You never want hard surfaces jammed against each other. There must be room for the house to breathe. If you see cracked grout around your toilet, it is a sign that the floor is moving more than it should. You might need to look into grout restoration secrets to find a more flexible solution for those joints.
The structural lie of the wax ring
A wax ring is a low-tech solution for a high-stakes problem. It relies on the consistency of the wax to create a physical barrier against water and sewer gas. However, wax has no ‘memory.’ Once a wax ring is compressed, it stays compressed. If the toilet rocks even once, the wax pulls away from the porcelain and stays there. This creates a permanent gap. This is why you cannot just tighten the bolts on a toilet that has been rocking for a month. The seal is already blown. You must pull the toilet and replace the wax ring. If you want a more modern solution, look into foam or rubber gaskets. These have ‘memory’ and can expand or contract slightly if the toilet moves. They are much more forgiving for a DIY fix. But even with a rubber gasket, the toilet must be secured. No seal can withstand constant movement. If your showers or bathrooms are showing signs of moisture damage near the floor, the toilet seal is the first place I would check.
“A floor is only as good as the subfloor beneath it; deflection is the enemy of every joint.” – Master Flooring Axiom
Regional considerations for floor stability
The climate in your region plays a significant role in how your subfloor behaves and how you should secure your toilet. In humid areas like Florida or the Gulf Coast, plywood subfloors are prone to swelling and delamination. This can cause the flange to shift over time. In these regions, I always recommend using a stainless steel flange repair ring to prevent corrosion. In dry climates like Arizona, the wood can shrink, causing the closet bolts to loosen. If you live in a high-humidity area, you must be extra vigilant about sealing the base of your toilet. Any moisture that gets under the tile will lead to mold growth in the subfloor. For those looking for eco-friendly tile solutions, consider that a longer-lasting installation is the most sustainable choice you can make. Replacing a rotten subfloor is a massive waste of resources that can be avoided with ten minutes of proper shimming.
Modern bathrooms and zero-threshold challenges
As we move toward more open, modern designs like curbless showers, the floor becomes a continuous surface. This makes the stability of the toilet even more important. In a small bathroom, the toilet is often very close to the shower area. If the toilet is loose, water from the shower can migrate under the toilet base and sit there. This is a recipe for a structural failure. When I design a high-end bathroom, I ensure the floor is perfectly level before a single tile is laid. We use self-leveling underlayment to create a glass-like surface. This eliminates the need for shims and ensures the toilet sits perfectly flat. If you are doing a renovation, do not skip this step. It is the difference between a floor that lasts fifty years and one that fails in five. If you have questions about your specific layout, you can always contact us for expert advice on floor preparation. It will save you a headache and a lot of money in the future.
Final thoughts on mechanical integrity
Securing a toilet is about respecting the materials. You are working with brittle porcelain, hard ceramic tile, and a rigid plumbing system. These three things do not like to move. Your job is to ensure they stay perfectly still. Do not rely on the bolts to do the work of the shims. Do not rely on the caulk to do the work of the bolts. Each component has a job. The shims provide the level base. The bolts provide the downward tension. The sealant provides the lateral stability and the waterproof barrier. When you balance these three, you get a toilet that is as solid as a rock. You protect your tile, you protect your subfloor, and you protect your home. For more information on maintaining your bathroom surfaces, see our privacy policy for how we handle your data when browsing our tips. A solid floor is the hallmark of a master craftsman. Do not settle for anything less in your own home.