
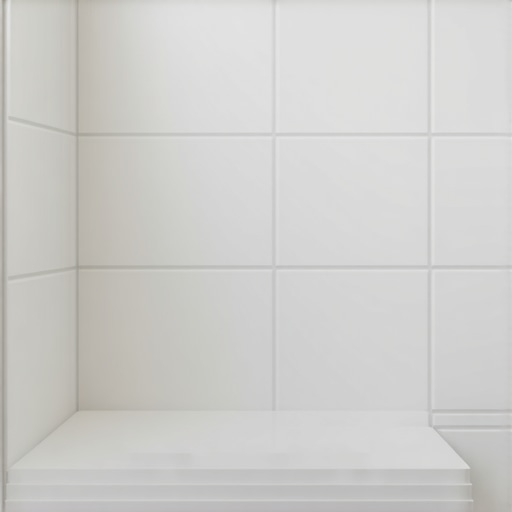
How to Install a Floating Shower Bench for a Modern Look
Most guys skip the leveling compound. They think the underlayment will hide the dip. It won’t. I spent three days grinding concrete on a job last month just so the floor wouldn’t click like a castanet. That same logic applies to a floating shower bench. If your framing is a fraction off, that bench is a diving board waiting to snap. I once walked into a remodel where the homeowner installed a heavy marble slab bench using only standard tile backer screws. The whole thing had sagged two inches, tearing the waterproofing and rotting the studs behind it. You don’t just ‘hang’ a bench. You engineer it into the skeleton of the house. This is a structural engineering challenge that requires an understanding of shear strength, dead loads, and the molecular bond of modified thin-set mortar. If you want that clean, minimalist look, you have to do the dirty, heavy work behind the tile first. We are talking about supporting 400 pounds of live load on a cantilevered surface. There is no room for error when water is involved.
The gravity of the situation and structural framing
Floating shower bench installation requires structural blocking using 2×6 or 2×4 kiln-dried lumber secured between studs with structural screws. This creates the load-bearing foundation necessary to support the weight of the bench and the user without deflection. Proper framing prevents grout cracking and waterproofing failure in modern showers. Before you ever touch a piece of tile or mix a bag of grout, you must open the wall. You cannot mount a floating bench to 1/2 inch cement board and hope for the best. You need to install horizontal blocking between the vertical studs at the exact height of your bench. I prefer using three inch structural screws because they have a higher shear rating than standard gold screws. This blocking must be perfectly level. If your blocking is tilted even 1/16 of an inch, the finished bench will feel like you are sliding off. We use a 4 foot stabila level to verify the plane across the entire shower width. The physics here are simple. The weight on the front edge of the bench creates a lever effect. That lever is trying to pull the top screws out of the wall and push the bottom of the bench through the tile. Without solid wood blocking, those forces will win every time. I recommend doubling up the studs on either side of the bench to ensure there is zero flex in the wall assembly. Deflection is the enemy of every joint. If the wall moves, the grout will powder and the waterproofing will rip. This leads to leaks that rot your subfloor. It is a chain reaction of failure that starts with poor framing.
The physics of the cantilever and metal brackets
Cantilevered shower benches utilize heavy duty stainless steel brackets or high density structural foam like Schluter-KERDI-BOARD to maintain a floating appearance. These components must be rated for at least 400 pounds and anchored directly into the wall framing to ensure long term stability and safety in wet environments. When you are aiming for that showers that wow aesthetic, the support system must be invisible. I typically use 1/2 inch thick stainless steel L-brackets. These are not your hardware store shelf brackets. These are industrial grade supports. We notch the studs so the vertical leg of the bracket sits flush with the wood. This allows the backer board to lay flat over the steel. If you don’t notch the studs, you get a hump in your wall that will make your tile layout a nightmare. Another option is the structural foam system. These are made of extruded polystyrene with a cementitious coating. While they look like simple foam, their compressive strength is incredible. However, even with foam, the bond to the wall is the weak point. I always use a secondary mechanical fastening system. You want to see at least 3 inches of thread penetration into the center of the stud. Stainless steel is mandatory. Zinc plated screws will eventually corrode in the high humidity environment of a shower, even behind the tile. When a screw corrodes, it expands. That expansion can crack your grout from the inside out. I have seen it happen in three year old bathrooms where the ‘pro’ used drywall screws.
“A floor is only as good as the subfloor beneath it; deflection is the enemy of every joint.” – Master Flooring Axiom
The chemistry of the bond and waterproofing
Waterproofing a floating bench requires a liquid applied membrane or a bonded fleece sheet that covers all fasteners and joints. Using high performance modified thin-set mortar ensures a chemical and mechanical bond between the bench substrate and the tile, preventing water intrusion and structural rot. Once the bench is physically attached, you have created a dozen new leak points. Every screw hole is a highway for water. We use a topical waterproofing system because I want the water to stay on the surface of the tile, not soak into the bench. I treat the bench like a miniature roof. It needs a 1/4 inch per foot slope toward the drain. If the bench is level, water will pond against the wall. That standing water will eventually find a microscopic pinhole in your grout. I have seen water travel six feet along a stud from a single unsealed screw head. We apply three coats of liquid waterproofing, reinforced with fabric in the corners. The molecular structure of these membranes allows for slight movement without cracking. For the tile, we use a polymer modified thin-set. The polymers act like tiny rubber bands inside the mortar, giving it the flexibility to handle the thermal expansion of the bench when the hot water hits it. If you use cheap, unmodified thin-set, the bond will eventually shear off due to the different expansion rates of the metal, foam, and ceramic. Check out these grout restoration secrets for more on maintaining those seals.
| Material Type | Weight Capacity | Pros | Cons |
|---|---|---|---|
| Stainless Steel Brackets | 500+ lbs | Ultra-slim profile, maximum strength | Requires wall cavity access |
| Structural EPS Foam | 300-400 lbs | Lightweight, waterproof core | Thicker profile than steel |
| Custom Wood Framing | Variable | Low cost, familiar materials | High risk of rot if leak occurs |
| Heavy Stone Slab | 200-300 lbs | Pre-finished surface | Difficult to anchor securely |
The 1/8 inch that ruins everything and drainage
Proper drainage on a floating bench is achieved by creating a 2 percent slope toward the shower floor. This ensures that gravity pulls moisture away from the wall junctions and prevents mineral buildup or mold growth on the tile surface and grout lines in modern showers. I see this mistake on almost every DIY job. The installer makes the bench perfectly level. It looks great in a photo, but it is a functional failure. You need that slight pitch. Without it, you will be fighting mold forever. When water sits on grout, it starts a chemical breakdown. The minerals in the water deposit on the surface, creating a white crust called efflorescence. To avoid this, we build the slope into the substrate itself. Don’t try to ‘build up’ the slope with thin-set. Thin-set is meant for bonding, not for leveling or ramping. If you put it on too thick, it will shrink as it cures, pulling the tile out of alignment. We use a screed to ensure the pitch is consistent across the entire length. This is especially vital when coordinating with chic baseboard designs in the adjacent bathroom area to maintain a unified floor height. If your bench is leaking, the water will often travel under the curb and ruin the baseboards in the main room. I have replaced miles of baseboard because of a poorly pitched shower bench. It is a costly fix for a simple 1/8 inch mistake.
- Ensure all horizontal blocking is secured with structural screws into at least two studs.
- Apply a minimum of two layers of waterproofing membrane to all bench surfaces.
- Verify a 1/4 inch slope per foot using a torpedo level before tiling.
- Use epoxy grout for the bench-to-wall transition for maximum flexibility and water resistance.
- Wait 24 hours for the thin-set to cure before applying any weight to the bench.
Tile and grout integration for a professional finish
Integrating tile onto a floating bench requires mitered edges or bullnose trim to hide the substrate. Using a high quality grout ensures the joints remain sealed against moisture while providing a cohesive look that matches the shower walls and floor for a modern design. The layout is where the artistry happens. For a floating bench, I always recommend a mitered ‘waterfall’ edge. This means the tile on the top and the tile on the face meet at a 45 degree angle. It makes the bench look like a solid block of stone. This requires a wet saw with a brand new diamond blade. If your cuts are jagged, the grout will look terrible. Speaking of grout, don’t use sanded grout on a bench if you are using polished stone. It will scratch the surface. Use a high performance unsanded grout or an epoxy. Epoxy is king here. It is waterproof, stain proof, and it never needs sealing. It is harder to work with, but for a bench, it is the only thing I trust. If you are struggling with old installations, you might want to learn how to refresh grout without replacing it before starting a new project. The transition between the bench and the wall should be filled with a 100 percent silicone caulk that matches your grout color. Never use hard grout in a change of plane. The wall and the bench will move at different rates, and hard grout will just crack and fall out. Silicone allows that movement while remaining watertight. This is the difference between a pro job and a hack job.
Maintaining the modern aesthetic and cleaning
Maintaining a floating shower bench involves regular cleaning with pH-neutral solutions to protect the tile finish and grout integrity. Avoiding harsh chemicals prevents the breakdown of waterproofing seals and keeps the modern aesthetic sharp and clean for years to come. People spend thousands on these benches and then ruin them with bleach. Bleach eats grout. It is an acid that breaks down the cementitious bond. Over time, your grout will become porous and start to hold onto dirt. I tell my clients to use a squeegee after every shower. It takes ten seconds and prevents 90 percent of soap scum buildup. For deep cleaning, follow these tile cleaning tips. If you have a natural stone bench, like marble or granite, it must be sealed every six months. Stone is a sponge. It will soak up oils from your skin and shampoo, leading to permanent staining. A floating bench is a high touch surface. It deserves high level care. If you treat it like a piece of fine furniture, it will last as long as the house. If you treat it like a sidewalk, you will be calling me in five years to tear it out. The modern look is about precision and cleanliness. Any crack or stain stands out. Keep it dry, keep it clean, and check the perimeter seals annually. If the silicone starts to peel, replace it immediately. That 10 dollar tube of caulk is the only thing standing between a beautiful shower and a moldy subfloor. For more inspiration on layouts, see these showers with a style for small spaces. The floating bench is the ultimate upgrade, but only if the structural reality matches the visual dream. Do the work behind the wall and the rest will follow.