
The physics of bonding wood to glazed surfaces
To stick baseboards to tiled walls effectively you must use a high-tack modified silane polymer or a premium polyurethane construction adhesive. These formulas provide the chemical bridge necessary to link a porous material like wood or MDF to a non-porous, glazed ceramic or porcelain surface. Mechanical fasteners often fail or crack the tile, making specialized adhesives the only viable professional solution.
I once spent three days grinding concrete on a job last month just so the floor wouldn’t click like a castanet. That experience reminds me that preparation is everything. Most guys think they can just slap some cheap liquid nails on a piece of MDF and call it a day. They are wrong. When you are dealing with tiled walls, the challenge is even steeper because you are trying to bond a porous material to a surface designed to repel everything. If you don’t understand the molecular reality of the bond, that baseboard will pop off the wall the first time the humidity shifts or someone hits it with a vacuum cleaner.
The problem with traditional fasteners on tile
Traditional nailing techniques are impossible when dealing with full-height tiled walls because the impact of a finish nailer will shatter the ceramic glaze or crack the tile body. Drilling individual pilot holes through tile for every single nail is a recipe for a structural nightmare and an aesthetic disaster. Adhesives provide a continuous bond line that distributes the load across the entire surface area of the trim piece.
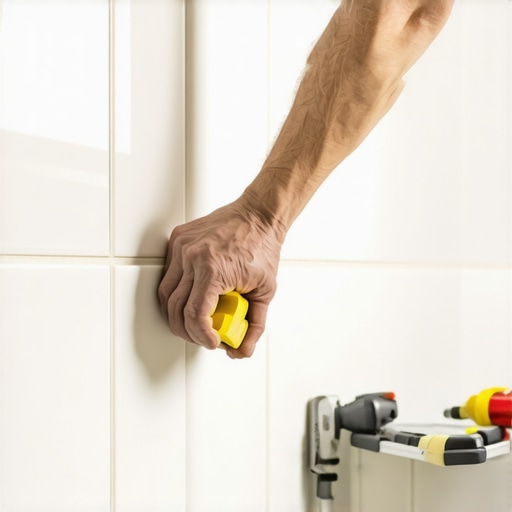
When you fire a nail into a wall, you rely on the friction of the wood stud. When you are working over tile, there is no friction. There is only the risk of a hairline fracture that will grow over time as the house settles. I have seen $20,000 bathroom renovations ruined because an installer tried to ‘toe-nail’ a baseboard into the floor plate through the bottom edge of a porcelain tile. The tile cracked, moisture got into the substrate, and the whole system failed within six months. This is why we pivot to chemical engineering. We need an adhesive that understands surface energy. Ceramic tile has high surface energy but the glaze is often hydrophobic. You need a product that can wet out the surface and create a microscopic interlocking bond. [image_placeholder]
“A floor is only as good as the subfloor beneath it; deflection is the enemy of every joint.” – Master Flooring Axiom
The molecular reality of bonding to ceramic
The chemical bond between a baseboard and a tiled wall depends on the adhesive’s ability to resist shear forces while remaining flexible enough to handle the different expansion rates of wood and stone. Wood expands and contracts significantly with changes in relative humidity, whereas ceramic tile is dimensionally stable. This creates a constant tug-of-war at the glue line that can snap brittle adhesives.
We have to look at the ‘skin-over’ time and the ‘open time’ of the product. If the adhesive skins over too fast, it won’t wet the tile surface properly. I prefer MS Polymers (Modified Silane) for this exact reason. They don’t contain solvents or isocyanates that can gas out and create bubbles in the bond. Instead, they cure through a reaction with atmospheric moisture. This means they actually get stronger in the humid environments where you typically find tiled walls, such as bathrooms or laundry rooms. If you are looking for chic baseboard designs that transform rooms in 2025, you have to ensure the foundation of the trim is rock solid first.
Why MS Polymers win every time
MS Polymer adhesives offer the highest initial tack and long-term flexibility, making them the superior choice for vertical tile applications. They provide a ‘grab’ that holds the baseboard in place without the need for complex bracing, which is essential when you cannot use nails to pin the board while the glue sets.
| Adhesive Category | Initial Tack | Flexibility | Cure Time | Best Use Case |
|---|---|---|---|---|
| Modified Silane (MS) | High | Excellent | 24 Hours | Wood to Tile |
| Polyurethane | Medium | Good | 48 Hours | Heavy Stone Trim |
| Solvent Based | Very High | Poor | 12 Hours | MDF to Drywall |
| Water Based | Low | Medium | 24 Hours | Lightweight PVC |
The flexibility of the MS polymer is the secret sauce. A standard construction adhesive dries hard like a rock. When the wood baseboard shrinks in the winter, that hard glue will either pull the glaze off the tile or simply snap. An MS polymer remains rubbery. It acts like a shock absorber between the wall and the trim. This is especially vital in showers that wow modern designs for 2025 where moisture fluctuations are the norm.
Preparing the glazed surface for maximum grip
Surface preparation is the most ignored step in flooring, yet it determines 90 percent of the success of the bond. You cannot stick a high-performance adhesive to a layer of soap scum, floor wax, or dust and expect it to hold for a decade. The surface must be chemically clean and mechanically sound.
- Remove all traces of grout haze using a professional acidic cleaner.
- Degrease the tile surface with denatured alcohol to remove any oils or waxes.
- Scuff the tile glaze slightly with a diamond hand pad if the surface is exceptionally glossy.
- Vacuum the area to ensure no dust remains in the grout lines.
- Dry the surface completely using a heat gun or shop fan.
If you are working on a project involving how to refresh grout without replacing it, do that work before you install the baseboards. You don’t want grout cleaners or dyes dripping onto your new trim. I have seen guys try to glue baseboards over old silicone caulk. Nothing sticks to silicone. Not even more silicone. You have to scrape every last molecule of old caulk off that tile before you even think about opening a tube of adhesive.
The 1/8 inch gap that saves your trim
Leaving a small expansion gap between the bottom of the baseboard and the floor tile prevents the trim from buckling when the house settles. Many installers make the mistake of jamming the baseboard tight against the floor. When the floor moves, it pushes up on the baseboard, breaking the adhesive bond on the wall.
I always use 1/8 inch spacers. Once the adhesive has cured, I pull the spacers and fill the gap with a color-matched 100 percent silicone caulk. This creates a waterproof seal that allows for movement. If you are looking at baseboards makeover ideas to elevate your space, remember that the finish work is what people see, but the expansion gap is what keeps it looking good. This is even more critical when integrating eco-friendly tile solutions for sustainable homes in 2025 because natural materials often have higher rates of movement.
“Adhesion is a surface phenomenon; if the surface is contaminated, the engineering is irrelevant.” – TCNA Handbook Adaptation
How moisture affects the adhesive skin
Humidity is both the friend and the enemy of the installer, as it accelerates the curing of polyurethane and MS polymer adhesives but can cause premature skinning. In a high-humidity environment like a bathroom that was just tiled, the moisture in the air will cause the adhesive to form a skin within minutes. If you don’t get that baseboard onto the wall immediately, you will be trying to bond a dry skin to the tile, which will fail.
I always work in small sections. I apply the adhesive in a serpentine pattern on the back of the board, making sure to stay at least an inch away from the edges to prevent squeeze-out. If you do get squeeze-out on your tile, don’t wipe it with a wet rag. That just smears the polymers into the grout and makes a mess. Let it dry slightly, then slice it off with a sharp razor blade. This keeps the tile clean and the bond line crisp.
Professional tools for the vertical bond
Using the right caulking gun and bracing tools ensures that the adhesive is applied with enough pressure to wet out the tile surface. A high-ratio caulking gun (18:1 or 26:1) is necessary for thick MS polymers. If you use a cheap $5 gun from a big-box store, you will have hand cramps within ten minutes and you won’t be able to apply the consistent bead required for a structural bond.
For long runs of baseboard, I use temporary braces. I take a few scraps of 2×4 and wedge them against the opposite wall to hold the baseboard tight against the tile while it cures. This is especially helpful if the tiled wall is slightly bowed. The adhesive can fill small gaps, but it needs to be held in compression to reach its full strength. For showers with a style that feature tiled wainscoting outside the splash zone, this technique is the gold standard. For more information on our standards, you can view our privacy policy or contact us for specific technical advice.