
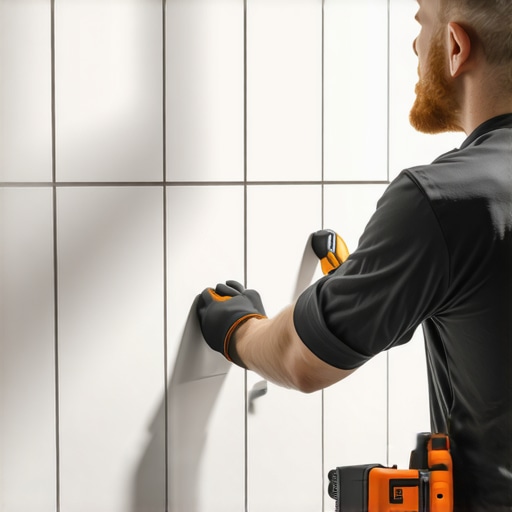
The substrate secret that stops gravity
Installing large format tiles on a shower wall requires a substrate with less than 1/8 inch variation over 10 feet. Because these tiles are heavy and inflexible, the wall must be perfectly flat to ensure 95 percent mortar coverage and prevent lippage. Professionals use high-bond polymer-modified thin-set to combat the vertical pull of gravity.
I once walked into a luxury bathroom where a two-foot by four-foot porcelain slab had literally peeled off the wall three months after the homeowner paid a ‘budget’ contractor six thousand dollars. The installer didn’t understand the physics of suction. He used a standard spot-bonding method, often called five-spotting, which left massive air pockets behind the tile. Moisture from the steam shower condensed in those voids, weakened the bond, and the sheer weight of the porcelain did the rest. It did not just crack. It fell. This is why I treat every shower as a structural engineering project. If the wall is not flat within the thickness of a nickel across the entire span, you are not ready to spread mud. You spend three days grinding high spots or shimming studs before the first tile ever touches the room. Most guys think the thin-set will hide the dip. It will not. Large format tile is unforgiving. It does not bend. It only breaks or detaches when the substrate is a lie.
Why your shower wall is lying to you
A shower wall appears straight to the naked eye but usually contains bows and dips caused by warped wooden studs. For large format tile, you must achieve a flatness tolerance of 1/8 inch in 10 feet as mandated by TCNA standards. This is achieved through sistering studs or using high-density foam backer boards with adjustable washers.
When you are dealing with tiles that have one side longer than fifteen inches, the math changes. You are no longer just ’tiling.’ You are cladding a vertical surface with heavy stone or ceramic. Standard drywall, even green board, is a failure waiting to happen in this environment. The moisture will eventually penetrate the grout or the transitions, and once that paper backing gets damp, the bond is gone. I insist on cementitious backer units or, preferably, waterproof foam boards that act as a vapor barrier. These boards provide the rigidity needed to support the weight of slabs that can weigh forty pounds each. If you skip the leveling phase, you will end up with lippage. Lippage is not just an aesthetic nightmare where the edge of one tile sticks out further than its neighbor. In a shower, it creates shadows that highlight every imperfection and creates a shelf for soap scum and hard water to collect. It turns a shower that wows into a maintenance disaster. You must check the plumb of every corner. If the corner is out of square, your grout lines will grow from an eighth of an inch to a half-inch by the time you reach the ceiling.
“A floor is only as good as the subfloor beneath it; deflection is the enemy of every joint.” – Master Flooring Axiom
The physics of suction and mechanical bonds
Successful installation of large format tile depends on 95 percent mortar contact and the elimination of air pockets. This is achieved through back-buttering the tile and using a notched trowel to create parallel ridges on the wall. Collapsing these ridges ensures a vacuum-like suction that holds the tile in place during the curing process.
The chemistry of the adhesive is just as vital as the technique. You cannot use a basic mastic or a cheap thin-set for these installations. You need an ANSI A118.15 rated mortar. This is a high-performance, polymer-modified cement that offers increased bond strength and flexibility. Think of the mortar as a bridge between two moving objects. Even though the wall seems static, the house shifts, the temperature in the shower fluctuates, and the materials expand. A rigid, low-quality mortar will snap under that stress. When you apply the mortar, the ridges must all run in the same direction, horizontally. When you press the tile into the wall, you move it slightly back and forth to collapse those ridges. This creates a solid bed of cement. If you swirl the trowel, you trap air. Trapped air means a weak bond and potential mold growth in the future. I tell my apprentices that if they do not have a workout from vibrating the tile into the wall, they did not do it right. You are looking for that specific ‘grab’ where the tile feels like it is being pulled into the wall by the mortar itself.
| Tile Size (inches) | Recommended Trowel Size | Mortar Coverage Goal | Adhesive Requirement |
|---|---|---|---|
| 12×24 | 1/2″ x 1/2″ Square Notch | 95% | ANSI A118.11 or A118.15 |
| 24×24 | 1/2″ x 1/2″ U-Notch | 95% | ANSI A118.15 High Bond |
| 24×48 | Euro Notch or 3/4″ Flowed | 95% | ANSI A118.15 Large/Heavy Tile |
Grout lines and the myth of zero maintenance
Grout lines for large format tiles should be no smaller than 1/16 inch to allow for thermal expansion and structural movement. Using high-performance epoxy or pre-mixed urethane grout provides superior stain resistance and color consistency compared to traditional cement grout. Proper grout selection is the final line of defense against water intrusion.
People choose large format tiles because they want fewer grout lines. They think it means no cleaning. This is a myth. While there are fewer lines, the lines that exist are under more stress. Each tile is a massive, rigid plate. When the house settles, that stress is concentrated on the few grout joints available. If you butt the tiles together with no gap, they will tent or crack. I always use a leveling system, those plastic clips and wedges, to hold the tiles in perfect alignment while the thin-set dries. This prevents the tiles from ‘slumping’ down the wall. Once the mortar is cured, usually 24 hours later, I pull the clips and prep for grout. For those who hate the look of dingy lines, I recommend looking into grout restoration secrets for future upkeep. In 2025, we are seeing a shift toward eco-friendly tile solutions that use recycled glass components in the grout itself, which offers incredible density and water resistance. You must also consider the transition at the floor. The joint where the wall tile meets the shower pan or the floor must be a movement joint, meaning it gets 100 percent silicone caulk, never hard grout. Grout will crack in that corner every single time.
The 1/8 inch that ruins everything
Precision cutting and layout are the hallmarks of an expert installation. The most common failure is a layout that leaves a small, sliver cut in the corner or at the ceiling, which is prone to cracking and looks unprofessional. A calculated layout ensures that no tile is cut smaller than half its original width.
- Measure the total height and width of the shower walls before mixing any mortar.
- Establish a level baseline using a laser level, do not trust the shower pan to be level.
- Dry fit the first two rows to check for pattern consistency and lippage issues.
- Apply a waterproof membrane like Schluter-Kerdi or liquid-applied RedGard over all seams.
- Use a wet saw with a high-quality diamond blade to prevent chipping the factory edges.
- Back-butter every single tile to ensure 100 percent transfer of adhesive.
- Check for plumb every three tiles to ensure the wall is not ‘running’ away from you.
The edges of the tile installation are where the amateur is revealed. If the tile ends at an outside corner, you should use a mitered edge or a high-end metal profile. Never leave the raw, unfinished edge of the porcelain exposed. It looks cheap and is vulnerable to chipping. This attention to detail extends to how the tile interacts with the rest of the bathroom. If you are running tile outside the shower, you need to consider how it meets the baseboards. I often recommend chic baseboard designs that complement the scale of the large format tile. If you are doing a full bathroom renovation, you might also explore baseboards makeover ideas to ensure the transition from the wet area to the dry area is seamless and waterproof. Even the choice of grout color can make or break the visual. A matching grout color creates the illusion of a solid stone slab, while a contrasting color emphasizes the geometry of the layout. If your grout starts to look dull over time, you can learn how to refresh grout to keep that high-end look without a full tear-out. For those working with tight footprints, there are specific trendy ideas for small bathrooms that use vertical tile orientation to make the ceiling feel higher. Always remember to perform regular maintenance, including tile cleaning to prevent mineral buildup on these large surfaces.