
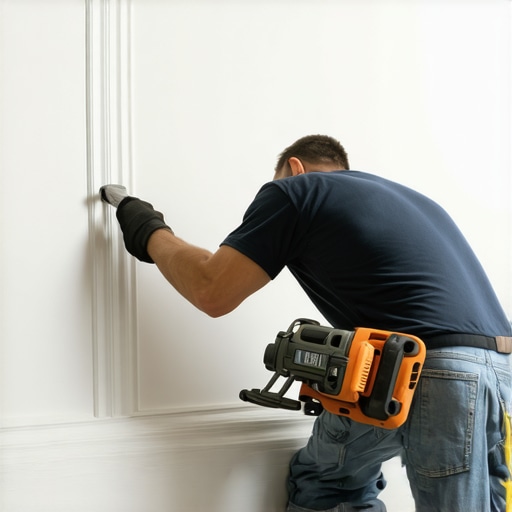
Installing baseboards over a curved wall requires more than just a bit of trim and a prayer. It demands an understanding of material tension, radial geometry, and the chemical bond of modern adhesives. I have spent twenty-five years on my knees with a moisture meter and a level, and I can tell you that a floor is only a performance surface. If the transitions fail, the whole room fails. Most homeowners think a curved wall is a design feature, but for an installer, it is a structural engineering challenge that tests the limits of wood fiber elasticity. You cannot just force a straight piece of wood to bend without consequences. The tension will eventually pull the nails out of the studs, leaving you with a gap that looks like a literal mouth opening in your wall. This guide examines how to do it right using professional methods that respect the physics of the material.
The ghost in the expansion gap
To install baseboards over a curved wall you must choose between kerf-cutting the back of the wood, using flexible polyurethane molding, or soaking the wood to increase fiber elasticity. These methods allow the material to follow the radius of the wall without snapping or creating structural tension that pulls the trim away from the drywall over time. I once spent three days grinding concrete on a job last month just so the floor wouldn’t click like a castanet. The same precision is required for walls. I remember a job where a guy tried to force a 3/4 inch solid oak baseboard around a bullnose corner. He didn’t kerf it. He didn’t steam it. He just used a framing nailer and high hopes. Three weeks later, the tension was so intense it actually cracked the corner bead on the drywall and popped the heads off the finish nails. It was a mess. That is why you never skip the prep work. You have to respect the radius.
“A floor is only as good as the subfloor beneath it; deflection is the enemy of every joint.” – Master Flooring Axiom
The physics of the radius and wood tension
Understanding the radius of your wall is the first step in determining if you need flexible molding or a kerf-cutting strategy. A tight radius, like those found on a spiral staircase or a small rotunda, creates extreme compression on the inside of the curve and extreme tension on the outside. Wood is essentially a bundle of straws held together by lignin. When you bend it, those straws want to separate. If you are working with solid wood, you are fighting thousands of years of evolution designed to keep that tree standing straight. You have to break the structural integrity of the back of the board to allow the front to remain beautiful. This is where we talk about the kerf. A kerf is a series of vertical cuts made on the back of the board, usually spaced about a half-inch apart. These cuts allow the wood to compress into itself. If you cut too deep, you snap the face. If you do not cut deep enough, the board remains a rigid lever. It is a delicate balance of math and muscle.
Selecting the right materials for a curved transition
Choosing between MDF, solid wood, and flexible polyurethane depends entirely on the tightest point of the curve and the desired finish. Flexible polyurethane is often the best choice for painted finishes because it can wrap around a soda can without breaking. However, if you are matching stained oak, you have to stay with real wood. MDF is the worst choice for tight curves because it has no grain structure to provide strength, it just snaps like a cracker. When looking for inspiration, you might find chic baseboard designs that transform rooms in 2025 that utilize these materials in ways that hide the transitions. The goal is a look that is unbroken and stable. We also have to consider the humidity. In a place like Houston, the moisture will expand that wood, making your curve tighter. In a dry climate, the wood will shrink, potentially opening up the kerf cuts if they weren’t filled correctly.
| Material Type | Flexibility Rating | Best Adhesive | Ideal Radius |
|---|---|---|---|
| Data based on standard 9/16 inch baseboard thickness at 70 degrees Fahrenheit. | |||
| Solid Oak | Low | Urethane | > 24 inches |
| MDF | Medium | PVA Glue | > 36 inches |
| Flex Poly | Extreme | CA Glue | < 6 inches |
The 1/8 inch that ruins everything
Precision measurement is the only way to ensure that your baseboard meets the floor and the wall without a visible gap. Even a 1/8 inch deviation in the floor’s levelness will be magnified when you try to bend a board. If the floor dips, the baseboard will tilt. If the wall is not plumb, the baseboard will lean. This creates a compound angle that is a nightmare to miter. This is why I always check the floor with a 6-foot level before I even pull my saw out of the truck. If I find a dip, I am using self-leveling compound or I am scribing the bottom of the baseboard. Scribing is the art of marking the board to follow the exact contour of the floor. It is tedious. It is dusty. But it is the difference between a pro job and a hack job. When you are done, you want the transition to be as clean as the work you see in baseboards makeover ideas to elevate your space. Precision is a habit, not an accident.
The chemistry of adhesives and mechanical fasteners
Using the right glue is more important than the nails when you are dealing with a curved wall. Nails provide the initial hold, but the wood will eventually fight back against those small metal pins. You need a chemical bond. For flexible molding, I use a high-quality cyanoacrylate adhesive with an activator spray. It bonds in seconds. For wood, I prefer a modified silane polymer or a heavy-duty urethane construction adhesive. These glues stay flexible even after they cure. This is vital. Houses move. They breathe. If the glue is too brittle, the bond will snap during the first winter when the furnace kicks on and the humidity drops. You also have to be careful about where you place your nails. You want to hit the studs, obviously, but on a curve, the studs might not be where you expect them. Use a rare-earth magnet to find the screws in the drywall. That is your anchor point. Don’t just fire nails blindly into the void.
- Check the wall for high spots or protruding drywall screws before starting.
- Measure the arc length using a flexible tape measure, not a stiff metal one.
- Pre-bend your material to see where the natural resistance points are.
- Apply a continuous bead of adhesive to the back of the board, avoiding the top edge.
- Use a block of wood as a buffer when hammering to avoid marring the finish.
Why your subfloor is lying to you
A subfloor that looks flat is often a series of hills and valleys that will frustrate any attempts at a perfect baseboard install. When a wall is curved, the floor beneath it is often a bit wonky because the framing for curves is harder to get right than straight lines. If the subfloor is concrete, you might be dealing with moisture issues. I always use a calcium chloride test or a pinless moisture meter. If the slab is off-gassing too much water, your baseboards will soak it up like a sponge. This leads to swelling at the base. If you are transitioning from baseboards to a wet area, such as showers that wow modern designs for 2025, you must use a moisture barrier. You can’t just put raw wood against a tile floor that sees daily steam. Even the grout needs to be considered. If the grout line is high, it will kick the bottom of the baseboard out. I have seen guys try to caulk a half-inch gap because they didn’t want to fix the floor. It looks terrible after six months. Do the work. Fix the floor first.
“Deflection is the silent killer of floors and the trim that frames them.” – Master Flooring Axiom
The art of kerf cutting wood trim
Kerf cutting involves making multiple shallow cuts on the backside of the baseboard to allow it to bend without breaking. You set your miter saw depth stop so that it leaves about 1/8 inch of the wood face intact. The spacing of the cuts depends on the radius. For a gentle curve, cuts every inch might work. For a tight radius, you might need them every quarter-inch. It is a slow process. You have to be careful not to rush, or you will slice right through the face of the board. Once the cuts are made, the board becomes like an accordion. When you push it against the wall, those gaps close up on the inside of the curve. If you are worried about the structural integrity, you can fill the kerfs with a mixture of wood glue and sawdust before you install it. This creates a solid, custom-curved piece of wood that will never lose its shape. It is old-school craftsmanship that the guys at the big-box stores have forgotten.
Managing transitions and corner joins
The most difficult part of a curved wall is where it meets a straight wall or a door casing. You cannot use a standard 45-degree miter. You are often dealing with weird angles like 22.5 degrees or even custom angles that you have to find with an angle finder. If you are using flexible molding, the joint where it meets the wood casing is a weak point. I like to use a biscuits or a miter joint with plenty of glue and a few pin nails to keep it from shifting. If the wall is tiled, you might need to think about how the baseboard interacts with the tile cleaning tips for a sparkling bathroom in 2025 protocols. You don’t want a baseboard that sits in standing water or absorbs the chemicals used to clean the grout. This is why a small bead of 100 percent silicone at the floor-to-baseboard transition is mandatory in bathrooms and kitchens. It stops the moisture from wicking up into the grain of the wood.
The final summary of professional curved installation
Installing baseboards on a curve is about patience and the refusal to accept a bad fit. Whether you are using the kerf-cut method or opting for high-tech flexible polymers, the preparation of the wall and floor is what determines the longevity of the job. You have to account for expansion, moisture, and the physical limits of the material. Don’t be the guy who relies on caulk to hide a half-inch gap. Be the guy who spends the extra hour getting the radius perfect. Your clients will notice the difference, and your reputation will stay as solid as a site-finished oak floor. If you have questions about specific materials or need help with a complex layout, you can always contact us for expert advice. This is more than just trim. It is the final signature on a room well-built.