
The best way to clean grout haze from pebble shower floors
I once spent four hours on my knees in a cramped guest bathroom because a DIY enthusiast decided to use a fast-setting epoxy grout on a pebble mosaic without a helper. By the time they realized the haze was hardening, it was already a translucent plastic skin covering the beautiful river stones. Most guys skip the leveling compound and then panic when the grout fills the uneven valleys of a pebble floor. They think a standard sponge will do the trick. It won’t. I spent those four hours carefully using a specialized haze remover and a stiff nylon brush just to keep the floor from looking like it was covered in dried milk. That job taught me that pebble floors are not just about aesthetics, they are a structural challenge involving hundreds of tiny irregular joints that trap residue at a molecular level.
The chemistry of the white film
Grout haze on pebble floors consists of residual cementitious particles and polymers that remain on the stone surface after the installation of tile. These minerals, primarily calcium carbonate and silicates, form a persistent bond with the porous texture of natural pebbles, requiring acidic neutralization or mechanical abrasion to remove. Understanding the chemical bond is the only way to win this fight. When you mix grout, you are initiating a chemical reaction called hydration. The Portland cement in the grout creates a crystalline structure that locks onto anything it touches. On a flat ceramic tile, you can just wipe it off. On a pebble, which has micro-pits and a rounded geometry, that crystalline structure wraps around the sides of the stone. This is why you cannot just treat it like a regular floor. You are dealing with a three-dimensional topography that demands a specific pH-balanced approach to break the bond without dissolving the grout joints themselves.
Why your pebble floor is a grout trap
Pebble mosaics are a nightmare for the unprepared installer because of their high grout-to-stone ratio. Unlike a 12 by 12 inch tile where the grout is a tiny fraction of the surface area, pebble floors are nearly thirty percent grout. The irregular heights of the stones create deep pockets where the grout sits. When you pull a sponge across the top, you are only hitting the peaks of the pebbles. The haze remains in the valleys. This is where structural zooming becomes vital. If you look at a river pebble under a magnifying glass, you see thousands of tiny pores. These pores drink in the grout water. As the water evaporates, it leaves behind the solids, creating that ghostly white film. If your water has high mineral content, you are adding even more solids to the mix, exacerbating the problem. Using tile cleaning tips for a sparkling bathroom in 2025 can help maintain the surface, but the initial haze removal requires a much more aggressive, targeted strategy.
“A floor is only as good as the subfloor beneath it; deflection is the enemy of every joint.” – Master Flooring Axiom
The window of opportunity for haze removal
Timing is the difference between a simple cleanup and a multi-day restoration project. In the flooring world, we talk about the initial set and the final cure. You have a window of about twenty-four to forty-eight hours where the haze is still relatively weak. During this phase, the polymers have not fully cross-linked. If you wait a week, you are no longer cleaning, you are essentially performing a chemical strip. The ambient humidity of your region plays a massive role here. In a humid climate like Florida, the grout stays wet longer, giving you a bit more time. In a dry climate like Arizona, the grout will flash-dry, locking the haze onto the pebbles before you even finish the first wipe. This is why I always keep a spray bottle of distilled water handy to keep the surface slightly damp during the cleaning process.
Comparing grout haze removal agents
Choosing the right chemical depends on the type of grout used. Cement-based grouts respond well to mild acids, while epoxy grouts require heavy-duty solvents. The following table breaks down the most common options for pebble floors.
| Cleaning Agent | Grout Type | pH Level | Effectiveness on Pebbles |
|---|---|---|---|
| Sulfamic Acid Crystals | Cementitious | Highly Acidic | Excellent for heavy deposits |
| White Vinegar Solution | Cementitious | Mildly Acidic | Good for light haze only |
| Commercial Haze Remover | Polymer-Modified | Neutral to Acidic | Best for modern high-performance grouts |
| Epoxy Solvent | Epoxy Grout | Strong Solvent | Mandatory for epoxy residues |
The physical act of tooling the texture
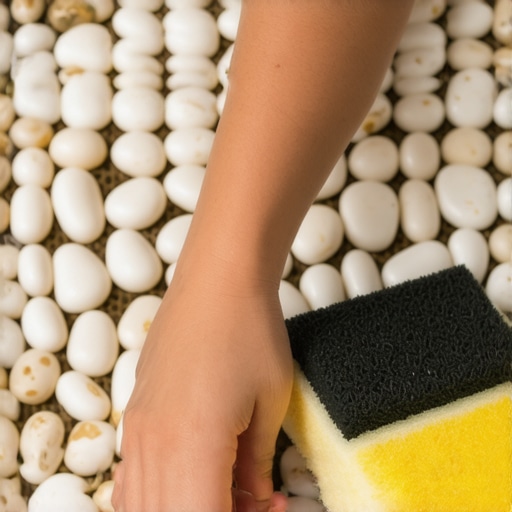
You cannot use a standard yellow sponge for pebbles. It is too soft and will pull too much grout out of the joints, leaving you with recessed areas that collect dirty water and soap scum. I prefer a white nylon scrub pad or a stiff-bristled brush. The goal is to agitate the surface of the stones without digging into the valleys. You should work in small circles, focusing on the individual pebbles. This mechanical action breaks the physical bond of the haze. If you are dealing with a particularly stubborn area, a specialized grout restoration secret involves using a wet-dry vacuum to suck the dirty water out of the pebble crevices immediately after scrubbing. This prevents the haze from just settling back down into the stone pores as it dries.
Professional checklist for haze removal success
- Wait at least 24 hours after installation but no longer than 72 hours for best results.
- Perform a patch test in a small corner to ensure the cleaner does not discolor the natural stone.
- Use two buckets of water, one for the cleaning solution and one for rinsing your tools.
- Change the rinse water every 20 to 30 square feet to avoid re-depositing minerals.
- Work in sections no larger than 3 by 3 feet to maintain control over the drying time.
- Wear knee pads and gloves, as the friction against pebbles is brutal on the joints and skin.
Why your subfloor is lying to you
If you see a haze that keeps returning even after multiple cleanings, you might not be looking at grout haze at all. You might be looking at efflorescence. This happens when moisture from the subfloor or the thin-set bed migrates upward, carrying soluble salts to the surface of the pebbles. This is a common issue in modern designs for 2025 where people use large-format pebbles over thick mortar beds. If the mortar bed was too wet, or if the waterproof membrane was not installed correctly, that moisture has to go somewhere. It evaporates through the grout joints, leaving a white crust. This is why checking the moisture content of the slab or the backer board is non-negotiable. A floor is a system, and if the foundation is wet, the surface will never stay clean. You can learn more about maintaining these surfaces through how to refresh grout without replacing it to ensure long-term durability.
“The integrity of the installation is determined by the preparation of the substrate, not the shine of the finish.” – TCNA Installation Handbook
The 1/8 inch that ruins everything
In the world of flooring, precision is measured in fractions. If your grout joints are too high, they will overflow onto the pebble face, creating a thick layer of haze that is almost impossible to remove without a chisel. If they are too low, the pebbles will feel sharp underfoot. The sweet spot is a 1/8 inch reveal of the stone. Achieving this requires a light touch during the haze removal process. You are not just cleaning, you are sculpting. This is especially true when working near the walls. You need to ensure the transition to the baseboards makeover ideas to elevate your space is clean and free of grout buildup. A messy transition is the mark of an amateur. I always use a small detail brush to clean the perimeter where the pebbles meet the wall or the drain assembly.
Maintenance secrets for pebble longevity
Once the haze is gone, the battle is only half won. Natural stone pebbles are porous. If you do not seal them, they will absorb body oils and shampoo residue, leading to a different kind of haze. Use a high-quality penetrating sealer that allows the stone to breathe while repelling liquids. Avoid topical sealers that create a shiny film, as these will peel over time in a wet environment. Re-sealing every year is a small price to pay for a floor that looks as good as the day it was installed. Remember that harsh chemicals like bleach will eat away at your sealer and eventually the grout itself. Stick to pH-neutral cleaners for daily maintenance to keep the structural integrity of the installation intact.