
Most guys skip the leveling compound. They think the underlayment will hide the dip. It won’t. I spent three days grinding concrete on a job last month just so the floor wouldn’t click like a castanet. When you are dealing with hexagon tiles in a shower, that prep work is the difference between a drain that works and a pond in your bathroom. Most homeowners think a floor is just a surface. I see a structural engineering puzzle. Hexagon tiles add a layer of complexity because their geometry fights the necessary slope of a shower floor. You cannot just lay them flat. If you do, you will have standing water and a grout line that eventually turns into a science project. Success starts long before the saw touches the tile.
The physics of the shower floor slope
Showers require a precise slope of 1/4 inch per foot toward the drain to ensure gravity pulls water away from the walls. This slope creates a cone shape in the mortar bed. Hexagon tiles are rigid, flat polygons that do not naturally bend to fit a cone. If you are using large format hex tiles, the problem becomes an architectural nightmare. To make these tiles follow the pitch, you must employ the envelope cut. This involves cutting the tiles along the lines of the slope change, usually from the corners of the drain to the corners of the shower. Without this, your tiles will have lippage, meaning the edges will stick up and stub your toes every morning. The geometry is unforgiving, and the margin for error is less than the thickness of a penny.
“A floor is only as good as the subfloor beneath it; deflection is the enemy of every joint.” – Master Flooring Axiom
Tools required for surgical precision in porcelain
Professional tile cutting requires a wet saw with a high quality diamond blade and a steady hand to avoid chipping the glazed surface. I have seen too many DIY projects ruined by cheap snap cutters. Porcelain is dense. It is fired at higher temperatures than ceramic, making it harder and more brittle. When you are cutting a hexagon to fit a circular or square drain, you need a saw that can handle intricate notches. You also need a variable speed angle grinder with a dry diamond bit for those rounded edges. If you try to rush the cut, the heat buildup will crack the tile right as you finish the notch. It is a heartbreaking sound. I always keep a bucket of water nearby to keep the tile cool and the dust down. Dust is the enemy of a clean bond.
The math behind the center point
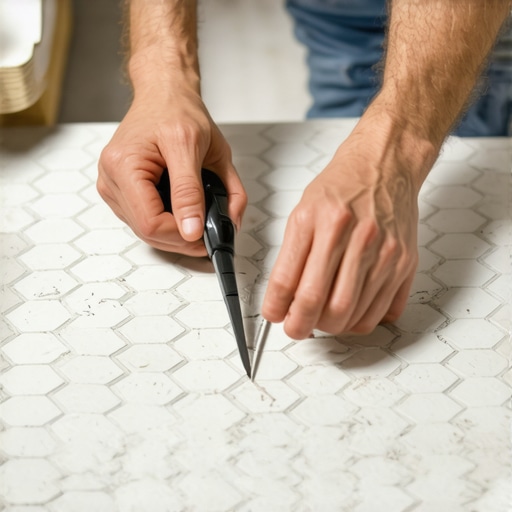
Finding the center of your hex tile in relation to the drain throat is the most important step in the layout phase. You have to dry fit the entire floor first. Do not even think about mixing thin-set until the dry fit is perfect. Start your layout from the drain and work outward. This ensures that the most visible cuts, those surrounding the drain, are symmetrical. If you start at the wall, you might end up with a tiny sliver of tile at the drain that is impossible to cut without it shattering. I measure the distance from the last full tile to the edge of the drain assembly. Mark these points on the tile with a grease pencil. Do not use a standard marker, as the ink can bleed into the porous edges of the tile and haunt you through the grout later.
| Tile Size | Recommended Slope | Cutting Difficulty |
|---|---|---|
| 2-inch Hex | 1/4 inch per foot | Low – Multi-joint flexibility |
| 4-inch Hex | 1/4 inch per foot | Medium – Requires some back-buttering |
| 8-inch Hex | 1/4 inch per foot | High – Mandatory envelope cuts |
| 12-inch Hex | 1/4 inch per foot | Expert – Complex structural miter cuts |
The envelope cut technique for drainage
An envelope cut breaks the hexagon into segments that allow it to follow the four-way pitch of the shower pan. Imagine an invisible line running from each corner of the drain to the corresponding corner of the shower wall. Where the tile crosses this line, it must be cut. This creates a functional fold in the floor. While some think this ruins the aesthetic, it is actually a mark of a master installer. If you want showers that wow, you have to respect the mechanics of water. You can try to avoid the cut with smaller 2-inch hex tiles because the many grout joints absorb the slope change, but for anything larger, the envelope cut is your only path to a flat surface. Failure to do this results in tiles that pivot like a seesaw on the high points of the mortar bed.
Dry fitting and the 1/8 inch rule
Every cut around the drain must maintain a consistent 1/8 inch gap to allow for grout and expansion. Many people try to make the tile flush with the drain grate. That is a rookie mistake. Metals and ceramics expand and contract at different rates. If the tile is tight against the drain, the pressure will eventually pop the tile loose or crack the grout. I use plastic spacers even during the dry fit to ensure the math stays true across the entire floor. You want to see the shape of the drain perfectly mirrored in the tile. If the drain is square, your notches must be perfectly 90 degrees. If the drain is round, you are going to spend a lot of time with your grinder and a sanding stone to smooth those interior curves.
Adhesives and the chemistry of the bond
Modified thin-set is mandatory for porcelain hexagon tiles in wet environments to ensure a chemical and mechanical bond. While most people want the thickest underlayment, too much cushion actually causes the locking mechanisms on modern floors to fail, and in tile, too much thin-set causes shrinkage. When the thin-set dries, it pulls the tile down. If your mud bed is uneven, the tile will sink at different rates, creating lippage. I always back-butter every single piece around the drain. This means applying a thin layer of mortar to the back of the tile before setting it. It ensures 100 percent coverage. In a shower, any void behind the tile is a place for water to collect, which leads to mold and the eventual failure of the system.
“The integrity of a shower floor is measured by what lies beneath the grout, not the shine of the stone.” – TCNA Handbook Reflected
- Verify the subfloor is rigid and meets L/360 deflection standards.
- Check that the waterproofing membrane is intact and leak-tested.
- Dry fit the entire hex pattern before cutting the drain tiles.
- Use a fresh diamond blade to minimize porcelain chipping.
- Ensure the drain assembly is set at the correct height for the tile thickness.
Grouting hexes without the mess
Grout is more than a filler; it is a structural component that locks the tiles together and prevents lateral movement. Once your tiles are set and the thin-set has cured for 24 hours, you need to clean the joints. Any thin-set that squeezed up into the gaps will show through the grout and look amateur. For hex tiles, I prefer a high-performance cement grout or an epoxy grout if the client has the budget. Epoxy is waterproof and stain-resistant but is a nightmare to work with because it gets sticky fast. If you are struggling with old, stained grout in other areas, you might look into grout restoration secrets for long-lasting results to match the new floor. Proper cleaning is also vital, and following tile cleaning tips for a sparkling bathroom in 2025 will keep that hex pattern popping for years.
Transitioning to walls and baseboards
The connection between the shower floor and the wall is the most common point of failure for waterproofing. You must leave a gap at the perimeter for movement. Do not shove the tiles tight against the wall. This gap will be covered by the wall tile or the baseboards. If you are working in a bathroom with high-end finishes, you might consider chic baseboard designs that transform rooms in 2025 to bridge the gap between the floor and the wall. In the shower itself, this transition is usually handled by the first course of wall tile, which should sit on top of the floor tile. This creates a shedding effect where water runs down the wall and onto the floor rather than into the wall cavity. Always use a 100 percent silicone caulk at these change-of-plane joints. Grout will crack there every single time.
The final inspection of the drain fit
Once the grout is dry and the silicone is cured, the final test is a simple bucket of water. Pour it at the furthest corner and watch the path it takes. It should move steadily toward the drain without pooling in any of the hex centers. If you did the math right and executed your envelope cuts with precision, the water will disappear down the drain as intended. Cutting hexagon tiles is a test of patience. It requires you to slow down and respect the geometry of the space. It is not about the speed of the installation. It is about the durability of the structure. A well-cut hex floor around a drain is a signature of a craftsman who cares about the invisible details. Small bathrooms often present the most challenges, so exploring showers with a style trendy ideas for small bathrooms can give you more perspective on layout options before you start your next project. Careful planning ensures the floor lasts as long as the house itself.