
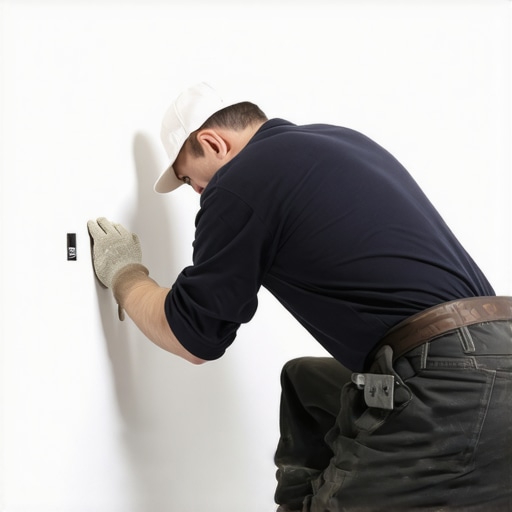
Most guys skip the leveling compound. They think the underlayment will hide the dip. It won’t. I spent three days grinding concrete on a job last month just so the floor wouldn’t click like a castanet. Now, you have these pipe holes in your baseboards and you think a little glob of painter’s caulk will fix the visual mess. It will not. I have been installing floors and trim for over twenty five years and if there is one thing I have learned, it is that the details you try to hide will eventually find a way to expose your laziness. A baseboard is not just a piece of decorative wood; it is a structural transition that manages the intersection of your vertical walls and your horizontal performance surface. When a pipe for a radiator or a vanity supply line punches through that transition, it creates a point of failure for both aesthetics and moisture control.
The structural reality of plumbing penetrations
To hide pipe holes in baseboards effectively you must utilize a combination of tight tolerance scribing, two piece decorative collars known as escutcheons, and flexible sealants that allow for the thermal expansion of the plumbing. Most installers fail because they treat the pipe as a static object. It is not. Hot water pipes expand and contract with every boiler cycle. If you wedge your trim tight against that copper, the floor will eventually groan and the baseboard will pull away from the wall. You need to understand the physics of the gap. A standard half inch copper pipe has an outside diameter of five eighths of an inch. If you drill a hole exactly that size, you are inviting a squeak that will drive a homeowner mad. I always advocate for a hole that is at least one eighth of an inch larger than the pipe, which then requires a sophisticated method of concealment.
Measuring the radius of your failure
Successful concealment starts with an accurate measurement of the pipe center point relative to the floor height and the thickness of the baseboard material being used. You cannot eyeball this. I use a digital caliper to find the exact outside diameter of the pipe. If you are working in a bathroom near showers, you are likely dealing with moisture resistant materials that have different expansion rates than standard pine. I take the baseboard and mark the horizontal center of the pipe on the back of the board first. Then I use a contour gauge to translate the exact position. If the pipe is coming out of the floor rather than the wall, the challenge shifts to the bottom edge of the trim. This is where most installers hack the wood with a jigsaw and hope the homeowner doesn’t look down. A professional uses a Forstner bit to create a clean, circular entrance that mimics the factory finish of the material.
“A floor is only as good as the subfloor beneath it; deflection is the enemy of every joint.” – Master Flooring Axiom
The chemistry of the perfect seal
High quality concealment requires sealants with at least twenty five percent joint movement capability to ensure the gap remains hidden during seasonal humidity shifts. We are talking about the molecular bond of the product. Cheap acrylic caulk will shrink by thirty percent as the water evaporates from the compound. This creates a concave bead that shadows the pipe and looks terrible. I prefer a siliconized acrylic or a pure polymer sealant for baseboards. This stuff stays flexible. When the winter air dries out the house and the wood baseboard shrinks, the sealant stretches rather than snapping. This is especially vital when the baseboard meets tile or grout. If you have a solid connection there, the movement of the subfloor will crack the grout lines. You need that soft joint to act as a buffer. I often tell my apprentices that if they aren’t thinking about the moisture content of the wood, they aren’t really installing; they are just guessing.
Material performance comparison
| Material Type | Expansion Rate | Best Use Case | Durability Rating |
|---|---|---|---|
| Solid White Oak | High | High-end residential | 5 Stars |
| Primed MDF | Moderate | Budget renovations | 3 Stars |
| PVC Trim | Low | Wet rooms and bathrooms | 4 Stars |
| Finger-Jointed Pine | Moderate | Standard living areas | 4 Stars |
The physics of the escutcheon plate
A split-ring escutcheon plate is the most reliable mechanical solution for hiding oversized holes because it provides a finished metal or plastic flange that slides over the pipe to cover the rough cut. These come in chrome, brushed nickel, and even paintable plastic. The secret is the tension spring. If the plate is loose, it will rattle every time someone walks near it. I often apply a tiny dab of clear silicone on the back of the flange before snapping it together. This dampens the vibration and keeps it flush against the baseboard. When you are looking for chic baseboard designs that transform rooms in 2025, you should consider how the metal finish of the pipe cover matches the overall hardware of the room. It is a small detail that separates a master from a handyman.
Techniques for the perfect cut
- Use a Forstner bit for clean circular holes instead of a standard twist bit.
- Measure the pipe diameter at three points to ensure it is not out of round.
- Back-cut the baseboard at a slight angle to allow the front edge to sit tighter against the wall.
- Always leave a 1/16 inch expansion gap around the pipe itself.
- Dry fit the board before applying any adhesive or nails.
The ghost in the expansion gap
Expansion gaps are the silent protectors of your trim installation and failing to account for them will lead to buckled baseboards and cracked pipe seals. I remember a job where the guy before me had used liquid nails to glue the baseboard directly to the copper pipes. Every time the heat came on, the whole wall sounded like it was being hit with a hammer. That is the physics of thermal expansion at work. Wood moves. Metal moves. Everything moves. You have to create a system that allows for this movement while maintaining the illusion of a solid structure. This is particularly important when you are implementing baseboards makeover ideas to elevate your space. You want the beauty of the new trim without the structural headaches of improper mechanical clearance.
The interaction of tile and baseboards
When installing baseboards over tile floors, the pipe holes must be sealed against moisture wicking from the floor level to prevent the wood from rotting from the inside out. Tile is often a wet environment. If you are working near showers that wow modern designs for 2025, you have to assume that water will eventually find its way to the floor. If your baseboard hole is open and raw, the end grain of the wood will suck up that moisture like a straw. I always seal the inside of the cut hole with a bit of primer or even clear nail polish in a pinch. This prevents the wood fibers from swelling. It also keeps the grout at the base of the wall from cracking. If you have old grout that looks terrible, you might want to look into how to refresh grout without replacing it before you put the new boards down. There is no point in putting beautiful new trim over a floor that looks like it has been neglected for a decade.
The final finish and sanding
Achieving a seamless look after cutting for pipes requires meticulous sanding with progressively finer grits to remove tool marks that catch the light and reveal the hole location. I start with 100 grit to shape the opening and move to 220 grit for the final pass. If you are using MDF, be careful not to oversand or you will blow through the factory primer and end up with a fuzzy texture that paint will not hide. I see it all the time. Guys get impatient and they think the paint will fill the scratches. It won’t. Paint highlights mistakes; it does not hide them. A professional finish is about the preparation of the substrate, not the thickness of the topcoat. This is the same principle I apply to every floor I lay. If the subfloor is wrong, the top floor is wrong. If the trim prep is wrong, the room is wrong.
“Precision in the hidden areas defines the quality of the visible ones.” – Master Flooring Axiom
While most people want the thickest underlayment, too much cushion actually causes the locking mechanisms on LVP to snap under pressure. This same logic applies to baseboards. People want to pack the pipe holes with as much filler as possible, but that mass eventually cracks. You need just enough to bridge the gap while maintaining the structural integrity of the material. If you are looking for more tips on maintaining the areas around your new installation, you might find tile cleaning tips for a sparkling bathroom in 2025 useful, as clean surfaces make your trim work stand out even more. In my years on the job, I have seen it all. The guys who rush the pipe cuts are the same guys who leave gaps in their miters. Don’t be that guy. Take the extra ten minutes to measure twice, cut once, and seal it properly. Your floor and your reputation depend on it.