
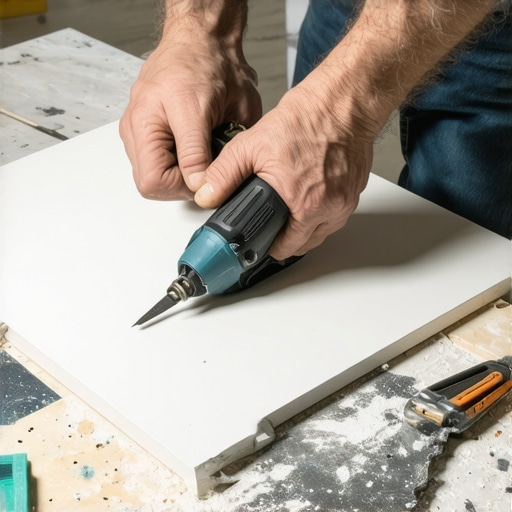
I spent three days grinding concrete on a job last month just so the floor wouldn’t click like a castanet. Most guys skip the leveling compound and they think the underlayment will hide the dip. It won’t. This same lack of precision ruins more porcelain tile jobs than any other mistake. People buy a box of expensive Italian porcelain and then hack at it with a dull wheel on a flimsy cutter. You cannot treat porcelain like standard ceramic. It is a dense, vitrified material with a water absorption rate of less than zero point five percent. If your subfloor is not perfectly flat, even a perfect cut will eventually crack. I have seen fifteen thousand dollar projects fail because the installer did not understand the physics of the snap. You need to respect the material. You need to understand how tungsten carbide interacts with a fired clay surface. This guide is about the reality of the job site. It is about the grit, the dust, and the perfect fracture. Forget the marketing fluff you read on big box store websites. We are talking about the structural integrity of your installation from the subfloor up to the baseboards and the grout lines.
The physics of the porcelain fracture
Porcelain tile cutting requires a tungsten carbide scoring wheel to create a controlled fracture point on the vitrified surface. Unlike ceramic, porcelain is fired at higher temperatures, creating a molecular density that demands a precise score line and even pressure distribution to prevent shattering or jagged edges during the snap. This is not about brute strength. It is about creating a microscopic valley in the glaze that tells the rest of the tile where to break. When you pull that lever, you are sending a shockwave through the material. If that score line is shallow or uneven, the energy will dissipate into the body of the tile, causing a diagonal break. You need to think like a geologist. Porcelain is essentially a man made stone. It does not want to break. You have to convince it. The manual snap cutter, often called a rail cutter, is the most efficient tool for this when used with professional technique. It avoids the mess of a wet saw and provides a cleaner edge for showers and main floor areas.
“A floor is only as good as the subfloor beneath it, deflection is the enemy of every joint.” – Master Flooring Axiom
Selecting the right scoring wheel for the job
Scoring wheel diameter determines the depth of the score and the cleanliness of the edge on porcelain tiles. A 22mm wheel is typically better for textured surfaces, while a 6mm or 10mm wheel provides a sharper score on polished porcelain to ensure the breaker bar applies force exactly where needed. Most installers use whatever wheel came with the tool. That is a mistake. A small wheel concentrates all the downward force into a very narrow point. This is great for smooth tiles. If you are working on a rustic, wood look porcelain with a lot of grain, that small wheel will jump around. You need a larger diameter wheel that can ride the bumps without losing its line. I always keep a variety of wheels in my kit. I check them for nicks every morning. If the wheel does not spin freely, it will drag. A dragging wheel creates friction, and friction creates heat. Heat causes the porcelain glaze to chip before you even try to snap it. If you want your grout to look perfect, you need that edge to be straight.
| Tile Type | Wheel Size | Pressure Level | Resulting Edge Quality |
|---|---|---|---|
| Polished Porcelain | 6mm – 8mm | Light | Razor Sharp |
| Matte Porcelain | 10mm – 12mm | Medium | Clean |
| Textured / Wood Look | 18mm – 22mm | Firm | Controlled |
| Large Format Slab | 22mm + | Variable | Structural Snap |
The single pass rule of professional installers
Manual tile cutting success hinges on the single pass score where the tungsten wheel creates a continuous incision without double scoring. Multiple passes dull the blade and create micro-fractures that lead to irregular breaks and material waste during the snapping process. I see novices do this all the time. They run the wheel back and forth like they are sawing a log. Stop doing that. You are destroying the tool and the tile. One smooth, firm motion from the bottom to the top is all you need. You should hear a distinct crisp sound. It sounds like a zipper. If it sounds like grinding gravel, you are pressing too hard. If it is silent, you are not pressing hard enough. The goal is to weaken the surface tension just enough. Once you have made that score, do not touch it again. Move the breaker bar into position immediately. This is where the chemistry of the tile matters. The stress you just put into the surface is temporary. If you wait too long, the internal tension of the tile can actually settle, making the snap harder and less predictable.
The geometry of the breaker bar and lever
Snap cutter mechanics utilize lever action and a breaker bar to apply downward pressure on both sides of the score line. Proper alignment of the tile against the stop fence ensures the pressure is perpendicular, which is essential for long cuts and diagonal snaps in large format porcelain. The breaker bar is the most misunderstood part of the machine. It is not a hammer. You do not hit the handle. You apply steady, increasing pressure. I like to feel the tile give. There is a specific vibration that travels up the handle right before the snap. If you are cutting a long plank, you need to make sure the tile is supported. If the ends are hanging off the cutter, the weight of the tile will cause it to snap early and ruin the cut. Use outrigger supports. Keep the tool clean. I wipe my rails down with a dry cloth every few hours. Never use oil on the rails. Oil attracts porcelain dust, which creates a grinding paste that will lock up your carriage. A sticky carriage means a jerky score, and a jerky score means a broken tile.
- Check the subfloor for flatness before starting any layout.
- Verify the scoring wheel is sharp and free of chips.
- Clean the tile surface to remove any factory wax or dust.
- Align the mark on the tile with the center of the cutter guide.
- Apply one continuous score from the front edge to the back.
- Engage the breaker bar with a firm and steady downward motion.
- Smooth the cut edge with a diamond hand pad for a professional finish.
Maintaining your equipment for longevity
Manual tile cutters require regular maintenance of the chrome rails and ball bearing carriages to ensure smooth scoring. Dust buildup from porcelain and grout can clog the mechanism, leading to uneven pressure and failed snaps that increase labor costs and installation time. When I finish a job, I do not just throw my cutter in the truck. I blow it out with compressed air. I check the springs on the breaking pads. If those pads are worn down to the metal, they will mar the surface of your next tile. For those working on eco-friendly tile solutions, keeping your tools sharp reduces waste, which is a key part of sustainable building. Every broken tile is more trash in the landfill. A professional installer takes pride in having zero waste. If I buy twenty boxes of tile, I expect to use twenty boxes of tile. Precision with the snap cutter is how you achieve that. It is also how you ensure your chic baseboard designs sit flush against the floor without huge gaps that need to be filled with caulk. If your cuts are bad, your whole room looks cheap.
“Precision in the first cut prevents a hundred headaches in the final grout line.” – Tile Council Principles
Common mistakes that ruin porcelain installations
Inaccurate tile measurements and poor scoring technique are the primary causes of waste in bathroom and kitchen remodels. Failure to account for grout joints and expansion gaps leads to structural pressure that can pop tiles off the thin-set mortar bed over time. I once saw a guy try to snap a half inch sliver off a twelve by twenty four inch porcelain tile. He could not figure out why it kept shattering. You cannot snap a sliver that is thinner than the thickness of the tile itself with a manual cutter. For that, you need a wet saw or a grinder. Trying to force a tool to do something it was not designed for is a rookie move. Also, watch your baseboards makeover ideas carefully. If you cut the tile too short, the baseboard will not cover the gap. If you cut it too long, the tile will be pressed against the wall. When the house shifts or the temperature changes, that tile has nowhere to go. It will tent. It will crack. Always leave that eighth of an inch. It is the most important eighth of an inch in the whole house. If you need more help with the finishing touches, you can check our contact us page for professional advice. Keeping your tiles clean after the cut is also vital, so look into tile cleaning tips to maintain that new look.