
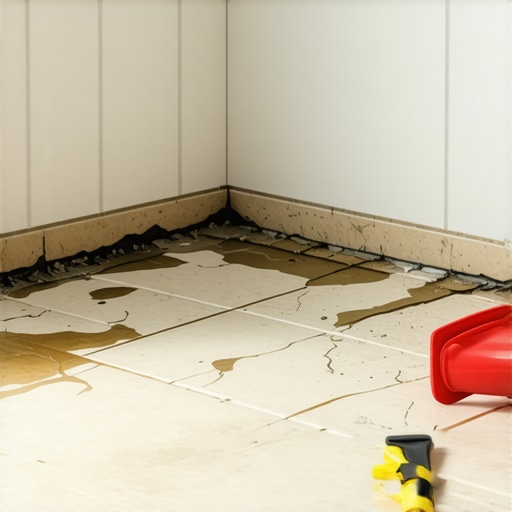
The crunching sound of failed installation
Bathroom floor tiles lift up because of poor subfloor preparation, improper thinset coverage, or structural deflection that exceeds the limits of the tile material. Most failures occur at the bond line between the mortar and the substrate. When you hear that hollow thud or a gritty crunch under your feet, the mechanical bond has already failed. Most guys skip the leveling compound. They think the underlayment will hide the dip. It won’t. I spent three days grinding concrete on a job last month just so the floor wouldn’t click like a castanet. That job was a mess because the previous crew thought a thick layer of mortar would fix a two-inch dip. It did not. It just created a massive, unbonded island of ceramic that cracked within six months.
Tile installation is a game of physics and chemistry. It is not about making things look pretty. If you treat it like a cosmetic project, you are going to fail. You have to look at the substrate. Is it concrete? Is it plywood? Each one has a different expansion coefficient. If you ignore the moisture vapor transmission rate of a concrete slab, your tile will pop. It is inevitable. The water vapor pushes up through the slab and hits the underside of your tile. Since the tile is non-porous, that moisture has nowhere to go. It sits there and rots the bond. This is why we use moisture meters before a single drop of water touches the thinset.
The physics of deflection and the L over 360 rule
Deflection is the amount of bend or flex in a floor system under a specific load. For ceramic and porcelain tile, the industry standard is L/360, which means the floor should not bend more than the length of the span divided by 360. If your floor bounces when you walk, your tile will lift. It is that simple. Natural stone requires an even stricter L/720 rating. Most modern homes are built to the bare minimum code. This is fine for carpet. It is a disaster for tile. When the joists flex, the rigid tile stays stiff. The mortar is caught in the middle and snaps. This creates a tenting effect where tiles push against each other and rise off the floor.
“A floor is only as good as the subfloor beneath it; deflection is the enemy of every joint.” – Master Flooring Axiom
We see this often in second-story bathrooms. The builder used 2×8 joists on a wide span. You walk in, the floor dips 1/4 inch, and suddenly your 12×24 porcelain planks are clicking. You cannot fix this with more grout. You have to stiffen the subfloor. This usually means adding a second layer of exterior grade plywood or installing an uncoupling membrane. These membranes allow the subfloor and the tile to move independently. It is a shear-stress absorber. Without it, the house moves and the tile breaks. If you want to see how to maintain what you have left, check out tile cleaning tips for a sparkling bathroom in 2025 to keep the surface intact.
Chemical bond failure and the thinset mystery
Thinset mortar fails when it is applied to a dusty surface, allowed to skin over, or mixed with too much water. If the back of your lifted tile is clean, you have a mechanical bond failure. This means the mortar stuck to the floor but not the tile. This happens when installers do not back-butter the tiles. On large format tiles, you must apply a thin layer of mortar to the back of the tile itself. This collapses the ridges and ensures 95 percent coverage. If you only have 50 percent coverage in a wet area like a bathroom, the air pockets will collect moisture and weaken the bond over time.
Dust is the great enemy of the installer. I have seen guys sweep a floor and think it is clean. It isn’t. There is a microscopic layer of concrete dust that acts like flour on a rolling pin. The thinset sticks to the dust, not the slab. You have to damp-mop that floor until the sponge comes up clean. Furthermore, mixing mortar is a science. If you use a high-speed drill, you whip air into the mix. This makes the mortar weak and brittle. You need a low-speed mix and a proper slaking period. Let the chemicals react for ten minutes, then stir again. Skip this, and you are just spreading expensive mud that won’t hold.
Moisture vapor and the hydrostatic pressure trap
Hydrostatic pressure occurs when water in the ground pushes up through a concrete slab and breaks the adhesive bond. This is extremely common in basement bathrooms. You might think your floor is dry, but concrete is a sponge. It breathes. If you seal the top with tile and grout, you trap that moisture. Eventually, the pressure builds up enough to pop the tiles right off the thinset. We measure this with calcium chloride tests or electronic probes. If the moisture levels are too high, you need a vapor barrier epoxy before you even think about thinset.
The relationship between your floor and your shower is also a factor. If your shower pan is leaking, that water travels under the tile throughout the whole bathroom. It follows the path of least resistance. You might see tiles lifting five feet away from the shower. That is the water wicking through the subfloor and destroying the bond. If you are planning a renovation to fix these issues, look into showers that wow modern designs for 2025 for better waterproofing systems. Proper waterproofing prevents the structural rot that leads to lifting tiles.
The role of expansion gaps at the perimeter
Expansion gaps are 1/4 inch spaces left around the perimeter of a room to allow the floor to expand and contract. Many installers run the tile right up against the wall. This is a mistake. Houses move. They breathe with the seasons. In the summer, humidity makes the framing swell. If the tile has no room to go, it will bridge. This is when the center of the floor literally lifts into the air because the edges are pinned against the walls. You must leave that gap. It will be hidden by your baseboards anyway.
Speaking of the edges, your trim plays a part in the overall stability. If you are redoing the floor because of lifting issues, you should also consider baseboards makeover ideas to elevate your space to ensure the perimeter is handled correctly. If you pin the baseboards too tight to the tile, you can actually restrict the floor’s movement. It is a delicate balance. The same applies to chic baseboard designs that transform rooms in 2025 which offer both aesthetic and functional benefits for expansion management.
Grout failure as an early warning sign
Cracked grout is the first sign that your tiles are about to lift. Grout is rigid. It has zero structural strength. When the subfloor moves, the grout is the first thing to snap. If you see powder coming out of your grout lines, your tiles are moving. Most people try to fix this by adding more grout. That is like putting a band-aid on a broken leg. You are not fixing the movement. You are just hiding it for a week.
You can try to save the look by learning how to refresh grout without replacing it, but if the tile is loose, new grout won’t stay. You need to address the bond. If the grout is failing because of age and not movement, grout restoration secrets for long-lasting results can help. But if you can move the tile with your thumb, the grout is irrelevant. The floor is dead. You have to pull it up and find out why the thinset failed.
Technical Specifications for Tile Stability
Before you start your next project, look at the technical requirements. Choosing the wrong material for your environment is a recipe for disaster. Using a large format tile on a floor with high deflection will always result in lifting.
| Factor | Ceramic Tile | Porcelain Tile | Natural Stone |
|---|---|---|---|
| Deflection Limit | L/360 | L/360 | L/720 |
| Water Absorption | > 0.5% | < 0.5% | Varies |
| Bond Strength | Medium | High (Needs Polymer) | Variable |
| Expansion Rate | Low | Very Low | High |
The checklist for a permanent bond
Follow these steps to ensure your bathroom floor never lifts again. These are the steps the big-box installers usually skip because they are in a hurry.
- Check the subfloor for any vertical movement or bounce.
- Grind down any high spots and fill low spots with self-leveling underlayment.
- Wipe the substrate with a damp sponge to remove all microscopic dust.
- Select a high-quality, polymer-modified thinset rated for your specific tile size.
- Back-butter every single tile to ensure 95 to 100 percent coverage.
- Leave a 1/4 inch expansion gap around the entire perimeter of the room.
- Allow the mortar to cure for a full 24 hours before walking on it or grouting.
The ghost in the expansion gap
I once saw a bathroom where the tiles were popping like popcorn. The homeowner thought the house was haunted. I pulled up one tile and found that the installer had filled the expansion gap with solid grout. When the house settled in the winter, the walls squeezed the floor. The tile had nowhere to go but up. We cleared the grout out of the perimeter, installed a soft silicone caulk that matches the grout, and the popping stopped. It was a simple fix, but it required a complete tear-out of the perimeter. This is why small bathrooms require just as much planning as a ballroom. If you are working with limited square footage, see showers with a style trendy ideas for small bathrooms to understand how to maximize space without sacrificing structural integrity.
“If you do not have 95% mortar contact in a wet area, you do not have a floor; you have a ticking time bomb.” – TCNA Installation Handbook
Using the right materials also means thinking about the planet. Many modern thinsets and tiles are moving toward better sustainability. You can explore eco-friendly tile solutions for sustainable homes in 2025 to find products that bond well and reduce your environmental footprint. Just remember that no matter how eco-friendly a tile is, it still obeys the laws of physics. If the subfloor is wet, the tile will lift. If the floor is bouncy, the tile will crack. If you have questions about a specific failure in your home, feel free to contact us for expert advice on your specific flooring situation. We also value your data security, which you can review in our privacy policy.