
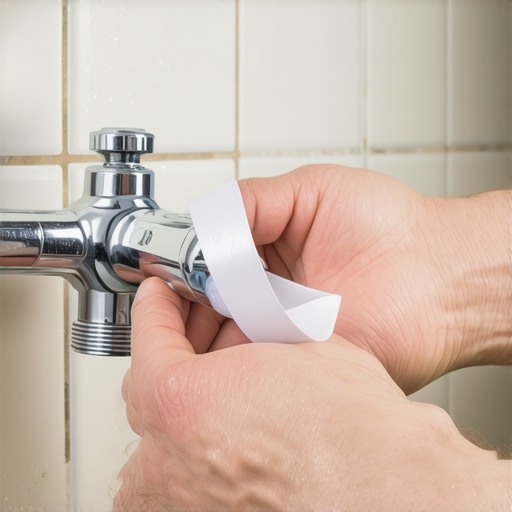
How to Fix a Leaky Shower Arm Without a Plumber
I once walked into a house where the homeowners thought a tiny drip at the shower arm was just a minor nuisance. By the time they called me, that 2 cent leak had saturated the wall cavity and rotted the subfloor so badly the bathroom vanity was literally sinking into the crawlspace. I spent the next four days grinding concrete and sistering floor joists because someone didn’t want to spend five minutes replacing a thread seal. Flooring and plumbing are inextricably linked. If you do not respect the physics of water containment, your high-end tile and expensive baseboards will pay the price in the form of mold and structural failure.
The anatomy of a shower connection
To fix a leaky shower arm, you must understand that the joint consists of a 1/2 inch threaded pipe nipple located behind the wall and the decorative shower arm that screws into it. Most leaks occur at the junction where these two components meet because the sealant has degraded or the threads were never fully engaged. This is not a matter of just tightening a nut. It is about the molecular seal between the male threads of the arm and the female threads of the drop-ear elbow hidden behind your tile. When water escapes here, it does not always drip into the tub. It often travels backward, following the path of least resistance right into your wall studs.
“A floor is only as good as the subfloor beneath it; deflection is the enemy of every joint.” – Master Flooring Axiom
Why your shower arm is actually leaking
A leaky shower arm usually stems from a failure of the polytetrafluoroethylene tape or the breakdown of the plumbing dope applied during the original installation. Mineral deposits from hard water can also accumulate within the threads, creating micro-gaps that allow pressurized water to spray outward. This is a common issue in older homes where the thermal expansion and contraction of the pipes over decades have slowly backed the arm out of its seat. If you see water trickling down the wall from behind the escutcheon plate, you are looking at a failure of the mechanical seal. This is the same logic we use in flooring. If the substrate is unstable, the surface will fail. You can see some of these challenges reflected in our guide on showers that wow modern designs for 2025 where structural integrity is the foundation of beauty.
The tools you will likely drop on your toe
Fixing a shower arm requires a specific set of tools including a strap wrench to protect the finish, a roll of high-density PTFE tape, and a pair of needle-nose pliers. You might also need a pipe wrench if the old arm is seized, but you must be careful not to apply so much torque that you snap the fitting inside the wall. If you snap that drop-ear elbow, you are no longer doing a DIY repair. You are looking at a full-scale demolition of your shower wall. I always keep a small bucket of floor wax nearby to help lubricate the escutcheon plate if it is stuck against the tile. Having the right tools is the difference between a ten minute fix and a weekend long disaster. This is especially true when dealing with sensitive surfaces like tile cleaning tips for a sparkling bathroom in 2025 which can be damaged by sloppy tool work.
| Tool or Material | Purpose in Repair | Critical Spec |
|---|---|---|
| PTFE Tape | Thread Sealant | High-density pink or yellow |
| Strap Wrench | Unscrewing the arm | Rubberized grip for chrome |
| Plumbing Dope | Secondary Seal | Non-hardening formula |
| Needle-nose Pliers | Internal grip | Long reach for recessed nipples |
Removing the old arm without snapping the pipe
Removing a shower arm requires steady, counter-clockwise pressure and a firm grip on the arm as close to the wall as possible. Slide the escutcheon plate back to expose the hole in the tile. If the arm feels like it is fused to the pipe, do not just yank it. Use a penetrating lubricant and let it sit for twenty minutes. The goal is to break the bond of mineral scale without twisting the copper pipe behind the wall. I have seen guys use a massive pipe wrench and literally twist the copper line into a pretzel. That is a mistake that costs thousands of dollars. Once the arm starts to move, keep the rotation smooth and even. If you encounter resistance, turn it back in a quarter turn then out again. This clears the debris from the threads as you go.
The chemistry of the seal
The secret to a permanent fix is the way you apply the thread sealant to the 1/2 inch threads of the new shower arm. You need to wrap the tape in a clockwise direction. If you wrap it counter-clockwise, the tape will simply unravel as you screw the arm into the fitting. You want three to five tight wraps of high-density tape. I often add a thin layer of pipe joint compound over the tape for a belt-and-suspenders approach. This creates a chemical and mechanical barrier that can withstand the high pressure of a modern rain shower head. Water is a persistent enemy. It will find a way through any gap larger than a few microns. This is why we are so obsessive about moisture barriers in flooring. If you are worried about the state of your bathroom surfaces, you might want to look into how to refresh grout without replacing it to ensure your shower remains watertight.
Managing the tile and grout interface
When the shower arm is removed, you will see a gap between the pipe and the tile which must be handled with care to prevent water from entering the wall. This area is a prime candidate for mold growth. Before installing the new arm, inspect the grout around the hole. If it is crumbling or missing, you are inviting disaster. I always suggest a small bead of 100 percent silicone sealant around the pipe nipple where it exits the wall. This ensures that even if the thread seal fails in the future, the water will be directed back into the shower stall rather than behind the tiles. For those looking to keep their grout in top shape, check out grout restoration secrets for long-lasting results to learn more about maintaining these critical barriers.
- Inspect the threads for any signs of cross-threading or wear.
- Clean the internal threads of the drop-ear elbow with a small wire brush.
- Apply the PTFE tape starting from the second thread to prevent blockage.
- Hand-tighten the arm before using a wrench for the final half-turn.
- Test the connection for leaks before sliding the escutcheon plate back.
Protecting your baseboards from moisture
A leak in the shower arm often manifests as damp baseboards on the other side of the bathroom wall. If you see the paint peeling or the wood swelling at the floor line, you have a leak that has been going on for months. This moisture travels down the wall studs and pools on the subfloor. By the time it hits your baseboards, the damage is often extensive. This is why I tell people to check their plumbing the second they see a gap in their trim. If you need to replace damaged trim, there are plenty of baseboards makeover ideas to elevate your space that can help you recover from a leak. You can also explore chic baseboard designs that transform rooms in 2025 for a more modern look that might handle humidity better.
“Water follows the path of least resistance, and usually, that path leads to your most expensive flooring material.” – Master Flooring Axiom
The 1/8 inch that ruins everything
The most common mistake DIYers make is failing to check if the shower arm is perfectly level after tightening. If the arm is angled slightly upward toward the wall, water will naturally run back toward the tile and seep behind the escutcheon. This is the 1/8 inch of error that ruins a bathroom. You want a slight downward pitch or at the very least a perfectly level horizontal run. When you are finishing the install, the final quarter turn is where you set the alignment. If it feels too tight to reach the correct position, do not force it. Back it out, clean the threads, and try again with a little more pipe dope. For those in humid climates like Houston, this is even more critical as the ambient moisture already puts a strain on your building materials.
Final testing and structural validation
Before you call the job done, you must run the shower at full pressure for at least five minutes while watching the wall connection. Use a dry paper towel to wipe the underside of the joint. If even a tiny bit of moisture shows up on the towel, you have a fail. Do not assume it will seal itself with mineral buildup over time. It won’t. It will only get worse. This is the same discipline we use when checking for subfloor moisture before laying down a hardwood floor. If the data says it is wet, you don’t lay the floor. If the towel says it’s leaking, you don’t close the escutcheon. If you find yourself over your head, you can always contact us for professional advice on how to integrate your flooring and plumbing repairs. Always prioritize the structural health of the home over the speed of the project. If you follow these steps, you will have a dry wall, a solid floor, and a shower that functions exactly as the engineers intended.