
Most guys skip the leveling compound. They think the underlayment will hide the dip. It won’t. I spent three days grinding concrete on a job last month just so the floor wouldn’t click like a castanet and the vanity wouldn’t lean away from the wall like a drunk sailor. If you are staring at a gap between your bathroom cabinet and the drywall, you are looking at the failure of a structural plane. Whether the wall is bowed or the subfloor is sagging under the weight of a stone countertop, that space is a magnet for moisture and mold. Closing it requires more than a squeeze of cheap caulk. It requires an understanding of how materials move in a high humidity environment.
The physics of the bathroom void
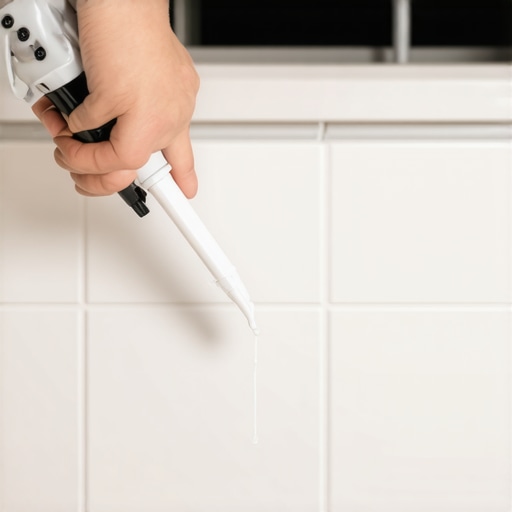
To seal the gap between a vanity and the wall, you must apply 100 percent silicone sealant or a color-matched grout caulk while ensuring the substrate is dry and clean. This process involves using backer rods for gaps larger than one eighth of an inch and painter’s tape to define the bond line. The primary goal is to create a flexible, waterproof bridge that survives the seasonal expansion and contraction of the home. Most homeowners fail because they ignore the deflection in the floor joists. A vanity loaded with a double-sink marble top can weigh five hundred pounds. If your subfloor has even a three-sixteenths inch dip, that weight will pull the cabinet away from the wall. This creates a leverage point. No matter how much caulk you pump into that hole, it will tear if the cabinet is still moving. You have to stabilize the base first. Use shims made of composite material rather than cedar. Cedar compresses over time. Once the cabinet is plumb and level, you can address the cosmetic and functional seal at the wall. The wall itself is rarely straight. Drywall finishers often leave humps of joint compound at the studs. This means your vanity might touch the wall in the center but have a half-inch gap at the edges. Closing this gap is about managing three-point adhesion. You want the sealant to bond to the cabinet and the wall, but not the back of the gap itself. That is why backer rods are mandatory.
“A floor is only as good as the subfloor beneath it; deflection is the enemy of every joint.” – Master Flooring Axiom
Why silicone chemistry matters in wet environments
Selecting the correct chemical sealant involves choosing 100 percent silicone over acrylic or latex because of its superior hydrophobic properties and elastic modulus. Silicone does not shrink upon curing and remains flexible through thermal cycles and moisture vapor transmission common in bathrooms. Most people reach for the cheapest tube of white kitchen and bath caulk. That stuff is mostly water. As the water evaporates, the bead shrinks. It pulls away from the edges. Within six months, you have a hairline crack that lets steam penetrate the wall cavity. I only use neutral cure silicone for high-end stone. Standard acetoxy silicone releases acetic acid as it cures. That is why it smells like vinegar. That acid can etch natural stone like marble or travertine. If you have a custom stone backsplash, you must use a non-staining neutral cure product. The molecular bond of silicone is much stronger than the physical bond of acrylic. It creates a chemical suction to the surface. It is also inherently resistant to mold. Some products claim to be mold proof for ten years. That is only true if you keep the surface clean of soap scum. Mold grows on the dirt on top of the caulk, not necessarily the caulk itself. Understanding the Shore A Hardness of your sealant helps you understand how much movement it can handle. For a vanity gap, you want a low modulus sealant that can stretch and compress without losing its grip on the cabinet gable or the drywall paper.
The backer rod intervention for structural gaps
Using a closed cell backer rod provides a firm base for the sealant while preventing three point adhesion which causes the bead to fail prematurely. This foam material is pushed into deep gaps to ensure the sealant maintains a concave shape that can stretch like a rubber band. If you just fill a large hole with caulk, the bead becomes a solid block. When the wall moves, that block has no room to flex. It just snaps. I see this all the time in new construction where the house is still settling. A backer rod should be about twenty-five percent wider than the gap you are filling. You compress it and shove it into the void about an eighth of an inch below the surface. This creates a channel for the silicone. You are essentially building a gasket. This is the difference between a handyman job and a master installation. For those looking to integrate these seals into a larger aesthetic, chic baseboard designs that transform rooms in 2025 often require similar gap-filling techniques where the wood meets the cabinet. The same principles apply. You need a backstop to support the weight of the sealant. This prevents the bead from sagging or falling into the wall cavity where it does nothing but waste money and attract dust.
| Material Type | Elasticity | Water Resistance | Best Use Case |
|---|---|---|---|
| 100% Silicone | High | Excellent | Stone tops and wet walls |
| Siliconized Acrylic | Medium | Good | Paintable transitions |
| Polyurethane | Very High | Excellent | Structural movement joints |
| Latex Caulk | Low | Poor | General trim in dry areas |
How floor deflection creates the vanity split
Floor deflection is the vertical movement of the subfloor under a load which causes the vanity to tilt and separate from the wall surface. To prevent this, installers must ensure the L/360 deflection standard is met for ceramic tile or the L/720 standard for natural stone installations. I once walked into a house where a fifteen thousand dollar wide-plank walnut floor was cupping so bad it looked like a potato chip because the installer didn’t check the crawlspace humidity. The same thing happens with vanities. If your joists are undersized or have been notched by a plumber, the weight of the vanity will cause the floor to dip. This dip pulls the top of the cabinet away from the wall. You can seal that gap a dozen times and it will keep coming back until you sister those joists or reinforce the subfloor. I always check the level of the floor before I even unbox the vanity. If the floor is out of level by more than an eighth of an inch over ten feet, I am pulling out the grinder or the self-leveling underlayment. You cannot build a stable house on a soft foundation. If you are dealing with a tiled floor, you should check for cracked grout lines near the vanity legs. This is a sign of movement. You might need grout restoration secrets for long-lasting results to fix the floor before you worry about the wall gap. A solid floor means a solid vanity, which means a seal that lasts for twenty years instead of twenty days.
Preparation steps for a professional grade seal
Proper preparation involves removing all old residue using a razor blade and cleaning the area with denatured alcohol to ensure a contaminant free surface. Skipping the cleaning step is the most common reason for sealant delamination and adhesion failure in high moisture environments. I don’t care how clean you think your bathroom is. There is hairspray, soap residue, and skin oils on that surface. Silicone will not stick to oil. You need to wipe both the cabinet side and the wall side with a solvent. Do not use rubbing alcohol as it often contains oils or perfumes. Use denatured alcohol or acetone. If the gap is between a wood vanity and a painted wall, make sure the paint is fully cured. Fresh paint will peel off with the caulk. If you have tile on the wall, you should also look into tile cleaning tips for a sparkling bathroom in 2025 to make sure the grout lines are free of minerals before you apply your final bead. I like to use blue painter’s tape on both sides of the gap. This allows me to pull a perfect line. You tool the silicone with a finger dipped in soapy water or a dedicated caulking tool, then pull the tape while the silicone is still wet. This leaves a crisp edge that looks like it was done by a machine. It prevents that smeared, messy look that marks an amateur job.
- Inspect the vanity for level and plumb before sealing
- Check subfloor for deflection or soft spots
- Clear out all old caulk with a sharp utility knife
- Vacuum the gap to remove sawdust and drywall debris
- Insert foam backer rod for gaps wider than 1/8 inch
- Apply denatured alcohol to all bonding surfaces
- Apply a continuous bead of 100 percent silicone
- Tool the bead within five minutes of application
“Movement joints are not optional in wet environments where thermal expansion occurs.” – TCNA Handbook Standards
The intersection of baseboards and vanity seals
Transitioning the seal from the vanity cabinet to the floor requires a coordinated effort between the cabinet base, the floor tile, and the baseboard trim. This area is often a moisture trap where water from the shower or sink can seep under the flooring and cause mold growth or subfloor rot. I hate seeing a vanity just slapped against a wall with no baseboard return. It looks unfinished and it is a functional nightmare. When you are sealing the vertical gap, you should also look at the horizontal gap at the floor. If you have baseboards, make sure they are caulked to the vanity as well. This creates a unified moisture barrier. If you are updating your bathroom, you might consider baseboards makeover ideas to elevate your space to ensure the trim matches the scale of your vanity. I always use a siliconized acrylic for the baseboard-to-wall joint because that needs to be paintable, but where the baseboard touches the vanity, I stick with pure silicone. Wood moves. Stone stays still. The joint between them is a war zone. You need the right ammunition. If the vanity sits on a tile floor, make sure the grout is sealed. If the grout is failing, you may need to know how to refresh grout without replacing it before you finalize your vanity seal. The goal is a water-tight envelope. If water can get behind your vanity, it will eventually rot out the drywall and then you have a much bigger problem than a cosmetic gap. You have a structural one.
When the gap signifies structural failure
Large or widening gaps between a vanity and the wall can indicate foundation settling, floor joist rot, or significant moisture intrusion into the wall studs. If you notice the gap is wider in the winter than in the summer, your home is reacting to low humidity and lumber shrinkage. If the gap is getting progressively larger and does not close, you have a structural issue. Sometimes it is as simple as the vanity being screwed into the drywall only, rather than the studs. A heavy vanity will eventually pull the screws through the gypsum. I always insist on using cabinet screws with a wide washer head, driven directly into at least two studs. If the studs are not where I need them, I open the wall and install horizontal blocking. I don’t trust drywall anchors to hold the weight of a stone top. If the cabinet is sagging, the seal will fail every single time. It doesn’t matter if you are using the most expensive silicone on the market. Physical stability is the prerequisite for a successful seal. If you are doing a full remodel, check the plumbing penetrations. Often, the plumber cuts a massive hole in the subfloor for the drain, weakening the area right where the vanity sits. I reinforce these areas with 3/4 inch plywood blocking. You want that floor to be stiff. A stiff floor leads to a quiet house and a perfect vanity seal that never cracks. It is about the chemistry of the adhesive and the physics of the frame. Do not settle for a band-aid fix when you have a structural problem.