The microscopic war inside your shower joints
Black grout in showers occurs because porous cementitious materials absorb organic matter, soap scum, and moisture, creating a nutrient-rich breeding ground for Stachybotrys chartarum and Aspergillus niger. This biological growth is rarely a surface issue but rather a structural failure of the sealant or the underlying waterproofing drainage system.
I spent three days grinding concrete on a job last month just so the floor wouldn’t click like a castanet, but the real nightmare was the master shower. The homeowner complained about a musty smell. On the surface, the tile looked like an architectural masterpiece. When I pulled up the first drain-side pebble, the thin-set underneath was the color of used motor oil. It was a swamp. Most guys skip the leveling compound and the proper slope. They think the underlayment will hide the dip. It won’t. That black sludge in your grout is not just dirt. It is a sign that your shower is holding onto water like a sponge. When water cannot reach the weep holes in your drain, it sits. It stagnates. It rots. You are looking at a chemistry problem disguised as a cleaning chore.
The physics of capillary action and porous membranes
Grout is essentially a liquid stone that remains breathable, which means it acts as a wick for every gallon of water you pour over it. Without a molecular-level barrier, the moisture travels deep into the sand-and-cement matrix, carrying skin cells and fats that feed fungal colonies.
Think about the molecular structure of standard sanded grout. It is a lattice. Under a microscope, it looks like a series of jagged mountain peaks with deep valleys. Those valleys are where the trouble starts. When you shower, the water does not just run off the tile. It infiltrates. If your installer used a cheap, builder-grade sealer, that protection vanished six months after you moved in. Now, the grout is thirsty. It sucks up the gray water. This process is called capillary action. Once the moisture is inside the cement matrix, the surface might look dry, but the core is saturated. This is why you see black spots return forty-eight hours after a heavy scrub. You are only cleaning the tip of the iceberg. You need to address the internal saturation. Proper tile cleaning tips can help, but they won’t fix a failing substrate.
“A floor is only as good as the subfloor beneath it; deflection is the enemy of every joint.” – Master Flooring Axiom
The chemistry of the black biological bloom
Biological growth in grout lines is driven by the presence of phosphates in soaps and the alkaline environment of cement. These factors, combined with a lack of airflow and high humidity, trigger a rapid expansion of fungal spores that embed themselves into the polymer chains of the grout.
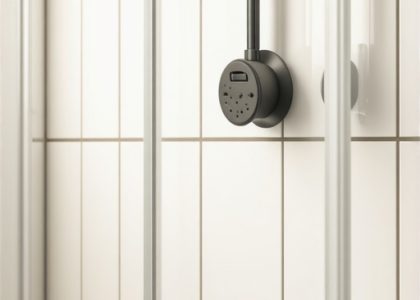
You are dealing with a living organism. When you see black streaks, you are looking at the fruiting bodies of a fungus. It loves the heat of your 102-degree shower. It loves the humidity that hangs in the air because your exhaust fan is undersized. It especially loves the body oils you wash off every morning. These oils act as a binding agent, trapping the spores against the porous surface of the grout. If you live in a humid region like the Gulf Coast or the Pacific Northwest, your shower is an incubator. The chemistry of the water matters too. Hard water with high mineral content creates a rougher surface on the grout, giving the mold more surface area to cling to. To fight this, you have to change the environment. You have to make the grout uninhabitable.
The first fix involves surgical grout removal
Removing the top three millimeters of compromised grout allows for the application of a fresh, high-density polymer-modified cement that resists water penetration. This mechanical removal ensures that the fungal roots are physically extracted rather than just bleached, providing a clean slate for modern chemical inhibitors.
Do not just reach for the bleach. Bleach is a surface oxidizer. It turns the mold white, but it does not kill the roots deep in the cement. It actually introduces more water into the pores, which can feed the fungus later. If your grout is black and crumbling, you need to get aggressive. Use a carbide-tipped grout saw. You don’t have to remove the whole joint, just the top layer. This creates a clean channel. Once you have cleared the debris, you can apply a high-performance grout. I recommend looking into grout restoration secrets for long-term stability. This is not a weekend hobby. This is structural maintenance. You are restoring the integrity of the surface tension that keeps water out of your walls.
Epoxy resins and the death of porosity
Epoxy grout is a two-part chemical system consisting of resin and hardener that creates a completely non-porous, waterproof joint. Unlike cementitious grout, epoxy does not require sealing and is impervious to the organic staining and moisture absorption that cause blackening in traditional showers.
If you never want to see black grout again, epoxy is the only answer. It is a pain to install. It is sticky. It sets fast. If you don’t wash it off the tile face within minutes, it stays there forever. But once it cures, it is essentially plastic. It has zero absorption rate. Water beads off it like a freshly waxed car. In the world of modern shower designs, epoxy is the gold standard for hygiene. It resists acids, fats, and oils. You could pour grape juice on it and it wouldn’t stain. This is the structural engineering solution to a cosmetic nightmare. You are replacing a porous sponge with a solid chemical bond.
Comparison of Grout Performance Metrics
| Feature | Sanded Cement Grout | High-Performance Grout | Epoxy Grout |
|---|---|---|---|
| Moisture Absorption | High (10-15%) | Low (3-5%) | Zero (<0.5%) |
| Stain Resistance | Poor | Moderate | Excellent |
| Chemical Resistance | Low | Medium | High |
| Flexibility | Rigid | Low | High |
| Installation Difficulty | Easy | Moderate | Expert Only |
The baseboard connection you keep ignoring
Moisture migration from a failing shower floor often travels behind the tile and wicks into the adjacent bathroom baseboards, causing rot and paint failure. Ensuring a waterproof transition between the shower curb and the floor trim is essential to preventing hidden mold growth in the wall cavity.
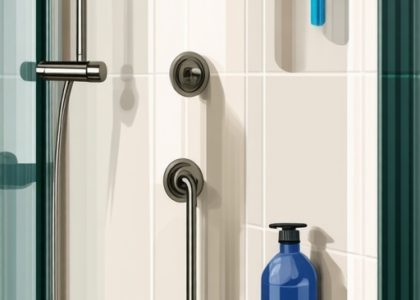
I have seen it a thousand times. A guy calls me because his shower grout is black, and I look two feet to the left and see the baseboards are peeling. That is not a painting issue. That is a moisture migration issue. The water is escaping the shower pan and traveling through the subfloor via capillary action. It hits the wood or MDF of the baseboards and gets sucked up like a straw. If you are renovating, look for chic baseboard designs that use moisture-resistant materials. You need a silicone transition at the floor, not a hard grout joint. Grout cracks at the floor-to-wall transition. Siliconized acrylic or 100 percent silicone caulk allows for the expansion and contraction of the house without breaking the water seal. This prevents the black bloom from spreading from your shower joints into your actual structure.
The third fix requires vapor-pressure management
Managing the vapor pressure in a bathroom through high-CFM ventilation and the use of hydrophobic coatings on tile surfaces prevents the sustained high-humidity conditions required for fungal spores to germinate. Reducing the time the grout remains at 100% saturation is the most effective preventative measure for 2026.
You have to dry the room out. If your mirrors are foggy twenty minutes after you shower, your ventilation is failing. Every minute that water sits on your grout is a minute the mold has to grow. I tell my clients to use a squeegee. It sounds old-school, but it works. By physically removing the bulk water from the tile and grout, you reduce the evaporation load on the room. You can also apply a fluorocarbon-based sealer. These are superior to the cheap silicone sealers found at big-box stores. They create a high contact angle for water droplets, meaning the water stays in a bead rather than soaking in. Check out how to refresh grout with these advanced sealers to save yourself from a full tear-out.
“Saturation is the catalyst for failure; a dry shower is a clean shower.” – TCNA Technical Bulletin
The 1/8 inch that ruins everything
Incorrect grout joint width often leads to premature cracking and water infiltration, as the aggregate size in the grout must match the space provided to ensure structural integrity. Joints that are too narrow for sanded grout will result in pinholes, which are perfect entry points for black mold.
Precision matters. If you try to cram sanded grout into a 1/16 inch joint, the sand particles will bridge the gap and leave a void underneath. That void becomes a hidden reservoir for water. You want a solid, deep pack. If you are doing a baseboard makeover or retiling, match your grout to your spacer. For joints under 1/8 inch, you must use unsanded or a high-performance fine-aggregate grout. If you get this wrong, the grout will flake out in six months, and the black spots will return with a vengeance. It is about the physics of the bond. The grout needs enough mass to resist the pressure of the water and the movement of the house.
Checklist for Permanent Grout Maintenance
- Verify exhaust fan pulls at least 50 CFM per 50 square feet of bathroom space.
- Squeegee all vertical and horizontal surfaces after every shower.
- Apply a high-grade penetrating sealer every 12 months on cementitious joints.
- Inspect the silicone caulk at the change of plane for any sign of peeling.
- Clean exclusively with pH-neutral cleaners to avoid stripping the sealer.
- Monitor the temperature of the bathroom to prevent condensation on cold walls.
The reality is that your shower is a high-stress environment. It goes from 70 degrees and dry to 105 degrees and 100% humidity in five minutes. This thermal shock causes materials to expand and contract. If your grout is too rigid, it cracks. If it is too porous, it stains. By choosing modern materials like epoxy or high-performance polymers, you are building a floor that lasts. You are moving away from the