
The structural integrity of a shower depends entirely on the chemical stability of the grout lines that hold the assembly together. Most guys skip the leveling compound and think the underlayment will hide the dip. It won’t. I spent three days grinding concrete on a job last month just so the floor wouldn’t click like a castanet. That same level of obsession is required for shower grout. When your grey grout begins to turn a muddy, uneven shade, it is not just a cosmetic failure. It is a sign of mineral migration and moisture intrusion that can lead to subfloor rot. Dealing with grey shower tile grout requires a move beyond simple scrubbing. It demands an understanding of the pH balance of your cleaning agents and the molecular porosity of cementitious materials. By 2026, the technology behind grout restoration has shifted from topical dyes to deep-penetrating resins that fuse with the existing cement matrix. If you want a floor that stands up to the daily thermal expansion and high-velocity water impact of a modern walk-in shower, you have to treat the grout as a structural seal. Most homeowners fail because they use acidic cleaners that eat the calcium carbonate right out of the grout. This leaves the surface pitted and prone to holding onto the very iron and magnesium deposits that cause that ugly discoloration. You can find more details on general maintenance at tile cleaning tips for a sparkling bathroom in 2025 which covers the basic hygiene of these surfaces.
The chemical war against grey grout stains
Fixing grey shower tile grout in 2026 involves using alkaline deep-cleaners, steam-vapor extraction, and epoxy-based colorants to neutralize mineral deposits and seal the porous cement. These methods stop the capillary action that draws moisture into the subfloor. You must begin by stripping the old, failed sealer using a high-pH stripper that breaks down the molecular bonds of acrylic and silicone residues.
“A floor is only as good as the subfloor beneath it; deflection is the enemy of every joint.” – Master Flooring Axiom
This axiom applies to walls too. If your wall studs have even a 1/8 inch bow, the grout will crack, and water will wick through those fissures, turning your grey grout into a breeding ground for manganese-consuming bacteria. The physics of water tension means that even a microscopic crack is a highway for moisture. When moisture sits behind the tile, it causes efflorescence, a process where soluble salts migrate to the surface as the water evaporates. This leaves a white, chalky film over your grey grout that makes it look dusty and old no matter how much you scrub. To fix this for good, you need to neutralize the salt migration before applying a new protective layer.
The mechanical reality of grout removal
Mechanical grout removal requires a diamond-tipped oscillating tool to carve out the top 1/8 inch of the damaged material without chipping the ceramic or porcelain edges. This process creates a clean, vertical surface for the new grout or colorant to bond with. Using a manual grout saw is for amateurs who want to spend all week on one wall. I use a high-RPM oscillating multi-tool with a vacuum attachment. You have to be steady. One slip and you are replacing a tile. This is often the only way to deal with grout that has been deeply impregnated with hard water minerals like iron and calcium. Once you have a clean channel, the new material can achieve a mechanical lock. If you are looking to refresh the look without a full tear-out, check how to refresh grout without replacing it for specialized techniques. The goal is to create a fresh substrate. If you just smear new grout over the old, thin layer, it will flake off within months. This is known as spalling. It happens because the new layer cannot form a strong enough bond with the contaminated surface of the old grout. You need depth. You need a clean, dust-free channel. I always use a shop vac and then a denatured alcohol wipe to ensure the grout lines are sterile before I even think about mixing my next batch of material.
The physics of the epoxy bond
Epoxy grout colorants work by creating a covalent bond with the cement particles, forming an impermeable plasticized barrier that rejects water and oils. This is the gold standard for 2026 shower restoration because it changes the surface energy of the grout lines. When you apply a high-quality colorant, you are not just painting the grout. You are filling the microscopic voids in the cement matrix with a durable resin. This resin prevents the penetration of soap scum and hair dyes. It also allows you to change the color of the grout entirely if the original grey was a poor design choice. Many people are moving toward eco-friendly tile solutions for sustainable homes in 2025 which often feature low-VOC epoxy resins. The durability of these resins is unmatched. They do not require the yearly resealing that traditional liquid sealers demand. When I do a restoration, I make sure the grout is bone dry. I use a moisture meter. If there is more than 3 percent moisture in that grout, the epoxy won’t stick. I’ve seen guys rush this and the whole thing peels off like a bad sunburn. You have to give it 24 to 48 hours of drying time with a dehumidifier in the room. Only then do you apply the colorant in thin, even coats, working it in with a stiff nylon brush. The result is a surface that is as hard as the tile itself.
| Grout Type | Porosity Level | Durability Rating | Chemical Resistance |
|---|---|---|---|
| Sanded Cement | High | Moderate | Low |
| Unsanded Cement | High | Low | Low |
| Modified Grout | Moderate | High | Moderate |
| Epoxy Resin | Zero | Maximum | Extreme |
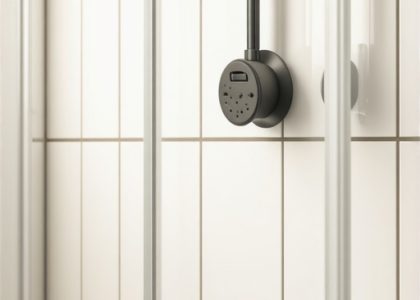
The structural role of baseboards in moisture control
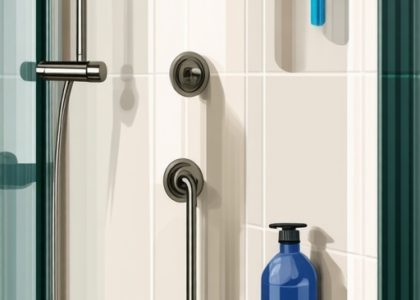
Baseboards and perimeter transitions serve as the primary expansion joint where the vertical wall meets the horizontal floor, preventing moisture from seeping into the wall cavity. In a shower environment, this transition is usually a bead of 100 percent silicone caulk, but the surrounding bathroom floor relies on baseboards to hide the expansion gap. If your shower is leaking at the floor level, your baseboards will be the first thing to rot. I always recommend using PVC or high-density polymer baseboards in wet areas. Wood baseboards in a bathroom are a ticking time bomb. They soak up humidity like a sponge. For those looking to upgrade their look, baseboards makeover ideas to elevate your space offers several high-durability options. You also need to ensure that the transition from the tile to the baseboard is sealed properly. I never use grout in a change of plane. A change of plane is anywhere two different surfaces meet at an angle, like the floor and the wall. Grout is rigid. It will crack when the house shifts. You must use a color-matched caulk that is flexible. This flexibility allows the tile and the subfloor to move independently without breaking the waterproof seal. If you see cracks in your grey grout at the corners of your shower, that is why. Someone used grout where they should have used silicone. You can find more on the visual side of these transitions at chic baseboard designs that transform rooms in 2025 which highlights how to blend function and form.
The permanent shield of high-performance sealers
High-performance penetrating sealers use fluoropolymers to lower the surface tension of the grout, causing water and oils to bead up rather than soak in. In 2026, we are seeing sealers that are designed to last five to ten years rather than six months. These are not the cheap sprays you find at big-box stores. These are professional-grade solvents that carry the sealing solids deep into the grout. While most people want the thickest underlayment, too much cushion actually causes the locking mechanisms on LVP to snap under pressure. Similarly, with grout, more sealer is not always better. You need the right sealer. You want a breathable sealer that allows moisture vapor to escape from the subfloor while preventing liquid water from entering. If you trap moisture under a non-breathable sealer, you get a phenomenon called white blush. This is where the moisture turns the sealer cloudy and ruins the look of your grey grout. For a deep dive into maintaining these seals, read grout-restoration secrets for long-lasting results. It takes patience to apply these properly. You have to wipe off the excess from the tile face before it dries, or you will have a hazy mess that requires a buffer to remove.
“Proper grout selection is not merely aesthetic but a structural barrier against hydrostatic pressure.” – Flooring Engineering Standard
This is why I tell people to spend the extra money on the sealer. It is the only thing standing between your subfloor and the five gallons of water your shower puts out every minute.
- Strip existing sealers using a heavy-duty alkaline cleaner.
- Scrub the grout lines with a stiff brush to remove surface mineral deposits.
- Steam clean the grout at 300 degrees Fahrenheit to kill mold spores.
- Rinse with deionized water to ensure no chemical residue remains.
- Apply a high-solids epoxy colorant or a fluoropolymer penetrative sealer.
- Buff the tile surfaces to remove any haze before the sealer cures.
- Maintain the surface with pH-neutral cleaners to preserve the bond.
If you are planning a full renovation to avoid these issues entirely, look at showers that wow modern designs for 2025 or showers with a style trendy ideas for small bathrooms. These modern setups often use larger format tiles which means fewer grout lines and fewer headaches. Always remember that a shower is a system. The grout, the tile, the thin-set, and the waterproofing membrane must all work together. If one part fails, the whole thing goes. If you need professional help assessing a failing floor, contact us for a structural consultation. We don’t just look at the surface. We look at the physics of the installation. For information on how we handle your data, see our privacy policy.