
3 Tactics to Stop Bathroom Baseboard Paint Peeling for 2026
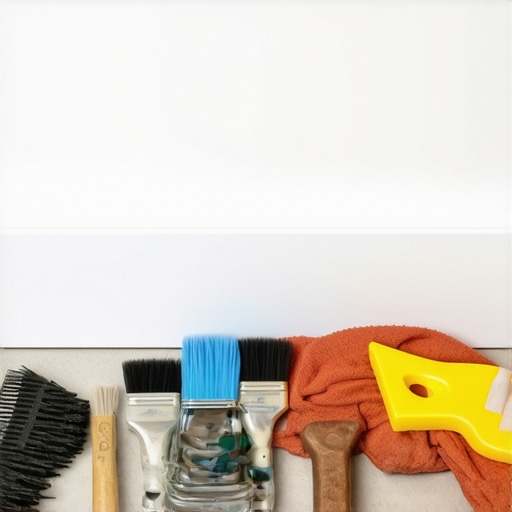
I smell like WD-40 and oak dust today, which is a lot better than the smell I encountered last week. I walked into a master bath where the baseboards looked like they had been through a car wash. The homeowner was devastated because they had just spent a fortune on a high-end remodel. I spent three days grinding concrete and scraping wet, pulpy MDF off that floor because the installer thought a moisture-resistant label meant the material could handle a flood. It could not. Most guys skip the leveling compound and ignore the moisture readings in the slab. They think the underlayment or a bit of caulk will hide the dip or the dampness. It won’t. I have spent my career seeing these shortcuts fail. If you want your bathroom trim to survive through 2026 and beyond, you have to stop thinking about paint as a decoration and start thinking about it as a chemical barrier. A bathroom is a high-pressure environment where water vapor is constantly looking for a weak point in your armor. When that vapor finds an unprimed edge or a microscopic gap in the caulk, it gets behind the paint film and starts the delamination process. You end up with peeling, bubbling, and rot.
The unseen moisture cycle behind your trim
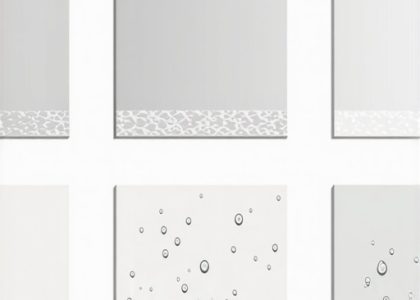
Bathroom baseboard paint peeling is caused by hydrostatic pressure and capillary action within the substrate material. To stop peeling for 2026, you must manage the dew point, the specific gravity of the trim material, and the chemical cross-linking of the primer to ensure a moisture-proof mechanical bond. Water does not just sit on top of your paint; it migrates through it. In a small bathroom, the steam from a hot shower creates a pressurized environment. This steam hits the relatively cool surface of the baseboard and condenses into liquid water. If the paint film is not perfectly adhered, the water sits in the microscopic space between the wood and the coating. This is why I always tell people to check their ventilation first. If your fan is not pulling at least 50 CFM, your baseboards are basically living underwater. I have seen guys install beautiful showers that wow with modern designs, only to have the surrounding trim fail within six months because they ignored the atmospheric moisture levels. You have to understand the physics of evaporation to keep your paint on the wall.
“A floor is only as good as the subfloor beneath it; deflection is the enemy of every joint.” – Master Flooring Axiom
Why your subfloor is lying to you
Your subfloor acts as a massive reservoir for moisture that migrates upward into your baseboards through the bottom edge. Stopping paint peeling requires sealing the bottom grain of the trim and ensuring the subfloor moisture content is below 12 percent before the installation of any finish materials. Most installers leave the bottom of the baseboard raw. They set it right on top of the tile or the subfloor. When you mop the floor, or when there is a small leak in the grout, that raw wood drinks up the water like a straw. This is called capillary action. The wood swells, the paint stretches, and eventually, the bond snaps. I once saw a $20,000 marble floor ruined because the installer did not check the crawlspace humidity. The moisture came up through the slab, into the baseboards, and the resulting rot spread into the wall studs. You have to seal every side of that board. If you are looking for baseboards makeover ideas to elevate your space, start by making sure the materials are actually suited for the environment. Do not trust the guy who says it is fine to install without a moisture meter. He is the one who will be gone when the paint starts curling off the wall like old wallpaper.
Material selection for high humidity zones
Choosing the right material is the first tactic in preventing paint failure because different substrates react differently to water vapor. For 2026, the standard is moving away from porous wood toward composite materials and specialized polymers that do not expand when they get wet. If you use medium-density fiberboard in a bathroom, you are asking for a disaster. MDF is basically a sponge made of sawdust and glue. Once it gets wet, it expands and never goes back to its original shape. I prefer PVC or solid pine that has been back-primed with an oil-based sealer. Even better, consider a tile baseboard that matches your floor. It is a permanent solution that laughs at water. If you are interested in chic baseboard designs that transform rooms, look for styles that allow for a thick bead of silicone at the bottom. This creates a mechanical break between the floor and the wall. Below is a comparison of how different materials handle the stresses of a bathroom environment.
| Material Type | Moisture Resistance | Stability Rating | Typical Failure Mode |
|---|---|---|---|
| MDF (Fiberboard) | Very Low | Poor | Swelling and blowing out |
| Solid Pine | Medium | Moderate | Tannin bleed and warping |
| PVC (Vinyl) | High | Excellent | Thermal expansion gaps |
| Porcelain Tile | Absolute | Superior | Grout cracking |
The chemical bond between primer and substrate
The second tactic involves using a high-adhesion bonding primer that creates a molecular bridge between the baseboard and the finish coat. To stop peeling, you must use a primer specifically formulated to resist alkaline surfaces and block moisture from penetrating the wood fibers. Most people grab a cheap bucket of latex primer and think they are done. That is a mistake. In a bathroom, you need something that bites into the surface. I use a shellac-based or high-solids oil primer. These primers have smaller molecules that penetrate deeper into the wood grain. When they dry, they form a hard, non-porous shell. This is the foundation of your paint job. If the foundation is soft, the topcoat will eventually pull away. Think of it like grout restoration secrets; if the prep work is garbage, the results will not last. You have to sand the factory finish off the boards before you prime. That factory coating is often a cheap, waxy substance that paint hates. Take a 120-grit sanding block and scuff it up. It is the only way to get a real bond.
Integrating tile and baseboards for longevity
The third tactic is the implementation of a 100 percent silicone transition at the floor-to-wall junction instead of standard painter’s caulk. This provides a flexible, waterproof seal that accommodates the natural movement of the house without cracking or allowing water infiltration. Standard caulk is water-based. Over time, it shrinks and cracks. When you take a shower, the steam gets into those cracks and works its way behind the board. Silicone is different. It is an elastomer. It stretches and moves. It also happens to be completely waterproof. Most guys hate working with it because it is messy, but it is the secret to a professional finish. If you are cleaning your bathroom and notice the edges are looking rough, check out these tile cleaning tips to see how to maintain the seal. If you do not have a solid seal at the bottom, your paint will fail from the bottom up every single time.
- Test moisture levels with a pin-meter to ensure the wood is under 12 percent.
- Back-prime every linear foot of trim, including the cut ends and the bottom edge.
- Leave a 1/16 inch gap between the board and the tile for the sealant.
- Apply a high-quality bonding primer before the topcoat.
- Use 100 percent silicone at the floor-to-wall transition.
- Install a ventilation fan that moves at least 1 CFM per square foot of room space.
The 2026 approach to bathroom ventilation
Modern bathroom ventilation strategies involve continuous-run fans and humidity-sensing switches that activate before condensation forms on the baseboards. Proper airflow is the most effective way to prevent the environmental conditions that lead to paint delamination and mold growth. You cannot expect paint to survive in a sauna. If your mirror is fogged up after a shower, your ventilation has failed. I tell my clients to install a timer switch. Set it for 20 minutes after you leave the room. This ensures all the latent moisture is pulled out of the air. This is as important as the eco-friendly tile solutions you choose for your home. You are protecting your investment by controlling the climate inside the room. Airflow should be directed across the floor and up toward the ceiling. If the air is stagnant near the floor, the baseboards stay wet longer, and that is when the peeling starts. It is a simple fix that saves you from a full tear-out later.
“Water is a patient enemy; it will find the one spot you forgot to prime.” – TCNA Guidelines Commentary
Thermal expansion and the paint failure cycle
Thermal expansion causes bathroom baseboards to grow and shrink as temperatures fluctuate, which creates stress on the paint film at the joints and corners. Managing this expansion requires leaving appropriate gaps and using flexible coatings that can withstand the mechanical movement. Houses move. They breathe. In the winter, the wood shrinks. In the summer, the humidity makes it swell. If your paint is too brittle, it will crack at the corners. Once it cracks, the moisture gets in. I have seen people try to fix this by putting more paint on top. That just makes it thicker and more prone to cracking. You need a high-quality acrylic latex paint with a semi-gloss or gloss finish. These have a higher resin content and more flexibility than flat paints. They also provide a smoother surface that sheds water more effectively. Do not let the pretty colors distract you from the technical specs of the can. Read the label. Look for words like enamel or urethane-modified. Those are the ones that will still be there in 2026. If you need more help, you can always contact us for a professional consultation on your specific layout. Understanding the chemistry of the coating is just as important as the skill of the brush stroke. Stop settling for builder-grade results and start building for the long haul.

This post hits all the critical points I wish I had known about when remodeling my bathroom last year. I especially appreciate the emphasis on material choice, like switching from MDF to PVC or tile for longevity. I’ve seen too many projects fail because of overlooked moisture management, leading to costly repairs down the line. I haven’t tried using silicone at the floor-to-wall transition myself—do you think it’s worth the extra effort compared to traditional caulking? I also wonder how many homeowners realize that even bathroom doors and windows need proper sealing and ventilation to truly prevent moisture issues from sneaking in behind the paint. Managing moisture and house movement seems complex but essential. Have you come across any innovative solutions or emerging materials that could make these tasks even easier or more foolproof for DIYers?