Most guys skip the leveling compound. They think the underlayment will hide the dip. It won’t. I spent three days grinding concrete on a job last month just so the floor wouldn’t click like a castanet because the substrate had a four millimeter wave. That is the reality of this trade. I have spent twenty five years on my knees with a moisture meter and a level. I have smelled enough floor wax and WD-40 to last three lifetimes. When you see a shower where the grout looks like a patchwork quilt of three different shades of gray, it is not an accident. It is a failure of chemistry and a lack of respect for the materials. Most homeowners think a shower is just a place to get clean, but to me, it is a high stress laboratory where moisture and minerals fight a war against Portland cement.
The ghost in the expansion gap
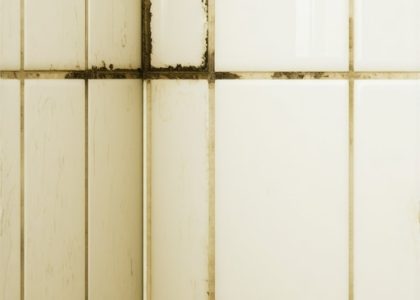
Mismatched grout colors in showers occur due to uneven hydration rates and mineral migration during the curing process of Portland cement. These inconsistencies happen when the water to powder ratio is off or when the sponge used for cleaning is too wet. This pulls the pigment from the surface. Fixing it requires professional grade tools that address the structural and chemical layers of the joint. You cannot simply paint over a problem that exists in the crystalline structure of the grout. If you want to understand how to fix this, you have to understand the grout restoration secrets for long lasting results. It involves more than just a quick scrub. You are dealing with the porosity of the material and the way it bonds to the tile edge.
“A floor is only as good as the subfloor beneath it; deflection is the enemy of every joint.” – Master Flooring Axiom
The mineral pigment trap
Mineral pigments fail when the hydration of the cement binder is interrupted by external moisture or excessive heat. If you look at grout under a microscope, it is a forest of interlocking needles. When these needles grow unevenly, light hits the surface differently, making one area look dark and another look chalky. This is often called efflorescence. It is the salt of the earth rising to ruin your Tuesday. Most people want the thickest underlayment or the heaviest grout, but too much mass can lead to slow drying times that trap these salts. You need to manage the vapor drive. If your subfloor is holding moisture, that water will push through the grout and carry minerals that bleach the color. This is why site finished work is a dying art. Nobody wants to wait for the physics to settle. They want it done by lunch.
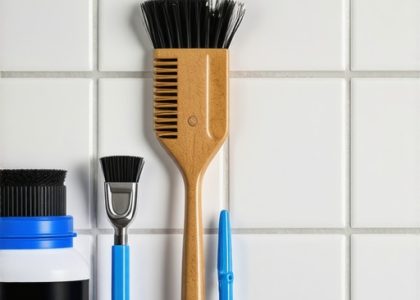
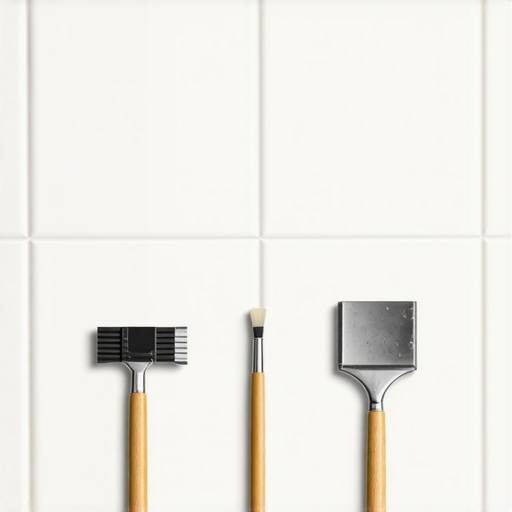
The diamond blade precision manual scraper
A manual grout scraper with a tungsten carbide or diamond grit blade is the primary tool for physical pigment removal. This tool allows an installer to shave off the top one sixteenth of an inch of the grout line without vibrating the tile loose. Vibrating tools like oscillating saws are dangerous because they can chip the glaze on expensive porcelain. A hand tool gives you the feel of the resistance. You can tell when you hit a soft spot where the cement did not hydrate properly. It smells like wet stone and hard work. Once you remove that top layer of discolored material, you reveal the true color underneath. This is how you how to refresh grout without replacing it entirely. You are performing surgery on the joint. It is tedious. My back hurts just thinking about the last time I had to scrape a sixty square foot walk in shower by hand.
Epoxy resins that rewrite the surface color
Industrial grade epoxy grout colorants are the second tool used to fix shade variation by creating a chemical bond with the cement. These are not craft store paints. These are high solid resins that penetrate the pores of the cementitious grout and lock in. They are hydrophobic. This means they repel the very water that caused the color mismatch in the first place. You have to clean the joint with a phosphoric acid solution first to open the pores. If you skip the acid wash, the epoxy will just peel off like a cheap sunburn. You need to look for colorants that have a high mil thickness once dried. This ensures that the old, ugly color does not bleed through. When you apply this, you are effectively turning a porous mineral surface into a non porous plastic surface. It is the only way to guarantee color uniformity in showers that wow in the long term.
| Tool Type | Primary Function | Risk Level | Durability |
|---|---|---|---|
| Manual Scraper | Physical Removal | High for Tile Edges | Permanent |
| Epoxy Colorant | Chemical Masking | Low | 10 to 15 Years |
| Steam Vaporizer | Thermal Extraction | Zero | Temporary |
High pressure steam vapor machines
Dry steam vapor cleaners reaching temperatures above 300 degrees Fahrenheit are the third essential tool for extracting embedded polymers and residues. Most grout color issues are actually caused by soap scum and hard water deposits that have petrified inside the joint. A standard mop just moves the dirt around. A steam machine uses thermal expansion to blast the pores open. The heat liquefies the oils and the pressure pushes them to the surface. You then wipe them away with a microfiber cloth. This is the foundation of tile cleaning tips for a sparkling bathroom in 2025. If you do not clean the grout to a molecular level, any color fix you try will fail. The bond will not hold. I have seen guys try to color grout that still had shower oil on it. It looked great for a week. Then it started flaking off like dandruff.
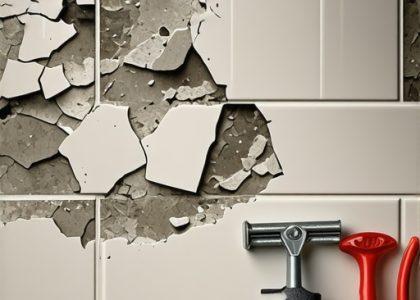
The 1/8 inch that ruins everything
An expansion gap of at least one eighth of an inch is required at all change of plane joints to prevent grout cracking and color loss. When a wall meets a floor, the house moves. If you put hard grout in that corner, it will crack. When it cracks, water gets behind the tile. That water then sits there and rots the thin-set, which eventually leaches back through the grout and turns it a nasty brown color. You must use 100 percent silicone caulk in these corners. This is a basic rule from the TCNA that half the installers today seem to forget. They are too busy trying to get to the next job. They do not care about the longevity. I care. I have to look at my work and know it will still be there in thirty years. Even the chic baseboard designs that people love so much will fail if the floor is shifting and cracking underneath them.
“Grout is not a structural component; it is a sacrificial barrier against the elements of the home.” – Master Flooring Axiom
Why your subfloor is lying to you
Subfloor deflection causes microscopic shifting that manifests as light and dark spots in the grout lines. If the plywood or the concrete slab is moving even a fraction of a millimeter, it stresses the grout joint. This stress creates micro fractures. Light enters these fractures and scatters, which makes the grout look like it is a different color. You think it is a stain, but it is actually a structural failure. Before you ever pick up a grout tool, you need to check the joist spacing. You need to know if the subfloor is stiff enough for the tile you chose. Large format tiles are the worst for this. They have zero flexibility. If you are looking for eco friendly tile solutions, you still have to follow the physics. Mother Nature does not care about your aesthetic choices. She only cares about gravity and moisture.
Baseboards that hide the ugly truths
Baseboards and transitions serve as the mechanical covers for the mandatory expansion gaps at the perimeter of the tile installation. Every tile floor needs a place to breathe. If you push the tile tight against the wall, the floor will tent. It will pop up like a mountain range. The grout will shatter. I always tell people to invest in quality trim. Check out these baseboards makeover ideas to elevate your space because they are more than just pretty wood. They are the mask for the engineering gap. If you see grout failing near the edges of a room, it is usually because the installer did not leave enough room for the house to expand and contract. The wood moves with the humidity. The tile does not. That conflict is where grout color dies.
The professional checklist for grout color correction
- Test the grout hardness with a scratch tool to ensure it is not crumbling.
- Deep clean the joints with a pH neutral specialized stone cleaner.
- Use a moisture meter to ensure the substrate is below 12 percent moisture content.
- Select a colorant that matches the dry grout sample, not the wet one.
- Apply colorant in thin, multiple coats rather than one thick layer.
- Seal the transitions with color matched silicone rather than hard grout.
The 2026 standard for shower durability
The future of shower installation relies on high performance additives and pre mixed resins that eliminate the human error of on site mixing. We are moving away from the bag of dust. The new materials are pre pigmented in a vacuum environment. This ensures that every inch of the joint is the exact same shade. If you are stuck with an old floor that has mismatched colors, use the tools I mentioned. Scrape it, steam it, or resin it. Do not just live with it. A shower with bad grout is a shower that is slowly failing. It is an invitation for mold and structural decay. I have spent my life preventing that decay. I will probably spend the rest of it doing the same thing. It is not about the fashion of the tile. It is about the integrity of the build. When you walk into showers with a style that lasts, you are looking at the result of someone who respected the chemistry and the tools of the trade.