
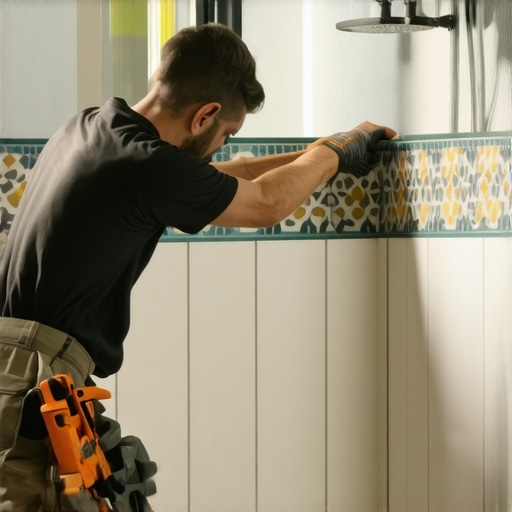
Most guys skip the leveling compound. They think the underlayment will hide the dip. It won’t. I spent three days grinding concrete on a job last month just so the floor wouldn’t click like a castanet. When it comes to showers, people do the same thing with wall boards. They slap up a decorative border and wonder why the grout cracks six months later. It is because they ignored the structural integrity of the substrate. I have been in this game for 25 years. I have seen every shortcut in the book and none of them work. A shower is a wet room. It is a hydraulic environment that requires precise engineering. If you think a decorative tile border is just about aesthetics, you are already behind. It is about managing planes of movement and ensuring the bond between the ceramic and the cement backer unit is chemically sound.
The structural lie of the shower wall
A decorative tile border requires a perfectly flat substrate to prevent lippage and uneven grout lines. You must ensure the cement backer unit or waterproofing membrane is plumb within 1/8 inch over 10 feet. Use a 6 foot level to identify high spots and low spots before the first scoop of thin-set touches the wall. The wall is the foundation. If the wall bows, your border will follow that bow, creating a visual disaster that no amount of grout can fix. I have seen showers where the installer tried to shim the tiles with extra mortar. That is a recipe for failure. Mortar shrinks as it cures. If one side of the tile has 1/4 inch of thin-set and the other has 1/8 inch, the tile will pull as it dries, leaving you with a jagged edge. Use grout to fill gaps, not to hide structural incompetence. If your wall is not flat, you are building on sand.
“A floor is only as good as the subfloor beneath it, deflection is the enemy of every joint.” – Master Flooring Axiom
The weapons of a precision installer
Professional tile installation demands high precision tools like laser levels and diamond blade wet saws to achieve clean cuts. You cannot expect a $10 snap cutter to handle the intricate edges of a glass mosaic border. You need a wet saw with a continuous rim diamond blade to prevent chipping. I always tell my apprentices that the tool does the work, but the brain guides the tool. You also need a notched trowel specifically sized for your border tile. If you are using a 1 inch by 1 inch mosaic, a 3/16 inch V-notch trowel is usually the right choice. Too much thin-set and it will ooze out of the joints, making your life a nightmare when it is time to clean the tracks for grout. Precision is not an accident. It is the result of having the right equipment and the patience to use it correctly. You should also consider how showers with a style benefit from using baseboards as a guide for the initial layout.
| Material Type | Water Absorption Rate | Adhesive Requirement | Expansion Rating |
|---|---|---|---|
| Ceramic Tile | 0.5 percent to 3 percent | Standard Modified Thin-set | Moderate |
| Porcelain Tile | Less than 0.5 percent | High-Bond Modified Thin-set | Low |
| Glass Mosaic | 0 percent | Glass-Specific White Thin-set | High |
| Natural Stone | Varies (High) | Large Format Stone Mortar | Moderate |
The geometry of a centered accent
Calculating the height and centering of a decorative border ensures visual balance and prevents awkward sliver cuts at the corners. You must measure the total height of the shower wall and determine the eye level of the average user. Usually, a border sits between 54 and 60 inches from the floor. Do not just start at the bottom and hope for the best. Work from the center of the main wall outward. If you end up with a half-inch sliver in the corner, you failed the layout phase. I spend more time with a tape measure and a chalk line than I do with a trowel. You have to account for the thickness of the grout joints in your calculations. If you are using 1/8 inch spacers, those add up over five feet of tile. If you forget to include the joint width, your border will be two inches higher than you planned by the time you reach the top. It is basic math, but it is the math that separates a master from a handyman.
Adhesive chemistry and the bond
Selecting the correct thin-set mortar is vital for the long term adhesion of tile borders in high moisture areas. You should look for a polymer-modified thin-set that meets ANSI A118.4 standards. This stuff has latex additives that allow the mortar to flex slightly without losing its grip. In a shower, the temperature changes constantly. The tiles expand and contract. If your mortar is too rigid, the bond will snap. This is especially true for glass borders. Glass expands at a different rate than ceramic. If you use a cheap, non-modified mortar, the glass will literally pop off the wall after a few dozen hot showers. I also recommend back-buttering every single piece of the border. You want 100 percent coverage. Any void behind the tile is a place for water to collect, which leads to mold and eventually structural rot. This is why grout restoration secrets always emphasize the importance of the initial bond.
- Check the expiration date on your mortar bag.
- Mix the thin-set to a peanut butter consistency.
- Allow the mortar to slake for 10 minutes after mixing.
- Use a laser level to keep the horizontal line perfect.
- Clean excess mortar from the joints before it cures.
The friction of the grout joint
Applying grout correctly involves pushing the material deep into the joints and cleaning it at the precise moment of initial set. If you wait too long, you will be scrubbing for hours. If you go too early, you will pull the grout right out of the joint. I use a rubber float at a 45 degree angle to pack the joints tight. There should be no air pockets. Air pockets are where water lives. For borders with intricate patterns, I prefer unsanded grout if the joints are less than 1/8 inch. Sanded grout can scratch the surface of delicate glass or polished stone. Once the grout is in, wait about 15 to 20 minutes until it looks hazy. Then, use a damp sponge. Not a wet sponge. A wet sponge will dilute the pigment and weaken the cement. You want just enough moisture to smooth the surface. If you see water dripping down the wall, you are using too much. Proper maintenance is key, and you can find tile cleaning tips to keep your work looking new for years.
“A floor is only as good as the subfloor beneath it; deflection is the enemy of every joint.” – Master Flooring Axiom
The ghost in the expansion gap
Leaving a 1/8 inch expansion gap at the corners and where the wall meets the tub is essential to prevent cracking. Never fill these vertical or horizontal change-of-plane joints with hard grout. They must be filled with 100 percent silicone caulk that matches your grout color. Houses move. They breathe. The wood studs behind your tile will swell in the summer and shrink in the winter. If you have hard grout in the corners, that movement will cause the grout to crumble or the tiles to crack. It is a fundamental rule of the TCNA. Many people ignore this because caulk is harder to apply neatly, but it is the only way to ensure the shower remains waterproof. If you see a crack in the corner of a shower, it is almost always because some guy thought he knew better than the physics of expansion. Even when installing chic baseboard designs near wet areas, you must respect the gap.
The myth of the thick border
While most people want the thickest underlayment, too much cushion actually causes the locking mechanisms on LVP to snap under pressure. The same logic applies to tile borders. Many homeowners think a thick, heavy border is a sign of quality. In reality, a border that is significantly thicker than the surrounding field tile creates a shelf. This shelf is a magnet for soap scum, hard water deposits, and mold. It is a maintenance nightmare. I always advise clients to choose a border that is roughly the same thickness as the field tile. If they insist on a thick stone border, I have to grind the back of the stone or build up the wall behind the field tile to keep the faces flush. A flush surface is easier to clean and looks more professional. It shows that you thought about the long-term life of the showers rather than just the immediate look. You can also see how baseboards makeover ideas follow this principle of flush, clean lines.
The final seal of approval
Applying a high quality penetrative sealer to your tile and grout protects the installation from moisture intrusion and staining. Do not use those cheap spray-on sealers from the grocery store. Get a professional grade solvent-based sealer. It sinks into the pores of the grout and the tile, creating a hydrophobic barrier. You should test it by dropping a bit of water on the surface. If it beads up, you are good. If it soaks in, you need another coat. This is the final step that protects all your hard work. Without sealer, that beautiful white grout will be orange and moldy in six months. I tell my customers that a shower is an investment. You spent the money on the tile and the labor, so spend the extra fifty bucks on a good sealer. If you need help with existing issues, how to refresh grout without replacing it is a good resource for maintenance. If you have more questions about your project, feel free to contact us for expert advice.