The subfloor secret and why your bench fails
A custom shower bench requires a structural foundation that accounts for deflection, moisture migration, and weight distribution. Most installers skip the leveling compound or fail to reinforce the framing, assuming the tile provides the strength. It does not. I spent three days grinding concrete on a job last month just so the floor wouldn’t click like a castanet, and that same level of precision is mandatory for a shower bench. If the subfloor or the bench frame moves even a fraction of an inch, your grout lines will scream and your waterproofing will eventually fail. You are building a structural element that must withstand hundreds of pounds of localized pressure while remaining completely impervious to water. This is not a weekend craft project. It is a hydraulic engineering challenge. A shower bench is essentially a miniature roof inside your house that people sit on. If the pitch is wrong or the materials are inferior, the physics of water will find the path of least resistance into your floor joists. You can find inspiration for the final look at showers that wow modern designs for 2025, but before the tile goes on, the bones must be perfect.
The physics of framing for moisture environments
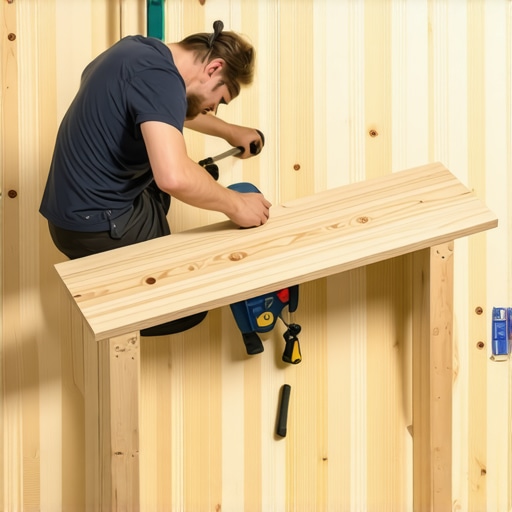
Framing a shower bench requires kiln dried lumber and specific screw patterns to prevent the wood from twisting as it acclimates to the humidity of a bathroom. When you build a bench from scratch, you are fighting the natural tendency of wood to expand and contract. I prefer using 2×4 or 2×6 pressure treated lumber for the base plates if they touch a concrete slab, but the vertical studs should be standard kiln dried spruce or fir to ensure they stay straight. You must space your vertical supports no more than 12 inches on center. This is tighter than standard wall framing because a human sitting down creates a concentrated load that can flex common cement board. Every joint should be fastened with three inch deck screws. Avoid drywall screws at all costs. Drywall screws are brittle and will snap under the shear force of a shifting house. We are looking for a structural rigidity that rivals the main load bearing walls of the home. The top of the bench must have a built in slope. I aim for a quarter inch of fall per foot toward the drain. If the bench is level, water will sit. If water sits, the minerals in your water will eat your grout. You can see how this structural approach differs from simple cosmetic fixes like how to refresh grout without replacing it.
“A floor is only as good as the subfloor beneath it; deflection is the enemy of every joint.” – Master Flooring Axiom
Sheathing and the myth of waterproof cement board
Cement board is water durable but it is not waterproof, meaning it will not fall apart when wet but it will allow moisture to pass through to your wood studs. This is the biggest mistake I see in the field. To build a bench that lasts 50 years, you must apply a topical waterproofing membrane. I use a liquid applied membrane or a bonded sheet membrane like those approved by the TCNA. When you wrap the bench, the membrane must be continuous from the floor, up the face of the bench, across the seat, and up the wall. This creates a monolithic tank. If you have a seam at the corner where the bench meets the wall, that is your primary failure point. You must use pre-formed outside and inside corners. Do not try to fold the fabric into a messy origami pile. The thickness of your waterproofing layer matters. If you are using a liquid membrane, you need a dry film thickness of about 20 to 30 mils. This is roughly the thickness of a credit card. Too thin and it will crack. Too thick and it might not cure properly in a humid environment. This attention to the substrate is what separates a professional build from a builder grade disaster.
| Material | Purpose | Critical Specification |
|---|---|---|
| 2×4 Kiln Dried | Internal Framing | 12 inches on center max |
| 1/2 inch Backer Board | Sheathing | Must be alkaline resistant screws |
| Liquid Membrane | Waterproofing | 2 coats minimum, 30 mil total |
| Modified Thin-set | Tile Adhesive | ANSI A118.11 compliant |
| Epoxy Grout | Joint Filler | Zero water absorption |
The 1/8 inch that ruins everything
Layout planning determines whether your shower bench looks like an architectural feature or a late addition that creates awkward tile slivers. Before you drive a single nail, you must know the size of your tile. If you are using 12×24 porcelain, you want the bench height and depth to correspond with full tiles. Nothing looks worse than a 1 inch sliver of tile at the baseboard line. Speaking of baseboards, you need to plan how the bench interacts with the rest of the room. Many homeowners use baseboards makeover ideas to elevate your space, but in a wet area, the tile on the bench often replaces the need for a traditional wood baseboard. You want your bench to be exactly 17 to 19 inches high. This is the ergonomic standard for a comfortable seat. If you go higher, the average person’s feet won’t touch the floor. If you go lower, it feels like a low stool. You must also account for the thickness of the tile and the thin-set. A standard porcelain tile plus the mortar adds about 1/2 inch to your framed height. Measure twice and cut once is a cliché, but in the world of shower benches, it is the difference between a seat and a tripping hazard.
Advanced adhesive chemistry and grout selection
The bond between the tile and the waterproofing membrane relies on the polymer content of your thin-set mortar. You cannot use a cheap, unmodified mortar here. The bench undergoes thermal expansion every time you turn on the hot water. The materials expand. When you turn the water off, they contract. If your mortar is too rigid, the bond will shear off. I always use a high performance, large format tile mortar with high polymer density. This allows for a microscopic amount of flex. When it comes to grout, avoid standard sanded grout if you want a low maintenance life. It is too porous for a seat where soap scum and body oils accumulate. Use an epoxy grout or a high quality cementitious grout with built in sealers. This ensures the bench remains easy to clean. You might find my tile cleaning tips for a sparkling bathroom in 2025 useful, but starting with epoxy grout makes the job much easier. If your grout fails, you will need to look into grout restoration secrets for long-lasting results, but it is better to do it right the first time.
- Ensure the subfloor is level within 1/8 inch over 10 feet.
- Check that all framing is square and plumb using a 4 foot level.
- Apply waterproofing in a continuous coat with no pinholes.
- Pre-float the bench seat with mortar if the framing slope is insufficient.
- Allow at least 24 hours of cure time before water testing the bench.
Regional considerations for shower construction
In high humidity regions like the Gulf Coast, the moisture vapor transmission through a concrete slab can actually push the tile off a shower bench if a vapor barrier is not installed. If you are building on a slab on grade in a swampy climate, you need a moisture vapor barrier underneath your shower pan that ties into the bench. In colder climates, like the Northeast, the bench can feel like a block of ice in the winter. This is why I often recommend installing electric radiant heat mats directly under the tile on the bench seat. If you do this, the wire must be embedded in a self leveling compound or a thick layer of thin-set to avoid hot spots that could crack the tile. The chemistry of the thin-set also changes with temperature. If your house is 55 degrees during a winter renovation, your mortar will take twice as long to reach full strength. Never rush the process. Let the chemistry work so the structure doesn’t fail. Professional results are the product of patience and a deep respect for the materials used.
“Slope is not a suggestion; it is a requirement for the survival of the substrate.” – TCNA Handbook Reference
Comments
One response to “How to Build a Custom Shower Bench from Scratch”
This post offers a really comprehensive look at the critical aspects of building a durable shower bench. I agree that the structural integrity starts with a solid subfloor and proper framing—it’s surprising how many overlook this! I’ve learned from personal experience that skipping the waterproof membrane can lead to costly repairs down the line, especially in humid climates. It’s interesting that you mention using a 1/4 inch slope for water runoff; I’ve found that even slight variations can cause pooling or water sitting, which is a nightmare for grout and tile longevity. Do you typically recommend embedded heating mats in colder regions, or do you find that proper insulation and vapor barriers suffice? I’ve been contemplating adding radiant heat myself, but I wonder about the long-term effects on waterproofing layers, especially with thermal cycling. Thanks again for such an insightful guide—building a solid foundation really does make all the difference in creating a lasting shower feature.