
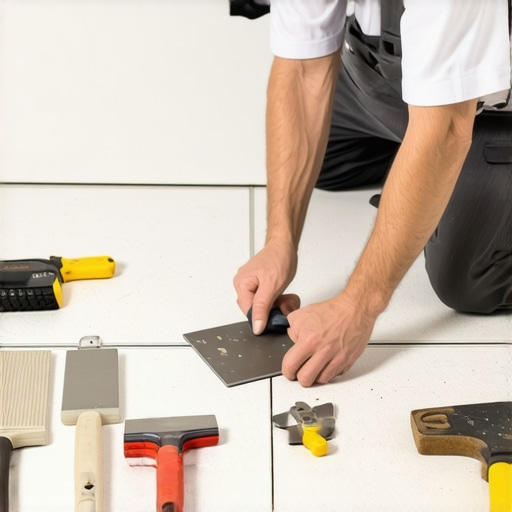
I have spent twenty five years with my knees on the concrete and my hands in a bucket of thin set. I have seen every mistake a weekend warrior or a cut rate contractor can make. Most guys skip the leveling compound. They think the underlayment will hide the dip. It won’t. I spent three days grinding concrete on a job last month just so the floor wouldn’t click like a castanet. When you see a tile floor with cracked grout or a hollow sound when you walk across it, you are looking at a failure of the bond. That bond starts with the metal tool in your hand. Picking the wrong trowel is like trying to build a skyscraper on a foundation of sand. It is a technical error that leads to structural catastrophe. I do not care how pretty the porcelain looks if the ridges are not deep enough to support the weight of a human being. We are talking about the physics of mortar displacement and the chemistry of hydration. You need to understand how the notch size dictates the life expectancy of your home infrastructure.
The geometry of a perfect bond
Choosing the right trowel size for your floor tiles depends on the dimensions of the tile and the flatness of your substrate. Large format tiles require deeper notches to ensure adequate mortar coverage and to compensate for slight variations in the subfloor. A square notch trowel creates taller ridges that collapse into a thicker bed than a V notch trowel. When you press a tile into the mortar, those ridges must collapse entirely to create a solid, void free support system. If you have air pockets, you have weak points. In wet areas like showers, those air pockets become reservoirs for mold and moisture that will eventually rot your studs. The goal is ninety five percent coverage in wet areas and at least eighty percent in dry living spaces. Anything less is a gamble with your bank account.
“A floor is only as good as the subfloor beneath it; deflection is the enemy of every joint.” – Master Flooring Axiom
Why your subfloor is lying to you
Subfloor preparation determines whether your trowel selection will actually succeed or fail during the installation process. No subfloor is perfectly flat, even if it looks like it to the naked eye. I use a ten foot straight edge to find the dips and humps before I ever open a bag of mortar. If your floor has a variance of more than one eighth of an inch over ten feet, your trowel size must increase to bridge those gaps. High spots need to be ground down. Low spots need self leveling underlayment. If you try to use a small trowel on a wavy floor, the tile will only touch the high points of the mortar. You will end up with lippage, where one tile sits higher than the neighbor, creating a trip hazard that looks like amateur hour. I have seen guys try to use a one quarter inch trowel on twelve by twenty four inch tiles. It is a disaster. The tile is too large and the mortar bed is too thin to absorb the irregularities of the concrete slab. You need at least a half inch notch for those big planks.
The math of thin set coverage
Calculating the correct mortar depth involves understanding the relationship between the notch width and the notch depth. A one half by one half inch square notch trowel does not actually leave a half inch thick layer of mortar under the tile. Once those ridges are collapsed by the weight of the porcelain and the pressure of your hands, the final thickness is roughly one third to one half of the notch depth. This is the science of displacement. For a standard twelve inch tile, a one quarter by three eighths inch trowel is often the sweet spot. It provides enough material to grab the back of the tile without causing the mortar to ooze up into the grout lines. If you see mortar coming out of the joints, you are either pressing too hard or your trowel is too deep for that specific tile size. It is a delicate balance between enough and too much. Too much mortar leads to shrinkage as the water evaporates, which can pull the tile down and create uneven surfaces. Too little mortar and the tile will simply pop off the floor the first time someone drops a heavy pot.
| Tile Dimension | Recommended Trowel Notch | Minimum Coverage Requirement |
|---|---|---|
| Mosaic (1×1 to 2×2) | 3/16 x 5/32 V-Notch | 95% |
| Small Square (4×4 to 6×6) | 1/4 x 1/4 x 1/4 Square | 80% |
| Standard (12×12) | 1/4 x 3/8 x 1/4 Square | 80% |
| Large Format (12×24+) | 1/2 x 1/2 x 1/2 Square | 95% |
Square notch against the U notch
The shape of the trowel notch influences how easily the mortar ridges collapse when the tile is set into place. I prefer a U notch for larger tiles because the rounded ridges are easier to collapse than the flat tops of a square notch. This reduces the amount of effort needed to get full coverage and minimizes the risk of trapping air. When you use a square notch, the ridges can sometimes fold over on themselves, creating a pocket of air that stays trapped forever. In a heavy traffic area, that air pocket is where a crack will start. If you are working on showers, you cannot afford these mistakes. Water will find that air gap and sit there. It will smell, it will grow bacteria, and it will eventually destroy the bond. I always back butter my large tiles. This means I use the flat side of the trowel to apply a thin skim coat of mortar to the back of the tile before I set it into the ridged bed. This ensures that the chemical bond is established on both surfaces. It is the only way to be sure.
“Ensure 95% mortar contact in wet areas to prevent moisture accumulation within the substrate assembly.” – TCNA Handbook Standards
The 1/8 inch that ruins everything
Lippage occurs when the trowel size is insufficient to accommodate the inherent bow found in many modern porcelain planks. Large tiles are rarely perfectly flat. They have a slight crown from the manufacturing process. If you use a small trowel, the center of the tile might touch the mortar while the corners are hanging in the air. This is why you see so many cracked corners in cheap bathroom remodels. You need a deep enough bed of mortar to allow the tile to sink in and level out. Once the tile is set, you need to think about the transition to the walls. Using baseboards makeover ideas to elevate your space is a great way to hide the expansion gaps you must leave at the perimeter. Never tile tight to a wall. Buildings move. Floors expand. If you do not leave a gap, the floor will tent and shatter. The trowel gives you the bed, but the layout gives you the longevity.
The professional checklist for mortar coverage
- Check the back of the tile to see if it has a deep texture that requires more mortar.
- Lift a tile immediately after setting it to verify that the ridges have collapsed.
- Ensure the mortar is not skinning over in the bucket before you apply it.
- Use a margin trowel to keep the edges of your notched trowel clean and sharp.
- Verify that the substrate is within the flatness tolerance of one eighth inch over ten feet.
Maintenance and the longevity of the bond
The work does not end once the mortar cures and the grout is spread. You have to protect that investment. Using the right trowel ensures the tiles stay down, but you have to keep the surface clean to prevent acids from eating away at the grout. For those with existing installations that look a bit tired, checking out grout restoration secrets for long lasting results can save a floor that was installed correctly but maintained poorly. If you find your bathroom looking a bit dated, you might look into showers with a style for inspiration on your next renovation. Just remember that the style is the skin, but the mortar is the bone. Do not neglect the bone. A master knows that the tool defines the outcome. Stop guessing at the notch size. Measure your tile, check your floor, and buy the right steel trowel for the job. It is the only way to build a floor that lasts a lifetime.