
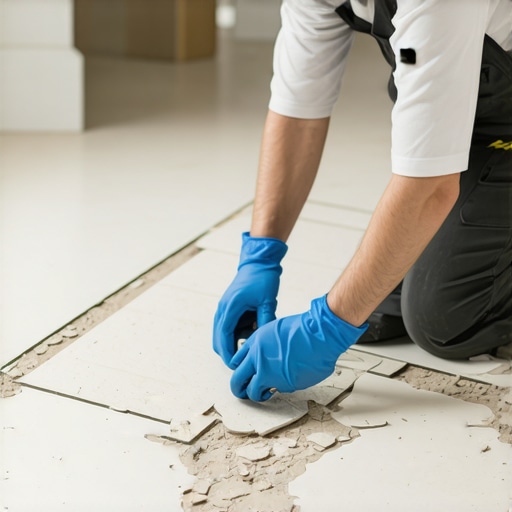
The hollow sound of failure under your feet
Fixing a loose tile without removal involves identifying the void, drilling into the grout line, and injecting a high-strength pressure-sensitive adhesive or low-viscosity epoxy to fill the air pocket. This method restores the bond between the tile biscuit and the substrate without risking a fracture of the surrounding ceramic or porcelain. Most guys skip the leveling compound. They think the underlayment will hide the dip. It won’t. I spent three days grinding concrete on a job last month just so the floor wouldn’t click like a castanet. That job was a wake-up call for the homeowner who thought a few bags of cheap thin-set could fix a wavy slab. When a tile starts to ‘click’ or ‘crunch’ when you step on it, you are hearing the death rattle of a failed bond. It is usually the result of ‘spot bonding’ where an installer just put a dab of mortar in the corners instead of achieving 80 percent coverage. In wet areas, like modern showers, that coverage needs to be 95 percent. If you hear that hollow thud, the bond has been compromised by deflection, moisture, or simply a bad mix. You don’t have to rip it all out, but you do have to respect the physics of the repair.
“A floor is only as good as the subfloor beneath it; deflection is the enemy of every joint.” – Master Flooring Axiom
The physics of the debonded biscuit
Tile debonding occurs when the shear strength of the adhesive is exceeded by the movement of the substrate or when the adhesive skin over during installation. Injecting a repair resin creates a mechanical lock within the voids, effectively rebonding the tile to the thin-set or the subfloor. You have to understand that a tile is a rigid body. The subfloor is a moving target. If you have a plywood subfloor that is too thin, it flexes. That flex snaps the bond of the mortar. If you are on a concrete slab, the issue is often laitance or a dusty surface that the installer didn’t prime. When I walk onto a job and hear that hollow sound, I know the ‘mechanical key’ failed. The thin-set didn’t grab the tile. To fix this without a sledgehammer, we use the ‘drill and fill’ method. We are essentially performing surgery on your floor. We use a 1/8 inch masonry bit to penetrate the grout. We do not touch the tile. Touching the tile with a bit is a one-way ticket to a crack. We want to find the air. Once the hole is open, we use a specialized adhesive that has the viscosity of water but the strength of a weld.
The 1/8 inch that ruins everything
Subfloor flatness is measured by a 1/8 inch deviation over 10 feet for large format tiles to prevent lippage and bond failure. When these tolerances are ignored, the resulting air pockets allow the tile to pivot, eventually breaking the grout and the adhesive bond. I’ve seen $50 per square foot marble ruined because the guy didn’t want to spend $30 on a bag of self-leveler. The industry standard is L/360 for ceramic tile. That means the floor shouldn’t bend more than the length divided by 360 under a concentrated load. If your floor is ‘bouncy,’ no amount of adhesive injection will keep that tile down forever. You might need to look at the joists from the basement. But for a localized failure, the injection method is king. You need to make sure the grout around the loose tile isn’t already pulverized. If it is, you need to look into grout restoration secrets to ensure the new bond is sealed against moisture. Moisture is the silent killer. It gets under the tile, turns the dust into mud, and then your floor starts sounding like a bag of potato chips.
The precision injection protocol
Successful tile rebonding requires a vacuum to remove dust from the void before injecting a low-viscosity acrylic or epoxy resin through a 2mm hole. The weight is then applied to the tile for 24 hours to ensure the adhesive spreads across the entire underside of the tile. You start by tapping the floor with a plastic mallet or a screwdriver handle. You map out the ‘hollow’ zone with blue painter’s tape. Don’t guess. You need to know exactly where the air is. I usually drill three holes per 12×12 tile. One in the corner, one in the center of a grout line, and one on the opposite side to allow air to escape. If air can’t get out, the glue can’t get in. It is simple fluid dynamics. I use a syringe or a specialized pressure-tube. You squeeze until the glue starts to bleed out of the secondary hole. That is how you know the void is full. Wipe the excess immediately. If that stuff dries on your tile, you are in trouble. Then, you pile on the weight. I use five-gallon buckets of water or stacks of old tiles. You want that tile pressed hard into the new bed of resin.
Materials needed for surgical tile repair
- 1/8 inch or 1/16 inch diamond-tipped masonry drill bits
- High-strength low-viscosity floor repair adhesive
- Shop vacuum with a HEPA filter and a narrow nozzle
- Weighted buckets or heavy toolboxes
- Color-matched grout or a grout touch-up kit
- Painters tape to mark the hollow boundaries
- Microfiber rags and denatured alcohol for cleanup
Why your subfloor is lying to you
Subfloors often appear flat to the naked eye but contain micro-dips and high spots that prevent full mortar transfer. These imperfections create the tension points that eventually lead to the hollow sounds and loose tiles you are experiencing now. I’ve had guys tell me the floor is ‘good enough.’ In my world, ‘good enough’ is a callback waiting to happen. If you are fixing a tile in a bathroom, you have to be careful about the cleaning products you use afterward. Harsh chemicals can eat away at the repair resin if the grout isn’t sealed properly. The chemistry of the bond is delicate. Most repair adhesives are acrylic-based. They stay slightly flexible. This is good because it handles the minor expansion and contraction of the house. Solid epoxy is stronger but it is brittle. If the house shifts, a brittle bond will just snap again. I prefer the acrylics for residential work because they ‘give’ a little. It is like the suspension on a truck. You want some travel, or something is going to break.
| Repair Method | Durability Rating | Difficulty Level | Cure Time |
|---|---|---|---|
| Adhesive Injection | High | Moderate | 24 Hours |
| Grout Caulking | Very Low | Easy | 4 Hours |
| Full Replacement | Maximum | High | 48 Hours |
| Surface Gluing | Failure Prone | Easy | 2 Hours |
The ghost in the expansion gap
Expansion gaps at the perimeter of a room are vital for allowing the entire floor assembly to move as a single unit without tenting or buckling. Tiles often come loose when they are installed tight against a wall or a cabinet, leaving no room for thermal expansion. People think tile is stone and stone doesn’t move. Wrong. Everything moves. When the sun hits that floor through a sliding glass door, those tiles expand. If they have nowhere to go, they push against each other. The weakest link is the bond to the floor. The tile pops up. We call it ‘tenting.’ If you are fixing a loose tile near a wall, check the baseboards. Are the tiles tucked under them with a gap, or are they jammed against the wood? You need at least a 1/4 inch gap around the perimeter. That gap is usually hidden by the trim. If your installer didn’t leave that gap, your ‘loose tile’ is just the beginning of a much bigger problem. I’ve seen whole rows of tile stand up like a deck of cards because of a lack of expansion joints. It is a structural failure disguised as a cosmetic one.
“Cementitious grout is not a structural adhesive; it is a filler that must remain under compression to survive.” – TCNA Technical Bulletin
Grout as the structural sacrificial lamb
Grout serves as the buffer between rigid tiles, and when a tile becomes loose, the grout is the first component to crack and crumble. Replacing the grout is not a fix for a loose tile, but it is a necessary final step in the repair process. I see people trying to ‘fix’ a loose tile by just rubbing more grout into the crack. That is like putting a band-aid on a broken leg. The movement will just crack the new grout within a week. You have to stabilize the tile first. Once the tile is rock solid from the injection, then you can worry about the aesthetics. You might need to refresh grout without replacing it entirely if the rest of the floor looks dingy. Match the color carefully. Grout colors change over time due to dirt and UV exposure. I usually mix a tiny bit of the new grout and let it dry on a piece of cardboard first. If it doesn’t match after it dries, I keep tweaking the mix. It is an art form, not just a chore. You want the repair to be invisible. If I can see where you worked, I didn’t do my job right.
The final word on floor stability
A floor is a system. It is not just a pile of materials. From the joists to the subfloor, the underlayment, the thin-set, and finally the tile. If any part of that system fails, the whole thing is compromised. Fixing a loose tile without tearing it up is a smart, surgical move that saves you time and money. But it requires patience. You can’t rush the drill. You can’t skim on the glue. And you certainly can’t step on it until it is cured. I tell my clients to stay off the floor for a full day. Lock the dog in the laundry room. Put a chair over the repair. If you step on that tile while the glue is wet, you’ll just pump the glue right back out of the holes. Respect the chemistry. Respect the physics. Your floor will thank you by staying quiet for another twenty years. If you’re dealing with more complex issues, like eco-friendly tile solutions in a full remodel, always remember that the prep work is 90 percent of the value. The tile is just the 10 percent everyone sees. Keep your subfloor flat, keep your bonds strong, and keep your grout sealed. That is the secret to a floor that lasts a lifetime.