
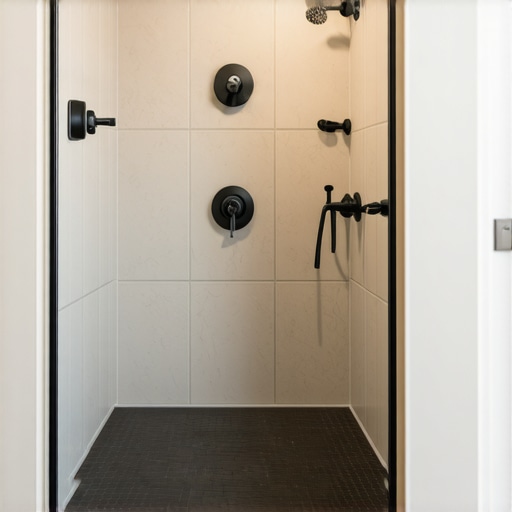
The dream of a zero-entry bathroom often dies when the first contractor quotes five figures for structural joist modification. Most guys skip the leveling compound. They think the underlayment will hide the dip. It won’t. I spent three days grinding concrete on a job last month just so the floor wouldn’t click like a castanet. That experience taught me that the secret to a curbless shower entry without major demo is not about what you remove, but how you manage the existing elevation. Achieving a curbless shower entry without major demolition requires a linear drain and a low-profile pan system. These components redirect surface water toward a single point, allowing for a zero-threshold transition by feathering out the subfloor height rather than lowering the structural floor joists. This is the reality of modern bathroom engineering. You are not just laying tile, you are manipulating gravity and surface tension. If you ignore the physics of the slope, you will end up with a flooded bathroom and ruined baseboards. I have seen it a hundred times where a homeowner wants the look of showers that wow but forgets that water does not care about your aesthetic preferences. Water follows the path of least resistance. Your job is to make that path lead exactly where you want it.
The gravity problem in modern bathrooms
Curbless shower design relies on a precise slope of 1/4 inch per foot toward the drainage point to prevent hydrostatic pressure from pushing water into the dry zone. When you bypass major demolition, you must use ramped mortar beds or pre-pitched pans that integrate with the subfloor. This requires a deep understanding of the L/360 deflection limit. Deflection is the enemy of every joint. If your subfloor flexes more than the thickness of a credit card under load, your grout will crack and your waterproofing will fail. It is not just about the tile you see on top. It is about the sandwich of materials underneath. Most people think a curbless entry is just a flat floor. It is actually a complex geometric puzzle where three different planes meet at a single transition point. If that transition is even an eighth of an inch off, you will feel it every time you walk into the room. I use a six foot level and a laser to check every square inch before I even think about opening a bag of thin-set. You have to be meticulous because the margin for error is zero.
“A floor is only as good as the subfloor beneath it; deflection is the enemy of every joint.” – Master Flooring Axiom
The physics of the invisible slope
Achieving the required pitch without dropping the floor involves using low-profile bonding flakes and top-mount linear drains that sit flush with the finished floor height. By utilizing structural foam pans, installers can create a recessed aesthetic while maintaining the structural integrity of the plywood or concrete base. The chemistry of the bond is where the real work happens. You need a polymer-modified thin-set that can handle the sheer stresses of a transition zone. When you are transitioning from a dry area to a wet area, the materials are expanding and contracting at different rates. Without the right adhesive, that movement will shear the bond right off the subfloor. I always tell my clients that they should spend more on the stuff they do not see than the stuff they do. If you want showers with a style that lasts, you invest in the membrane and the drain. The tile is just the skin. The subfloor and the waterproofing are the skeleton and the organs. If the organs fail, the skin does not matter.
| Component | Required Tolerance | Material Recommendation |
|---|---|---|
| Subfloor Levelness | 1/8 inch over 10 feet | Self-leveling underlayment |
| Shower Slope | 1/4 inch per foot | Pre-pitched high-density foam |
| Deflection Limit | L/360 or L/720 | Double-layered plywood or cement board |
| Waterproofing | 100 percent saturation | Liquid-applied or sheet membrane |
The 1/8 inch that ruins everything
A curbless entry fails most often at the transition point where the bathroom floor meets the shower pan because of capillary action. To stop water from wicking, you must install a capillary break, which is a silicone bead or metal profile that interrupts the water flow beneath the tile surface. I have walked onto jobs where the installer forgot the capillary break and the homeowners were wondering why their chic baseboard designs were rotting three feet away from the shower. It is because water was traveling through the grout lines like a straw. You have to seal the grout, but more importantly, you have to ensure the waterproofing membrane is continuous from the shower floor out into the main bathroom area by at least two feet. This is what we call the splash zone. People think the glass door stops the water. It does not. Steam condenses and drips. Feet carry water out. If your waterproofing stops at the glass, your subfloor is already dying. You need a system that treats the entire bathroom floor as a wet room, even if you are only showering in one corner. This is the difference between a DIY job and a professional installation.
- Check subfloor for levelness using a 10-foot straight edge
- Apply a high-quality primer to the plywood or concrete
- Install a linear drain along the back wall to simplify the slope
- Use a sheet-applied waterproofing membrane for better crack isolation
- Select a small format tile or a mosaic for the shower floor to accommodate the pitch
- Apply a high-performance epoxy grout to prevent moisture absorption
The chemistry of the bond
Using modified thin-set with high polymer content ensures that the tile bond remains flexible enough to handle thermal expansion in the wet zone. The molecular structure of these adhesives allows for vibration dampening and moisture resistance, which is vital for a curbless shower. When you are working with large format tiles, the vacuum created during the setting process is immense. You need to back-butter every single tile to ensure 100 percent coverage. If you leave a void, water will find it. Once water gets under the tile and sits in a void, it becomes a breeding ground for mold and can eventually blow the tile right off the floor when the temperature changes. I once saw a floor where the installer used a spot-bonding technique. Within six months, the tiles were clicking like a tap dancer’s shoes. We had to rip the whole thing out. If you want to avoid how to refresh grout without replacing it later, do the work correctly the first time. It is about the mechanical lock between the tile and the substrate. If that lock is weak, the whole system is a failure. You cannot fake a good bond. You either have it or you don’t.
“Waterproofing is not a suggestion; it is a structural mandate for the longevity of the home.” – TCNA Handbook Standards
The ghost in the expansion gap
Every tile installation needs a perimeter expansion gap to prevent tenting or cracking as the house settles and the temperature fluctuates. In a curbless shower, this gap must be filled with 100 percent silicone sealant rather than rigid grout to allow for lateral movement. Many people try to save money by using cheap caulk or just cramming grout into the corners. That is a mistake that will cost you your floor. The expansion gap is the lungs of the floor. It allows the surface to breathe. If you choke it, the pressure has nowhere to go but up. I have seen tiles pop off the floor with enough force to crack the tile next to them. It sounds like a gunshot when it happens. When you are integrating your shower with baseboards makeover ideas, you have to leave that gap. Use a color-matched silicone that stays flexible. This is especially important in regions with high humidity or extreme temperature swings. The house is moving. Your floor needs to move with it, not against it. If you fight the movement, you will lose every single time.
Water management and the capillary break
Proper water management in a low-demo curbless shower involves creating a secondary drainage path beneath the tile surface using a drainage mat or uncoupling membrane. This layer allows any moisture that penetrates the grout to migrate toward the drain instead of saturating the mortar. Information gain is found here because most people think the tile is the waterproof layer. It is not. Tile and grout are porous. The real waterproofing is the membrane underneath. If you do not provide a way for moisture to reach the drain once it is under the tile, you will get efflorescence. That is the white crusty stuff that grows on grout lines. It is caused by minerals in the water being left behind as the water evaporates. It is a sign of a failing system. You can read about grout restoration secrets to fix the appearance, but if the moisture management is wrong, the problem will return. A professional knows how to create a weep system even in a thin-bed installation. It is about understanding the microscopic movement of water molecules through the cementitious matrix of the grout. It is science, not just manual labor.
Maintenance for the zero-threshold life
Maintaining a curbless shower requires regular cleaning of the linear drain to prevent hair and biofilm from slowing the water exit speed. If the drain slows down, the water level will rise above the slope threshold and flood the bathroom floor. This is why accessibility comes with a responsibility for maintenance. You cannot just build it and forget it. I tell my clients to check their drain every month. It takes two minutes to pull the grate and clear the debris. If you ignore it, you are asking for trouble. You should also follow tile cleaning tips for a sparkling bathroom to ensure that the surface of your tile does not become a slip hazard. In a curbless shower, there is no barrier to catch you if you slip. The floor must be clean and the coefficient of friction must be maintained. Use a pH-neutral cleaner that does not leave a waxy film. A clean floor is a safe floor. If you take care of the installation, it will take care of you for decades. This is the hallmark of a master floor architect. We build for the future, not just for the photos. We build things that last because we respect the materials and the physics of the environment. If you want a sustainable home, look into eco-friendly tile solutions that offer both durability and style without compromising the health of your family or the planet.