
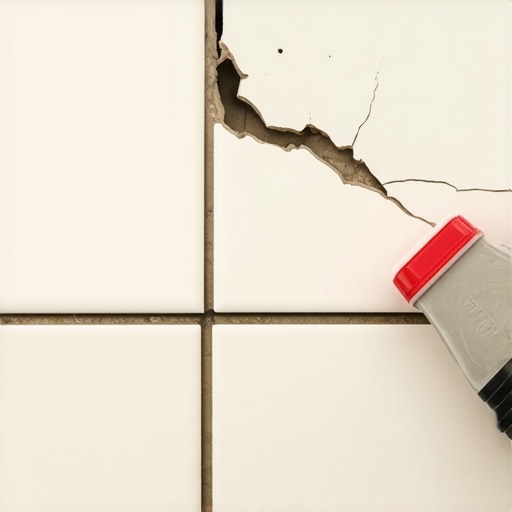
Most guys skip the leveling compound. They think the underlayment will hide the dip. It won’t. I spent three days grinding concrete on a job last month just so the floor wouldn’t click like a castanet. When you see a single hairline fracture running across a porcelain tile, it is rarely the fault of the tile itself. It is the subfloor telling a story of failure. I have seen fifteen thousand dollar installations ruined because an installer did not check the moisture vapor transmission rate of the slab. A floor is a structural system, not a sticker you slap on the ground. When we talk about repairing a broken tile without removing the surrounding grout, we are entering the territory of precision engineering. It is a slow, methodical process that requires an understanding of how polymers interact with ceramic bisque. You cannot just pry it up. You have to understand the physics of the bond.
The myth of the indestructible ceramic surface
To repair a broken tile without removing the grout, you must use a precision oscillating tool with a diamond grit blade to sever the bond between the tile and the grout line. This allows the damaged piece to be lifted without chipping the neighboring tiles. This technique is necessary when the surrounding grout is custom-colored or difficult to match. Ceramic and porcelain are incredibly strong under compression but fail quickly under tension or shear. When the subfloor moves, the tile is forced to bend. Since it cannot bend, it breaks. Most homeowners think a crack is a freak accident. Usually, it is a sign that the thin-set coverage was less than the required eighty percent for dry areas or ninety-five percent for wet areas like showers that wow. If you have a hollow sound when you tap the floor, you have a void. That void is where the crack starts.
“A floor is only as good as the subfloor beneath it; deflection is the enemy of every joint.” – Master Flooring Axiom
The physics of the mechanical bond
The bond between a tile and the substrate is both mechanical and chemical depending on the type of thin-set used during the initial installation. Modern polymer-modified mortars create microscopic tentacles that reach into the pores of the concrete and the back of the tile. If you try to pull a tile up without isolating it, those tentacles will pull on the surrounding grout, causing it to spiderweb. This is why we use a surgical approach. We are looking to break the mechanical bond of the specific damaged unit while leaving the surrounding structural matrix intact. You need to understand the Janka scale is for wood, but for tile, we look at the PEI rating. A PEI 4 or 5 tile is dense. It resists scratching, but its density makes it brittle. When it snaps, the energy release can actually loosen the grout two feet away if you are not careful. This is why grout restoration secrets are often needed after a repair to ensure the color remains consistent across the field.
Tools required for precision tile extraction
Successful tile surgery requires a specialized kit including a variable speed oscillating multi-tool, a diamond-encrusted grout blade, a heavy-duty vacuum, and a heat gun. You are not going in with a hammer and a cold chisel like a demolition crew. You are going in like a dentist. The vacuum is the most important tool here. Silica dust is a health hazard and a nuisance. You must capture the dust at the source. If you are working near baseboards makeover ideas, you should protect them with painters tape and plastic. The vibration from the oscillating tool can travel through the floor and rattle the trim. If your baseboards are high-end, the last thing you want is a scuff mark from a tool handle.
| Tool Type | Specific Purpose | Risk Level |
|---|---|---|
| Oscillating Multi-tool | Severing the grout perimeter | Moderate |
| Diamond Blade | Grinding through cured mortar | Low |
| Heat Gun | Weakening epoxy or mastic bonds | High |
| Carbide Scribe | Hand-detailing the corners | Low |
| Suction Cup Lifter | Removing the fractured pieces | Low |
The step by step guide to tile surgery
The process begins by taping off the adjacent tiles with multiple layers of blue painter’s tape to protect the finish from the oscillating tool’s footplate. Once protected, you take your diamond blade and slowly score the grout line of the broken tile. You are not trying to remove all the grout. You are only trying to create a gap of one-sixteenth of an inch between the broken tile and the grout. This gap acts as a vibration buffer. Once the perimeter is isolated, use a small drill bit with a carbide tip to drill holes into the center of the broken tile. This relieves the internal tension. You can then use the heat gun to warm the tile. Heat expands the ceramic and softens the thin-set beneath it. Start from the center and work your way out to the edges. Never pry against the good tiles. Always pry from the center of the hole you created. If the grout looks dull after this, you might need how to refresh grout without replacing it techniques to bring back the original luster.
Why your subfloor is lying to you
A subfloor that looks flat to the naked eye can still have significant dips that cause tile failure over time. I use a ten-foot straightedge on every job. If there is a gap larger than one-eighth of an inch over ten feet, the floor is not ready for tile. For large format tiles, the tolerance is even tighter. People love the look of huge thirty-six inch porcelain slabs, but they don’t realize that those tiles have zero tolerance for subfloor deflection. If the plywood or OSB subfloor flexes when you walk on it, the tile will eventually snap. This is physics. You cannot fight it with more glue. You have to stiffen the joists or add a layer of cement backer board. If you are doing a repair in a bathroom, check the showers with a style nearby for signs of moisture wicking into the subfloor. Moisture is the silent killer of floor bonds.
- Check for subfloor deflection using the L/360 standard.
- Ensure the concrete slab is fully cured for at least twenty-eight days.
- Verify that the thin-set is rated for the specific tile material.
- Use a moisture meter to check for hidden leaks behind walls.
- Always back-butter large format tiles to ensure one hundred percent coverage.
Adhesive chemistry for permanent bonds
Choosing the right mortar for the repair is the difference between a permanent fix and a tile that pops up in six months. For a single tile repair where you are trying to keep the grout intact, I often recommend a high-polymer modified thin-set or even a two-part epoxy adhesive. These materials have higher shear strength. They can bond to the old thin-set residue if you cannot scrape it all away. However, you should try to get down to the original substrate whenever possible. If the original floor was installed with a mastic, which is an organic adhesive, it will fail if it gets wet. In eco-friendly tile solutions, we see more water-based adhesives, but they still require a dry environment to cure properly. If you are repairing a tile in a high-traffic area, don’t walk on it for twenty-four hours. The chemical cross-linking of the adhesive takes time.
“Adhesion is a matter of surface energy; if the substrate is dusty, the bond is a fantasy.” – Master Flooring Axiom
The 1/8 inch that ruins everything
Precision in flooring is measured in increments of one-sixteenth of an inch, especially when dealing with expansion gaps. Most people think you should butt the tile right up against the wall. That is a mistake. Every floor needs an expansion gap at the perimeter. This is usually hidden by chic baseboard designs. If the tile is locked against a wall, and the house settles or the temperature changes, the floor will tent. Tenting is when the tiles push against each other and lift off the ground in a V-shape. If your repair is near a wall, ensure you leave that gap. Use a color-matched caulk instead of hard grout at the perimeter. This allows the floor to breathe. While most people want the thickest underlayment, too much cushion actually causes the locking mechanisms on LVP or the grout joints on tile to snap under pressure. Stiffness is your friend in the world of ceramics.
Aesthetic finishing and baseboard integration
Once the new tile is set and the adhesive has cured, you must address the visual transition between the new piece and the old grout. Even if you didn’t remove the old grout, there will be a microscopic seam. You can use a grout pen or a small amount of matching sanded caulk to bridge this gap. This keeps the repair water-resistant. If the repair happened near the wall, you might need to pull the trim. Check out tile cleaning tips to make sure the rest of the floor matches the new, clean tile. A single new tile often stands out because it lacks the years of wax and dirt buildup found on the rest of the floor. Deep cleaning the entire surface is the only way to make the repair invisible. It is the final step in the surgical process. If you follow these steps, you won’t just have a fixed tile. You will have a floor that is structurally sound and ready for another twenty years of service.