
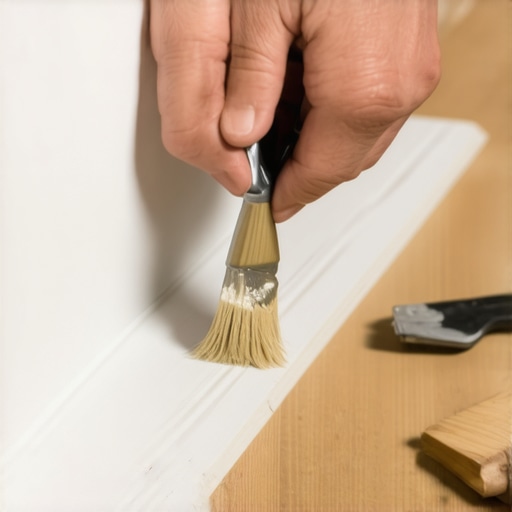
How to Fix Gaps in Baseboard Corners Without Redoing the Work
Most guys skip the leveling compound. They think the underlayment will hide the dip. It won’t. I spent three days grinding concrete on a job last month just so the floor wouldn’t click like a castanet. That same project had baseboard gaps you could lose a credit card in because the house settled three inches in the north corner. When you see a gap in a mitre joint, you aren’t just looking at a bad cut. You are looking at the story of the house. You are looking at how the humidity in the crawlspace is fighting the HVAC system. You are seeing the physical result of wood fibers losing moisture and shrinking away from their neighbors. Fixing these gaps without ripping out the trim requires a blend of chemistry and patience. I have spent 25 years on my knees fixing what other ‘contractors’ left behind. Here is how you handle it like a professional.
The physics of the mitre joint
Fixing baseboard gaps requires understanding wood movement, structural settlement, and the chemical properties of flexible fillers. You must stabilize the joint before applying any cosmetic finish to ensure the gap does not return during the next seasonal humidity shift. Identifying whether the gap is caused by shrinkage or settlement is the first step toward a permanent repair. Wood is hygroscopic. It breathes. When the winter air dries out, those fibers pull together. If you just shove some cheap wood putty in there, it will crack and fall out by April. You need a solution that has enough tensile strength to hold, yet enough elasticity to move. This is why I always tell people to check their baseboards makeover ideas before they decide to patch or replace. Sometimes the trim is so far gone it is better to start fresh, but usually, we can save it.
“A floor is only as good as the subfloor beneath it; deflection is the enemy of every joint.” – Master Flooring Axiom
Why your subfloor is lying to you
Subfloor deflection and uneven joists are the primary reasons why baseboards pull away from the wall and open up at the corners. When a floor dips even an eighth of an inch, the baseboard follows that curve, which pulls the vertical mitre joint apart at the top or bottom. Most homeowners blame the carpenter, but I blame the slab. If the concrete wasn’t ground flat, or the plywood subfloor wasn’t shimmed, the baseboard is under constant tension. This tension is a silent killer for joints. I have seen $20,000 hardwood installs ruined because the installer didn’t account for the 1/8 inch dip in the corner. When the floor sinks, the baseboard drops, and your perfect 45-degree cut becomes a 47-degree mess. To fix this without re-doing the work, you have to stop the movement first. Sometimes that means driving a trim nail into the floor plate of the wall to pull the baseboard back into alignment before you even think about caulk.
The chemistry of the perfect bead
Selecting the correct caulking agent or filler depends on the material of your baseboards and the width of the gap. For painted trim, a high-quality siliconized acrylic latex is the industry standard because it allows for 25 percent movement while remaining paintable. For stained wood, you must use a hardening wood filler or a two-part epoxy to match the grain. I don’t use the cheap tubes from the grocery store. I use resins that have a high solid count. When water evaporates out of cheap caulk, it shrinks. That is why you see those little cracks a week after a DIY job. You want a product that stays stable. If the gap is wider than a quarter inch, do not just fill it with goop. You need a backer rod. It is a foam cylinder that you stuff into the crack. It provides a ‘bond breaker’ so the caulk only sticks to the two sides of the wood, not the wall behind it. This allows the bead to stretch like a rubber band instead of tearing.
Comparison of filler materials for trim repair
| Material | Shrinkage Rate | Elasticity | Best Application |
|---|---|---|---|
| Acrylic Latex Caulk | High (20-30%) | Moderate | Small gaps in painted trim |
| Siliconized Latex | Moderate (10-15%) | High | Areas with high moisture |
| Wood Putty | Low (5%) | None | Nail holes in stained wood |
| Two-Part Epoxy | Near Zero | Low | Large structural gaps |
| Wood Slivers | None | None | Stained mitre repairs |
The 1/8 inch that ruins everything
Precision in gap repair often comes down to the ‘shave and glue’ method rather than relying solely on chemical fillers. If you have a wide gap in a stained wood corner, caulk will look like a mistake, so you need to use the actual wood species to bridge the divide. I keep a bag of offcuts from every job. I take a piece of the same oak or maple, shave a thin wedge with a block plane, and coat it in wood glue. I tap that wedge into the gap until it is tight. Once the glue dries, I flush-cut it with a Japanese pull saw. This is how you get a ‘zero-threshold’ look without pulling the boards off the wall. It is tedious. It requires a steady hand and a sharp blade. But it is the difference between a handyman job and a master craftsman result. If you are dealing with moisture-prone areas, like near showers that wow, you have to be even more careful about sealing the end grain of those wedges.
The regional humidity and the seasonal gap
Environmental conditions in your specific region dictate how much your baseboards will expand and contract throughout the year. In high-humidity zones like the Gulf Coast, wood stays swollen most of the year, while in the desert southwest, it stays bone-dry and brittle. If you fix a gap in the middle of a humid summer, expect that gap to double in size when the heater kicks on in December. I always advise waiting for a period of ‘neutral’ humidity before doing final trim repairs. Or, better yet, use a moisture meter to ensure the wood is at its equilibrium moisture content. If you are working on chic baseboard designs in a new build, give the house a full year to settle before you obsess over the corners. The wood needs to experience all four seasons before it finds its final shape.
“Expansion and contraction are not suggestions; they are the physical laws of wood fiber behavior.” – NWFA Field Manual
Step by step checklist for a professional corner fix
- Clean the joint thoroughly using a vacuum and a stiff brush to remove old dust and loose paint.
- Check for movement by pressing on the baseboard. If it moves, secure it with a 2-inch finish nail into the stud.
- Insert a backer rod for any gaps wider than 1/4 inch to prevent three-sided bonding.
- Apply a bead of siliconized acrylic caulk using a dripless caulk gun for maximum control.
- Smooth the bead with a damp finger or a specialized profiling tool using a single, continuous motion.
- Allow the filler to dry for at least 24 hours before applying touch-up paint.
- For stained wood, sand the filler flush with 220-grit sandpaper once fully cured.
When caulk is not the answer
Large structural gaps caused by poor framing or extreme house settling often require the addition of a ‘cove’ or ‘shoe’ molding rather than filler. If the gap is large enough that you can see the wall studs, no amount of caulk is going to look good. This is where we add a secondary layer of trim. A small piece of quarter-round or base shoe can cover the gap while allowing the main baseboard to remain in place. This is a common trick in older homes where the floors look like a rolling sea. You nail the shoe molding to the floor, not the baseboard. This allows the floor and the shoe to move as one unit while the baseboard stays fixed to the wall. It hides the gap perfectly and adds a bit of architectural detail. If you are also dealing with tile issues, you might want to look at grout restoration secrets to ensure the entire room looks as sharp as your new trim work.
The final word on trim integrity
Fixing gaps is about more than just aesthetics. It is about sealing the envelope of the room. Gaps in baseboards allow drafts, insects, and moisture to penetrate the wall cavity. By sealing these corners properly, you are improving the thermal efficiency of your home. Use the right tools. Don’t rush the drying times. And for heaven’s sake, keep your caulk lines thin. A thick, messy bead of caulk is a neon sign that says ‘I didn’t know what I was doing.’ If you find yourself over your head, you can always contact us for professional advice. A floor is a structural engineering challenge, and the baseboard is the final piece of that puzzle. Treat it with the respect it deserves.