
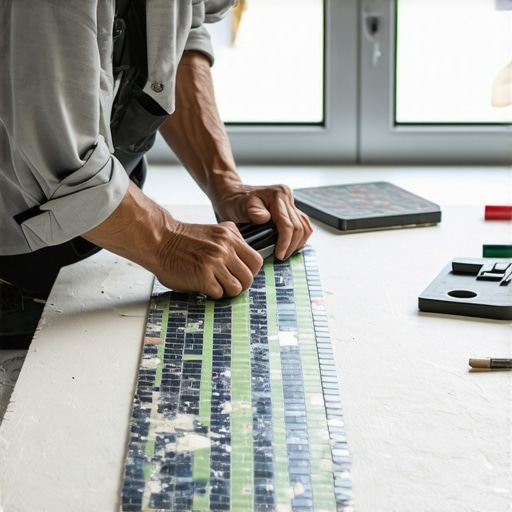
The trap of the flexible mesh
To cut mosaic tile sheets without losing your mind, you must secure the mesh backing onto a rigid substrate such as a piece of cement board or thin plywood before making your pass through the wet saw. This prevents the individual small tiles from vibrating or collapsing into the blade channel, which is the primary cause of shattered edges and crooked grout lines. Most guys skip the leveling compound. They think the underlayment will hide the dip. It won’t. I spent three days grinding concrete on a job last month just so the floor wouldn’t click like a castanet, and that same level of obsessive prep applies to mosaic sheets. If your subfloor isn’t flat, those tiny tiles will follow every hump and hollow. When you try to cut a sheet that is already stressed by a wavy subfloor, the mesh stretches. That stretch is your enemy. You think you are cutting a straight line, but the tension in the fiberglass mesh is pulling the tiles out of alignment the second the blade heat hits them. I have seen guys ruin two hundred dollars worth of glass tile in ten minutes because they didn’t respect the physics of the mesh. You need to treat the sheet as a single solid unit during the cutting process. Use painters tape across the cut line on both the top and bottom of the sheet. This creates a sandwich that locks the tiles in place. It stops the ‘chatter’ that happens when the diamond blade hits the hard surface of the tile. I smell like wet concrete and burnt diamond segments most days, and I can tell you that the difference between a pro job and a disaster is often just a roll of tape and a scrap of plywood. If you are working on showers with a style trendy ideas for small bathrooms, you know that every cut is visible. There is no hiding a bad mosaic cut in a small space.
Why your wet saw is eating your glass
A wet saw will destroy glass mosaic tiles if you use a standard notched porcelain blade, as the vibration from the teeth will cause micro-fractures along the edge of the glass. You must use a continuous rim diamond blade specifically rated for glass, which uses a finer grit and a softer metal bond to slowly grind away the material rather than chipping it. When the blade spins at 3,450 RPM, it generates immense centrifugal force. If the diamond matrix on the blade is too aggressive, it will grab the edge of the glass tile and pull a chunk out. This is not a cutting action. It is a grinding action. The water is there for two reasons. It cools the blade to prevent the metal core from warping and it flushes the glass powder out of the kerf. If your water flow is weak, the glass powder turns into a slurry that actually wears down the blade faster. I have seen rookies try to dry cut mosaics. It is a fool’s errand. The heat buildup causes the glass to expand at a different rate than the mesh backing, leading to an immediate crack. You should also check the table of your saw. If the slot where the blade passes through is too wide, the small tiles will fall into the hole. I usually zip tie a piece of thin plastic or wood over the table to create a zero clearance insert. This supports the tile all the way to the edge of the cut. This is the same level of care you should take with eco friendly tile solutions for sustainable homes in 2025 because high end materials deserve high end techniques.
“A floor is only as good as the subfloor beneath it; deflection is the enemy of every joint.” – Master Flooring Axiom
The physics of the mesh backing
The chemical composition of the adhesive used to bond tiles to the mesh backing determines how the sheet will react to water and heat during the cutting process. Most manufacturers use a water soluble glue for the mesh, which means that if you soak the sheet in the wet saw tray for too long, the tiles will begin to fall off before you even finish the cut. This is the nightmare scenario for any installer. You are halfway through a diagonal cut and the bottom three rows of tiles just slide off into the reservoir. To avoid this, you work fast and you dry the sheets immediately after cutting. Use a compressed air hose or a dry microfiber towel to get the water out from between the tiles. If you leave the moisture there, the glue softens and the sheet loses its dimensional stability. You are no longer installing a sheet. You are installing a hundred individual little squares, which takes ten times as long. This is why I prefer the dot-mounted mosaics where the tiles are joined by small plastic dots rather than a full mesh. They handle the water better. When you are looking at tile cleaning tips for a sparkling bathroom in 2025, you have to remember that the longevity of that clean look starts with how well that mesh was handled during the install. If the glue was compromised, those tiles will eventually pop loose under the pressure of a scrub brush.
| Tool Type | Best For | Risk Level | Speed |
|---|---|---|---|
| Wet Saw (Glass Blade) | Linear cuts across full sheets | Medium (vibration) | Fast |
| Manual Tile Nippers | Irregular shapes and corners | High (shattering) | Slow |
| Score and Snap | Straight cuts on large mosaics | Low | Medium |
| Rotary Tool | Outlets and circular holes | High (heat) | Very Slow |
Manual nippers and the art of the nibble
Using manual tile nippers requires a technique known as ‘nibbling’ where you take small bites of the material rather than trying to snap the whole piece at once. This localized pressure prevents the stress from radiating through the tile and causing a spiderweb fracture that ruins the entire piece. I carry a pair of carbide tipped nippers in my back pocket. They are the most used tool in my bag. For mosaics, you want the wheeled nippers. They work like a pizza cutter and a pair of pliers had a baby. You apply pressure and the wheels score and squeeze the glass simultaneously. It is about finesse, not strength. If you squeeze too hard, you crush the edge. You want to hear a crisp ‘tink’ sound. That is the sound of a clean break. I have spent hours on my knees nibbling around toilet flanges and pipes. It is a slow process, but it is the only way to get a professional finish. This attention to detail is what separates a master from a handyman. It is the same reason you should look into how to refresh grout without replacing it when the install is old. You have to respect the material. You cannot bully glass. It will win every time.
The 1/8 inch that ruins everything
Maintaining a consistent one eighth inch grout joint between the individual tiles and the sheets themselves is the most difficult part of a mosaic installation. If you do not account for the thickness of the factory edge, your sheets will ‘stack’ and create a visible line where one sheet ends and the next begins. This is the hallmark of a bad DIY job. You can see the grid of the sheets from the doorway. To fix this, you have to use a staggered layout or carefully trim the mesh so the sheets interlock. I use spacers, but I don’t use the cheap crosses. I use wedges. They allow me to micro-adjust the gap. A mosaic sheet is never perfectly square. You have to massage it into place. I have seen guys try to force it. They end up with a ‘ghost’ in the expansion gap where the tiles are squeezed so tight there is no room for grout. Then, when the house shifts in the winter, those tiles buckle. Grout restoration secrets for long lasting results always point back to the original spacing. If the spacing is wrong, the grout will crack. It is a physical certainty.
“Thermal expansion is not a suggestion; it is a law that will break your tile if you do not provide an expansion joint at the perimeter.” – Master Flooring Axiom
The checklist for a perfect cut
- Check the subfloor for flatness within 1/8 inch over 10 feet.
- Install a new diamond glass blade on the wet saw.
- Tape the cut line on both sides of the mosaic sheet.
- Use a sacrificial board under the sheet during the cut.
- Dry the sheet immediately with compressed air to save the glue.
- Test fit the cut before applying any thin-set.
- Clean any squeezed-up thin-set out of the joints before it cures.
The chemistry of the bond and final thoughts
The bond between the mosaic and the wall depends on the transfer of thin-set from the trowel to the back of the tile, which is often obstructed by the very mesh that holds the sheet together. To ensure a 95 percent coverage rate required for wet areas, you must use a small notch trowel and then ‘back-butter’ the sheet if necessary. I hate seeing people just slap a sheet onto the wall. You have to press it in with a rubber grout float to collapse the ridges. If you don’t, you will see the trowel lines through translucent glass tiles. It looks amateur. The adhesive chemistry matters too. For glass, you need a high polymer modified thin-set. Standard mortar won’t grab the smooth surface of the glass. It will just slide off. I have walked into jobs where the tiles were literally falling off the wall because the installer used the wrong mud. Once the tile is set, you have to think about the transition. Chic baseboard designs that transform rooms in 2025 can hide the expansion gap at the bottom of a wall, but in a shower, you need a clean silicone bead. Don’t use grout in the corners. Grout doesn’t flex. Silicone does. If you follow these steps, you won’t lose your mind. You will just have a floor that lasts as long as the house. If you need more help, you can always contact us for professional advice. The privacy policy on our site explains how we handle your data, but my policy on floors is simple. Do it right the first time or don’t do it at all. The physics of the subfloor and the chemistry of the glue are the only things standing between a beautiful room and a expensive tear out. Take your time with the cuts. Respect the mesh. Watch your fingers.