
The subfloor secret and the ruined shower
Most guys skip the leveling compound. They think the underlayment will hide the dip. It won’t. I spent three days grinding concrete on a job last month just so the floor wouldn’t click like a castanet. But it is not just about the floor. I remember a job where a guy tried to install a custom glass door in one of those showers that wow modern designs for 2025 and he used a standard hammer drill on a high fired porcelain. He did not just crack the tile. He shattered the entire corner because he did not understand the physics of vibration. He treated a glass like surface like it was a piece of pine. The sound of that crack is something you never forget. It is a sharp, expensive snap that means you are tearing out the wall. To drill through ceramic tile without cracking you must use diamond tipped bits, maintain low RPM speeds, and provide constant water cooling to manage thermal expansion. Ceramic is a brittle material with high compressive strength but zero ductility. If you apply lateral force or heat, the molecular bonds fail. You are not really drilling in the traditional sense. You are grinding. You are eroding the silica and clay particles one micron at a time. If you rush, you lose. I have spent 25 years with sawdust under my nails and thin-set in my pores. I know that the difference between a pro and a hack is the patience to let the tool do the work.
The ghost in the expansion gap
Drilling ceramic tile requires an understanding of thermal dynamics and material hardness to prevent catastrophic radial cracking. You must identify the Mohs hardness scale rating of your specific tile before selecting a carbide or diamond masonry bit. Most residential ceramic falls between a 5 and 7 on the scale. When you start that drill, you are generating friction. Friction creates heat. Heat causes the drill bit to expand at a different rate than the tile. If that heat cannot escape, the tile undergoes localized thermal shock. The expansion gap in your thinking should be as wide as the gap you leave at the wall. This is why we use masking tape. It is not just to keep the bit from walking. It acts as a friction buffer. It gives the bit a chance to bite into the glaze without skidding across the surface like a puck on ice. I have seen guys try to go dry. They end up with a burnt bit and a ruined backsplash. You need to keep it wet. A small sponge or a spray bottle is your best friend here. If you see smoke, you have already failed. The glaze is the hardest part of the tile. Once you penetrate that 0.5 millimeter layer, the rest of the clay body is softer, but that is where the risk of blowout occurs.
“A floor is only as good as the subfloor beneath it; deflection is the enemy of every joint.” – Master Flooring Axiom
Why your subfloor is lying to you
Subfloor stability and deflection ratings are the primary causes of tile failure during and after the drilling process. If there is a void behind the tile, the pressure of the drill will cause the ceramic to cave into the empty space. This is why thin-set coverage is the most important part of the install. You need 95 percent coverage for wet areas. If you have a hollow spot, you are drilling into a bridge with no supports. It will collapse. When you are working near baseboards makeover ideas to elevate your space, you have to be extra careful. The transition areas often have less mortar. I always tap the tile first. I listen for that hollow thud. If it sounds like a drum, I know I have to be incredibly light with the pressure. I use a diamond hole saw for anything over half an inch. The physics change when you go larger. A standard bit creates a single point of pressure. A hole saw distributes that pressure along a circular rim. This reduces the PSI on any given point of the ceramic. It is the same reason you do not wear high heels on a soft wood floor. You want to spread the load. If the subfloor has any flex, that tile is under tension. The moment you introduce a hole, you are giving that tension a place to release. That release manifests as a crack.
The chemistry of carbide and diamond
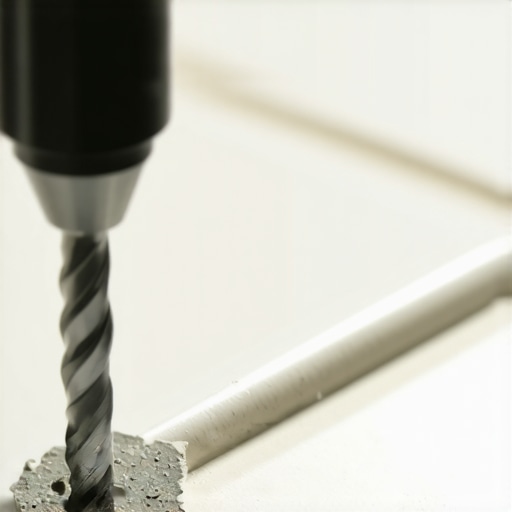
Selecting the correct drill bit involves analyzing the abrasive properties of polycrystalline diamond versus tungsten carbide. For standard ceramic tile, a spear-point carbide bit is often sufficient. However, for porcelain, which is fired at higher temperatures and is much denser, only a diamond bit will suffice. Porcelain tile has a water absorption rate of less than 0.5 percent. This density makes it incredibly resistant to wear but also incredibly difficult to penetrate. The diamond particles on the bit act as tiny knives. They shave the tile. If you use a hammer drill setting, you are dead in the water. The hammering action is designed for concrete, which is aggregate and cement. Ceramic is a vitrified solid. Hammering it is like hitting a glass bottle with a pebble. It will shatter. You need a steady, rotating pressure. I keep my drill in the lowest gear. I want torque, not speed. Speed kills bits. It glazes over the diamonds and makes them smooth. Once a diamond bit is smooth, it is a paperweight. You can sometimes revive them by drilling into a dressing stone or a piece of scrap concrete, but it is better to just keep it cool from the start.
| Material Type | Mohs Hardness | Recommended Bit | Cooling Method |
|---|---|---|---|
| Glazed Ceramic | 5 to 6 | Carbide Spear Point | Occasional Water |
| Porcelain | 7 to 8 | Diamond Grit Hole Saw | Continuous Water |
| Natural Stone | 3 to 9 | Diamond Core Bit | Water Bath |
| Glass Tile | 6 | Diamond Drill Bit | Submerged |
The 1/8 inch that ruins everything
Precision layout and pilot holes prevent chipped edges and misaligned fixtures in showers with a style trendy ideas for small bathrooms. If you are off by an eighth of an inch, your trim plate won’t cover the hole. You cannot just ‘stretch’ a hole in tile. You get one shot. I use a diamond pilot bit for everything. It is a 3/16 inch bit that creates a guide. Once the guide is through, I move up to the final size. This minimizes the torque on the tile. When you are working with eco-friendly tile solutions for sustainable homes in 2025, you might be dealing with recycled glass content. These materials are even more sensitive to heat. You have to be a surgeon. I also recommend checking your grout restoration secrets for long-lasting results to see if you can drill into the grout line instead of the tile face. Drilling into grout is easier, but it can lead to tile pop-outs if the grout is old and brittle. If you must drill the tile, stay at least two inches away from the edge. The edges are the weakest points. The internal stresses of the tile are highest at the perimeter. If you drill too close to the corner, the crack will travel to the nearest edge almost instantly. It is physics. You are creating a stress concentrator. It is like a scored line on a piece of glass.
“The integrity of the glaze determines the longevity of the aesthetic; never breach it without a cooling agent.” – Tile Council of North America standards
- Mark the spot with a cross of masking tape to prevent bit wandering.
- Set the drill to the non-hammer, rotary-only mode.
- Apply constant water using a spray bottle or a wet sponge held against the bit.
- Start at a 45-degree angle if using a hole saw to create a notch, then level out.
- Reduce pressure as you reach the back of the tile to prevent blowout into the wall.
- Clear the dust frequently to prevent the bit from binding.
The mechanics of the blowout
Blowout occurs when the drill bit exits the rear of the tile body and enters the substrate, causing a conchoidal fracture. This is the same type of fracture you see on an arrowhead. The front of the hole looks perfect, but the back has a massive chunk missing. This can weaken the bond between the tile and the wall. To prevent this, you have to ease up. As you feel the resistance change, you should stop pushing. Let the weight of the drill be the only force. This is especially vital when installing chic baseboard designs that transform rooms in 2025. If you blow out the tile behind a baseboard, you might lose the structural integrity needed for the nail or screw to hold. You also need to be aware of what is behind the wall. I have seen guys drill straight through a tile and into a copper water line. Use a depth stop. If you do not have one, wrap a piece of electrical tape around your bit at the desired depth. It is a simple trick that saves a lot of money. If you are drilling into showers that wow modern designs for 2025, you are likely hitting a waterproof membrane like Kerdi or Wedi. You must seal that hole with a high quality silicone sealant before you drive your screw in. If you don’t, water will find its way behind the tile, and you will be looking for how to refresh grout without replacing it or worse, dealing with mold in six months.
The final transition
Sealing the penetration and setting the anchor is the final step in a professional tile installation. Once the hole is clean, you need to remove all the slurry. That white paste is ground up ceramic and water. It is abrasive. If it stays in the hole, it can prevent the anchor from gripping. I use a vacuum with a brush attachment. Then, I insert a plastic or lead anchor. Do not use wood plugs. They rot. If you are in a wet area, fill the hole with 100 percent silicone before the anchor goes in. This creates a gasket. When you tighten the screw, the silicone is squeezed into any micro-fissures. This is the level of detail that separates a master from an amateur. We are not just making it look good for the photos. We are making it last for thirty years. I have seen tile cleaning tips for a sparkling bathroom in 2025 that forget to mention that the biggest source of grime is often the moisture trapped behind poorly sealed fixtures. Don’t be that guy. Take the extra five minutes to do the prep. Your knees and your reputation will thank you. The floor is a system. The wall is a system. Every hole you drill is a potential failure point in that system. Treat it with the respect it deserves. Stop looking at your watch and start looking at the bit. If it is glowing, you are failing. If it is cool and the water is clear, you are a craftsman.