
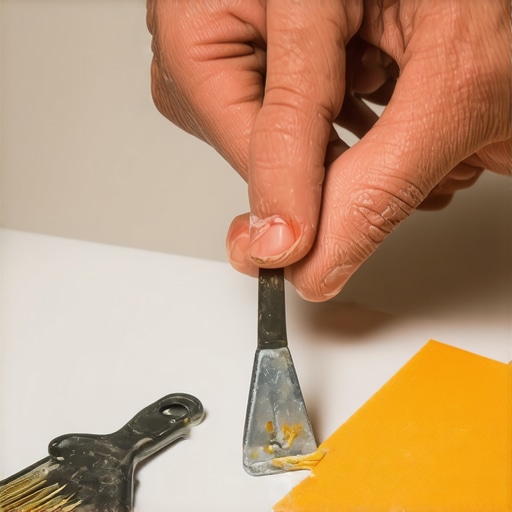
The structural anatomy of a porcelain crater
A chip in a ceramic bathtub is a breach of the structural integrity of the fixture that exposes the underlying steel or cast iron to immediate oxidation and eventual failure. This is not a cosmetic inconvenience. It is a chemical vulnerability. When the factory-fired glass coating is compromised, the moisture in the bathroom begins to penetrate the substrate. In a cast iron tub, this leads to the slow creep of rust. In a steel tub, it leads to rapid corrosion that can eat through the metal in a matter of years. To fix a chip correctly, you must understand the physics of the bond. You are not just filling a hole. You are creating a moisture-proof seal that must withstand the thermal expansion of the tub and the weight of hundreds of gallons of water. I spent three days grinding concrete on a job last month just so the floor wouldn’t click like a castanet, and I apply that same obsessive logic to tub repair. Most guys skip the prep. They think the glaze will hide the dip. It won’t. If you do not grind away the microscopic oxidation at the edge of the chip, your patch will delaminate before the season changes. I once saw a homeowner try to use white nail polish on a three-inch crater. Within a month, the rust had spread under the surrounding enamel, lifting the original coating like a scab. That is what happens when you ignore the chemistry of the substrate. You need to treat the metal with the same respect you give a subfloor before laying wide-plank oak. Humidity and surface tension are the enemies here. If the bathroom has been used in the last twenty-four hours, there is moisture trapped in the pores of the ceramic. You have to dry it out with a heat gun or wait forty-eight hours with a dehumidifier running. Only then can you begin the molecular bonding process. This process requires a specific sequence of degreasing, mechanical abrasion, and chemical curing. You cannot rush the clock when you are dealing with resins. If the temperature is below sixty-five degrees, the molecular chains will not cross-link properly, leaving you with a rubbery mess that will peel off the moment you scrub it with tile cleaning tips for a sparkling bathroom in 2025. We are looking for a rock-hard finish that mimics the original glass.
The physics of the repair bond
Repairing a bathtub requires a chemical transition from a liquid resin to a solid polymer that matches the thermal expansion coefficient of the original porcelain. If the patch material expands faster than the tub when you turn on the hot water, the bond will shear. Most retail kits are polyester-based, which is cheap but brittle. Professional-grade repairs use an epoxy-acrylic hybrid. These hybrids offer the hardness of epoxy with the UV resistance and color stability of acrylic. You have to understand that ceramic is essentially a layer of glass melted onto metal at two thousand degrees. You are trying to replicate that bond with cold-set chemistry. It is a tall order. To achieve it, the surface must be surgically clean. I use a multi-stage solvent approach. First, I use Trisodium Phosphate to strip the soap scum. Then, I follow up with pure acetone to remove any residual oils from the manufacturing of the tub itself. Do not use nail polish remover. It contains perfumes and oils that will kill your bond. You need technical-grade solvents. Once the area is clean, you have to create a mechanical key. This means sanding the interior of the chip and about an eighth of an inch of the surrounding enamel. You are looking to create a frosted glass look. This increases the surface area for the resin to grab onto. Without this mechanical key, the resin is just sitting on top of the glass, waiting for a reason to fall off. The science of adhesion relies on Van der Waals forces, and those forces require a clean, high-energy surface. If you touch the area with your bare finger after cleaning it, the oils from your skin will create a barrier that prevents a permanent bond. Use nitrile gloves and keep your hands off the work area. This is why I tell people that the prep work is ninety percent of the job. The actual application of the resin takes five minutes, but the prep takes an hour. If you ignore the details, you are just wasting your time and mine.
“A floor is only as good as the subfloor beneath it; deflection is the enemy of every joint.” – Master Flooring Axiom
Chemical selection for long term durability
Choosing the right repair compound involves balancing the viscosity of the liquid against the depth of the chip to prevent air entrapment and shrinkage. While most people want the thickest underlayment or the thickest patch, too much volume actually causes the resin to pull away from the edges during the exothermic curing process. If you have a deep crater, you must apply the material in thin layers. One heavy application creates heat that can lead to internal stresses. Those stresses manifest as micro-cracks that will eventually collect dirt and turn gray. I prefer a two-part catalyst system. It is more work to mix, but it is far superior to the one-part air-dry tubes. The one-part tubes rely on solvent evaporation, which leads to significant shrinkage. A two-part system creates a chemical reaction that fills the void without shrinking. This is critical for keeping the repair flush with the surrounding surface. If the patch sinks, it will create a shadow line that makes the repair obvious. We want a repair that is invisible to the eye and the touch. This requires a precise ratio of resin to hardener. I use a digital scale because a drop too much or too little can change the shore hardness of the final product. You want it to be hard enough to resist scratching but flexible enough to move with the tub. It is a delicate balance that separates the mechanics from the DIYers. When you look at showers that wow modern designs for 2025, you will notice they all have one thing in common. They are maintained with an eye for structural detail. A tub with a yellowed, peeling patch is a sign of a house that is being allowed to fail from the inside out. You have to treat the tub as the foundation of the bathroom. If the tub fails, the water gets into the subfloor, and then you are calling me to replace fifteen hundred square feet of hardwood because your joists are rotting.
| Repair Material | Bond Strength | Cure Time | Color Stability |
|---|---|---|---|
| Polyester Resin | Moderate | 1 Hour | Poor (Yellows) |
| Pure Epoxy | High | 24 Hours | Fair |
| Acrylic Hybrid | High | 12 Hours | Excellent |
| One-Part Glaze | Low | 4 Hours | Moderate |
The sanding ritual for a glass finish
Sanding the repair is a progressive reduction of surface friction that requires a transition through five distinct grits of wet-and-dry sandpaper to achieve a mirror finish. You start with 400 grit to level the high spots. This is where most people quit, but you are just getting started. You have to use water. Dry sanding generates heat that can scorch the resin. Once the patch is level, you move to 600, then 1000, 1500, and finally 2000 grit. By the time you reach 2000, the surface should feel like silk. This is the same process we use for high-end automotive finishes. If you skip a grit, you will leave scratches that will eventually show up as dark lines when soap scum and minerals from the water build up. After the final sanding, you need a polishing compound. I use a fine-grit automotive rubbing compound followed by a high-grade carnauba wax. This wax provides a temporary sacrificial layer while the resin continues to reach its full hardness over the next week. You cannot use the tub for at least twenty-four hours, but the chemical hardening actually continues for seven days. During this time, do not use any harsh chemicals or abrasive cleaners. Use only mild soap and water. If you treat the patch like a fresh paint job on a Cadillac, it will last for a decade. If you treat it like a rental property, it will fail in six months. It is about pride of craft. Even when you are working on something as small as a chip, you are defending the home against the elements. This attention to detail is what defines a Master Architect. We see the microscopic reality and we act accordingly. The same logic applies when you are looking at chic baseboard designs that transform rooms in 2025. Every transition matters. Every edge must be sealed. If you leave a gap, the moisture will find it.
- Remove all loose enamel using a carbide scraper.
- Clean the area with Trisodium Phosphate to remove oils.
- Degrease with technical-grade acetone on a lint-free cloth.
- Sand the chip and surrounding area with 400 grit paper.
- Mix the two-part resin according to the manufacturer weight ratio.
- Apply the resin in thin layers using a high-density foam applicator.
- Wet-sand from 400 grit up to 2000 grit until smooth.
- Buff with a fine polishing compound and a microfiber cloth.
Maintaining the bathroom ecosystem
The longevity of a bathtub repair is dictated by the chemical environment of the entire bathroom including the grout and the surrounding tile surfaces. If your grout is failing, water is getting behind the tub. If water gets behind the tub, it will eventually find its way under your patch from the backside. This is why I am always harping on people to how to refresh grout without replacing it. You have to keep the entire envelope sealed. A bathroom is a wet room. It is a high-stress environment for building materials. The constant cycle of heat and moisture causes everything to expand and contract. Your tile, your grout, and your tub are all moving at different rates. If you have a solid, site-finished repair, it will stay put, but only if the surrounding materials are not shifting. Check your caulking. If the caulk between the tub and the tile is cracked, moisture is getting into the wall cavity. That moisture increases the local humidity and can interfere with the long-term bond of your tub patch. It is all connected. You cannot fix one thing in a vacuum. You have to look at the whole system. From the baseboards makeover ideas to elevate your space to the way the floor meets the tub, every joint is a potential failure point. I see guys all the time who spend a fortune on a tub repair and then ignore the fact that their shower door is leaking onto the floor. That water sits there, wicks into the subfloor, and creates a humid environment that keeps the tub surface from ever truly being dry. You have to be smarter than the water. You have to anticipate where it wants to go and block it with the right chemistry and the right prep. That is how you build a home that lasts for generations instead of one that falls apart in ten years. Treat your tub like the precision instrument it is, and it will serve you well. Ignore the details, and you will be paying someone like me to tear it all out and start over from the joists up.
“Deflection is the enemy of every joint, and moisture is the catalyst for every failure.” – Master Flooring Axiom