
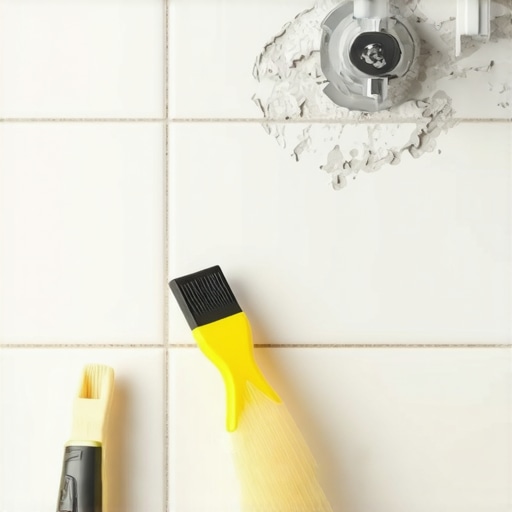
Fixing the Void in Your Shower Enclosure with Professional Precision
Most guys skip the leveling compound. They think the underlayment will hide the dip. It won’t. I spent three days grinding concrete on a job last month just so the floor wouldn’t click like a castanet. I once walked into a luxury bathroom where a plumber’s apprentice had accidentally punched a hole through the tile with a wrench while installing a handheld wand. He tried to cover it with a thick glob of silicone and a plastic plate. Six months later, the mold was eating the wall studs and the customer was looking at a five thousand dollar mold remediation bill. A hole in a shower wall is not a cosmetic blemish. It is a catastrophic failure of the moisture management system. You have to treat it with the same engineering rigor as a bridge foundation. If you do not seal the puncture at the substrate level, water will migrate through capillary action and rot your framing from the inside out. This is why I have spent twenty five years preaching the gospel of proper backing and waterproofing. A floor or a wall is only as good as the skeleton underneath it. In this guide, I will break down the chemistry and physics of a permanent patch that survives for decades rather than weeks.
The structural reality of a shower puncture
Patching a shower wall hole requires immediate attention to the moisture barrier and the rigid substrate to prevent long term rot and mold growth. You cannot simply slap a patch over a hole in a wet environment because water is a relentless solvent that finds every path of least resistance. When a tile is cracked or a hole is punched through the backer board, the integrity of the entire wet zone is compromised. You are looking at a breach in the defense. The first step involves assessing the depth of the damage. If the hole only affects the tile surface, you are lucky. If it has breached the cement board or the foam substrate, you are now dealing with a structural repair. Most modern showers that wow in the showrooms today are built on a system of integrated layers. Breaking one layer breaks them all. You need to understand that thin-set is not a waterproof membrane. It is a cementitious adhesive. It absorbs water. Without a solid barrier behind it, that water sits against your plywood or studs. That is how you end up with a sagging floor or a crumbling wall. You must cut back the damage to the nearest stable point of attachment. This often means removing more tile than you originally intended. It is better to have a four inch hole that is correctly patched than a one inch hole that leaks for a decade.
Why your substrate is the true hero
The underlying layer of your shower wall determines if your patch will hold or fail within a year under constant thermal expansion and contraction. In the tile industry, we live and die by the Tile Council of North America standards. If your substrate flexes, your grout will crack. If your grout cracks, water gets in. It is a simple, brutal cycle. Most builder-grade homes use green board, which is just water-resistant drywall. It is garbage. If you find green board behind your hole, you need to replace that section with a proper cement-based backer or a high-density foam board like Kerdi-Board. These materials do not swell when they get wet. They provide a rigid surface for the thin-set to bite into. When you cut your patch, you need to ensure the edges of the existing board are clean and dust-free. Dust is the enemy of adhesion. I use a vacuum with a HEPA filter and then wipe the edges with a damp sponge. You are looking for a clean, mechanical bond. If you are dealing with a small puncture from a misplaced screw or a drill bit, you might get away with an epoxy filler, but for anything larger than a dime, you are looking at a full substrate replacement. This is the difference between a pro and a hack. The hack fills the hole with caulk. The pro rebuilds the wall.
“A floor is only as good as the subfloor beneath it; deflection is the enemy of every joint.” – Master Flooring Axiom
The microscopic battle of water and cement
Chemical bonding at the site of a repair requires a specific moisture balance and polymer concentration to ensure the new material integrates with the old. When you mix thin-set, you are starting a chemical reaction. This is the formation of Calcium Silicate Hydrate crystals. These crystals grow into the pores of your substrate. If the existing substrate is too dry, it will suck the water out of your new thin-set before the crystals can grow. This results in a weak, chalky bond. I always lightly mist the edges of the repair area before applying my mortar. This is called SSD, or Saturated Surface Dry. It ensures the bond happens at the molecular level. For the patch itself, use a modified thin-set that contains high levels of latex or polymer. This allows for a tiny bit of flexibility. Showers are dynamic environments. They heat up when you run the hot water and cool down when you turn it off. This thermal movement can snap a rigid, brittle patch. The polymers in the mortar act like tiny shock absorbers. This is the same logic we use when installing eco-friendly tile solutions in high-traffic areas. You want strength, but you also want resilience. Don’t buy the cheap five dollar bag of mortar. Spend the twenty dollars on the professional grade stuff that has a high PSI rating and excellent shear strength.
| Material | Cure Time | Water Resistance | Flexural Strength |
|---|---|---|---|
| Modified Thin-set | 24 Hours | High | 450 PSI |
| Hydraulic Cement | 5 Minutes | Extreme | 3000 PSI |
| Two-Part Epoxy | 12 Hours | Total | 6000 PSI |
| Standard Grout | 48 Hours | Low | 150 PSI |
Selecting the right thin set for the repair
Choosing a mortar with high polymer content is the only way to ensure the patch remains waterproof and bonded to the existing substrate. Not all bags of cement are created equal. You need to look for a mortar that meets or exceeds ANSI A118.4 standards. This ensures the product can handle the moisture and the temperature swings of a shower. When I am doing a quick patch, I look for a rapid-setting mortar. This allows me to set the tile and grout it within the same day. However, you have to be fast. Rapid-set mortar has a pot life of maybe twenty minutes. If you are fumbling around with your tools, it will turn into a rock in your bucket before you even get it on the wall. I always pre-cut my tile and dry-fit everything before I even crack the bag of thin-set. Precision is not an accident. It is a result of preparation. If you find that the hole is in a spot where you can’t reach a stud for support, you have to use a backer patch. This involves sliding a piece of wood or cement board behind the hole and screwing it into the existing wall to create a flange. This gives your patch something to sit on. Without that flange, the patch will eventually push in and the grout will fail. It is basic physics. You need a solid foundation.
The geometry of a perfect tile patch
Matching the layout and the grout lines of the existing shower requires a meticulous approach to spacing and tile thickness. You can’t just shove a tile into a hole and hope for the best. You need to match the depth of the original installation. Sometimes the old tiles were installed on a thick bed of mud. Other times they are on a thin layer of adhesive. If your patch tile sits too deep, you will have a pool of water sitting in that dip. If it sits too high, it is a toe-stubber or an eyesore. I use plastic spacers to ensure the grout lines are perfectly aligned. Even a sixteenth of an inch of variance will stand out like a sore thumb once the grout is dry. If you can’t find a matching tile, you have to get creative. This is where showers with a style for small bathrooms often incorporate a decorative accent or a metal plate to cover the repair area if an exact tile match is impossible. If the surrounding grout is dirty, your new grout will look too bright. You should check out grout restoration secrets to learn how to blend the old with the new. A good patch should be invisible to the naked eye. If I can see where you worked, you didn’t do it right.
“The integrity of the grout joint is the final line of defense against subfloor saturation and mold colonization.” – TCNA Quality Control Standards
Avoiding the common traps of DIY kits
Professional results in shower repair cannot be achieved with generic hardware store kits that rely on weak adhesives or plastic fillers. Those ‘as seen on TV’ repair kits are a joke. They use a light-cure resin that looks like plastic and turns yellow after a month of exposure to soap and shampoo. If you want a real fix, you use real materials. This means cement, ceramic, and high-quality sealants. One of the biggest mistakes I see is people using silicone as a filler. Silicone is a great sealant for joints, but it is a terrible filler for holes. It has no structural integrity. It will peel away from the edges of the tile and allow water to seep behind it. Another trap is ignoring the baseboards if the hole is near the floor. Water travels down. If you have a hole in the wall, check the floor and the baseboards for signs of swelling. You might need some baseboards makeover ideas if the moisture has already wicked into the trim. Always think three steps ahead of the water. Water wants to rot your house. Your job is to stop it. Don’t be lazy with the waterproofing. Apply a liquid membrane like RedGard over your patch before you set the tile. It creates a rubberized layer that is completely impervious to water. It is like an insurance policy for your wall.
The essential checklist for a pro patch
- Diamond-grit oscillating tool blade for clean cuts through ceramic and stone
- ANSI A118.4 polymer-modified rapid-setting thin-set mortar
- Liquid waterproofing membrane for the substrate interface
- Replacement tile that matches the original dye lot and thickness
- High-density grout with antimicrobial properties
- Closed-cell foam backer rod for any expansion joints
- Polymer-based grout sealer for final protection
Final inspection and curing protocols
The longevity of your shower repair depends entirely on the curing environment and the final application of a high quality sealer. Do not turn the shower on the moment you finish. I don’t care if the bag says it sets in four hours. Give it twenty four. The cement needs time to complete its hydration process. If you hit it with water too early, you will wash out the pigments in the grout and weaken the bond of the thin-set. Once it is fully cured, you need to seal the grout. Grout is porous. It is essentially a hard sponge. If you don’t seal it, it will absorb body oils, soap scum, and dirty water. If you are looking for tips on keeping the rest of the area clean while the patch sets, look into tile cleaning tips for a bathroom to ensure the surrounding area is as pristine as your new patch. Finally, check your work with a level. The patch should be flush. No lippage. No sharp edges. If you follow these steps, you won’t be calling me in six months to tear out the whole wall. You did it right the first time. That is the way of the master installer. We don’t do things twice. We do them once and they last forever. If your baseboards look worn out after the repair, you can find chic baseboard designs to finish the room. A clean repair is a happy home. Keep your tools clean and your levels true. Your shower depends on it. Most people ignore the small cracks until they become big holes. Don’t be that person. If you see a crack in the grout, use how to refresh grout without replacing it techniques to stop the damage before it starts. The physics of home maintenance are simple. Small problems are cheap to fix. Big problems are expensive. Stay ahead of the curve. Your wallet will thank you. Your house will thank you. And you won’t have to smell mold every time you take a shower. That is the ultimate goal. A clean, dry, and structural home that stands the test of time. That is what I build every day. That is what you should aim for too. This concludes the professional breakdown of shower wall repair. Apply these principles and you will have a repair that is stronger than the original wall. It is all about the details. It is all about the chemistry. And it is all about the pride you take in your work. Go get it done.”, “image”: {“imagePrompt”: “A high-detail cross-section technical illustration of a shower wall repair, showing layers of cement backer board, liquid waterproofing membrane, a layer of modified thin-set, and a ceramic tile being placed perfectly flush with existing tiles. The lighting should highlight the textures of the materials.”, “imageTitle”: “Professional Shower Wall Repair Cross-Section”, “imageAlt”: “Diagram showing professional layers of a shower wall tile patch including waterproofing and substrate.”}, “categoryId”: 0, “postTime”: “”}