
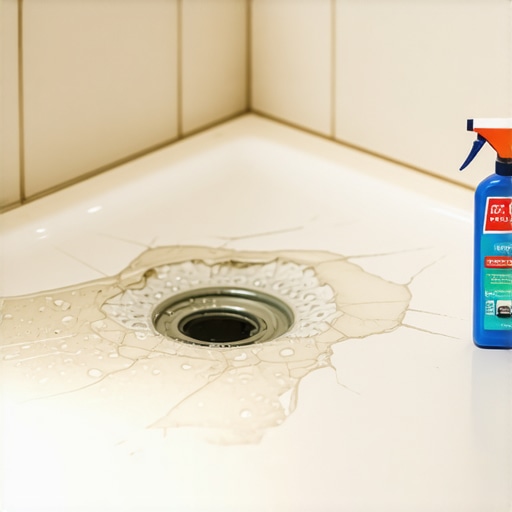
I spent three decades in the trenches of residential remodeling, and I have seen more failed shower pans than most men have seen sunsets. Most guys skip the leveling compound. They think the underlayment will hide the dip. It won’t. I spent three days grinding concrete on a job last month just so the floor wouldn’t click like a castanet. That same negligence is why shower bases crack. You have a heavy body standing on a thin sheet of acrylic or fiberglass with a literal void underneath it. The physics are simple. Without support, the plastic flexes. Eventually, the molecular chains of the polymer fatigue and snap. You hear that sickening pop while you are washing your hair, and suddenly, you are looking at a hairline fracture that is a direct portal for water to rot out your joists. Replacing a shower pan is a nightmare of plumbing and tile destruction. Before you tear out the walls, you need to understand the chemistry of structural resins and the mechanical reality of subfloor support.
The physics of shower pan failure and structural fatigue
A cracked shower base is caused by subfloor deflection, lack of mortar support, or material degradation in fiberglass and acrylic units. Repairing these cracks requires structural epoxy resins, fiberglass mesh reinforcement, and high-density foam injection to eliminate the underlying void and prevent further movement under weight.
When a manufacturer builds a shower base, they expect it to be set in a bed of mortar. This creates a solid foundation. In the real world, installers get lazy. They drop the pan on the plywood or concrete and walk away. This leaves air pockets. Every time you step on that spot, the material bends. Acrylic has a specific tensile strength. Once you exceed that limit, a crack forms. This is not just a cosmetic issue. It is a structural failure of the waterproofing envelope. Water travels through that crack via capillary action. It finds the subfloor, the plate of the wall, and the ceiling of the room below. By the time you see a leak in the kitchen downstairs, the rot has been festive for months. I have seen 2×10 joists turned into wet cardboard because a homeowner ignored a two inch crack for a season. You have to treat this like an engineering problem, not a cleaning chore. If you want to see how this fits into a broader bathroom strategy, you should look at showers that wow modern designs for 2025 to see what a properly supported unit looks like.
Identifying the scope of structural damage
To identify structural damage in a shower base, you must measure the crack length, check for vertical movement when stepping near the fracture, and use a moisture meter to detect saturated subfloors. Cosmetic scratches only penetrate the gelcoat, while structural cracks allow water to pass through the entire substrate.
You need to know what you are fighting. Take a flathead screwdriver and gently press near the crack. If the material sinks or feels spongy, the void underneath is significant. This means a simple surface patch will fail in forty eight hours. You are looking for movement. Any movement is the enemy of a permanent fix. In the world of high end flooring, we have a saying about subfloors.
“A floor is only as good as the subfloor beneath it; deflection is the enemy of every joint.” – Master Flooring Axiom
This applies to your shower pan too. If the pan moves, the patch will crack. You must stabilize the base before you worry about the aesthetics. If the crack is leaking, you are also dealing with potential mold. Check your baseboards for swelling. If you see water damage there, you might need baseboards makeover ideas to elevate your space after you fix the structural rot. The anatomy of the crack tells the story. A spiderweb pattern usually means something heavy was dropped. A long, straight crack indicates the pan is bowing over a joist or a dip in the slab.
The structural chemistry of epoxy resins and fiberglass
Epoxy resins for shower repair consist of bisphenol A and a polyamine hardener that create a cross-linked polymer chain with high shear strength. When combined with fiberglass matting, this creates a composite material that is stronger than the original acrylic or fiberglass shower base substrate.
Do not go to the hardware store and buy a tube of bathroom caulk. Caulk is a sealant, not a structural repair. You need a two part epoxy. The science of epoxy is about the bond at the molecular level. When you mix the resin and the hardener, an exothermic reaction occurs. The molecules bridge together. You want an epoxy with a high viscosity so it stays in the crack, but enough flow to penetrate the depth of the fracture. Fiberglass mesh is the skeleton. The epoxy is the muscle. Together, they form a reinforced bridge. I prefer resins that have a slower cure time. Fast cure epoxies can become brittle. A slower cure allows the chemical to bite into the edges of the plastic pan. This is called a mechanical tooth. Without a proper tooth, the patch will just peel off like a scab. We use similar principles when we discuss how to refresh grout without replacing it, though grout requires a different chemical profile for moisture resistance.
| Material Property | Acrylic Filler | Two-Part Structural Epoxy | Fiberglass Resin |
|---|---|---|---|
| Tensile Strength | Low | Very High | High |
| Flexibility | Moderate | Low (Rigid) | Very Low |
| Waterproof Rating | Excellent | Industrial Grade | Excellent |
| Adhesion Level | Surface Only | Molecular Bond | Mechanical Bond |
| Cure Time | 2 Hours | 12 to 24 Hours | 4 Hours |
The ritual of chemical decontamination and surface prep
Surface preparation for shower repair involves removing all soap scum with trisodium phosphate, sanding the area with 120-grit sandpaper to create a mechanical tooth, and wiping the surface with 99 percent isopropyl alcohol to remove residual oils and moisture from the crack.
You cannot glue anything to soap. Most people fail because they are lazy with the prep. You have spent years showering in that stall. It is covered in body oils, shampoo residue, and calcium deposits. If those are present, the epoxy will not stick. Period. I use a stiff brush and a heavy degreaser. Once it is clean, you have to sand it. You are not trying to make it smooth. You are trying to make it rough. Use 120 grit silicon carbide sandpaper. You want to see tiny scratches in the plastic. This increases the surface area for the epoxy to grab onto. Then, take a dremel tool with a small V shaped bit. You need to “vee out” the crack. This means making the crack wider at the top than at the bottom. It gives the epoxy a reservoir to sit in. If the crack is just a hairline, the epoxy will just sit on top and flake off. You have to be brave enough to make the crack look worse before it looks better. After sanding, use a vacuum to get every speck of dust out. Any dust left behind will act as a bond breaker. Finally, wipe it with denatured alcohol. Do not use nail polish remover. It has oils in it. Use the pure stuff.
Stabilizing the void with high density expansion foam
Stabilizing a shower base requires injecting high-density closed-cell polyurethane foam through small holes drilled near the crack to fill the void between the pan and the subfloor. This foam provides a rigid support structure that eliminates the deflection causing the crack to expand.
If the pan flexes when you stand on it, your patch will fail. You have to stop the movement. This is where the old timers’ trick comes in. You drill a few small holes, maybe 1/4 inch, through the pan in the area where the void is. Be careful not to drill through the subfloor or into a plumbing line. Then, you use a high density, closed cell expansion foam. Do not use the cheap stuff for windows and doors. That foam is soft. You need the rigid stuff. Inject it slowly. As it expands, it fills the air pocket. It turns into a solid block of support. Once it cures, it is like standing on concrete. This is the secret to a repair that lasts ten years instead of ten days. After the foam is hard, you cut the excess away and you have a solid foundation to apply your epoxy over. This is the same logic we use for flooring stability.
“Waterproof flooring is a myth if the substrate allows for vertical movement; the locking mechanism is the first casualty of a soft floor.” – Tile Council of North America Standard
Without support, you are just putting a band-aid on a broken leg.
The application of the structural composite
The composite application involves layering the mixed epoxy into the prepared crack, embedding a strip of fiberglass mesh into the wet resin, and applying a second coat of epoxy to encapsulate the fibers. This process must be completed within the resin’s pot life to ensure chemical integration.
Mix your epoxy on a clean piece of cardboard. Do not guess the ratios. If it says one to one, use a syringe to measure it. If you get the mix wrong, it will stay tacky forever and you will have to scrape it out with a putty knife and start over. That is a job I wouldn’t wish on my worst enemy. Spread the first layer into your V groove. Lay the fiberglass mesh over it. Use a small spreader to push the mesh into the resin. You want the resin to soak through the mesh. This is called wetting out. If there are air bubbles, the patch is weak. Pop them. Then, apply more epoxy over the top. Smooth it out as best you can, but do not obsess. You will sand it later. The goal here is strength. Let it cure for the full time suggested on the bottle. If it says twenty four hours, wait forty eight. The humidity in a bathroom can slow down the chemical reaction. If you are in a swampy climate like New Orleans, use a space heater to keep the room dry and warm during the cure.
Abrasive graduation and the art of the finish
Finishing the repair requires a progression of wet sanding from 400-grit up to 2000-grit sandpaper to blend the repair with the surrounding pan. A final application of a color-matched gelcoat or high-gloss marine grade paint restores the aesthetic appearance of the unit.
Now comes the elbow grease. You have a lump of hard epoxy in your shower. Start with 400 grit wet/dry sandpaper. Keep it wet. Water acts as a lubricant and keeps the sandpaper from clogging with plastic dust. Sand in a circular motion. Once the lump is level with the rest of the pan, move to 600 grit. Then 800. Then 1000. Each step removes the scratches from the previous step. By the time you get to 2000 grit, the patch will be smooth as glass. It will still be the wrong color, though. You need a gelcoat repair kit. These come with pigments. You have to play chemist again and match the white or almond of your shower. It is never just “white.” It is bone, or biscuit, or linen. Apply the color coat thinly. If you glob it on, it will look like a scar. You can also look into grout restoration secrets for long-lasting results to make sure the rest of the shower looks as good as your new repair. A bright white patch next to dingy grout looks terrible. Do the whole job.
Checklist for a permanent shower base fix
- Verify structural movement by applying weight near the crack.
- Procure two-part marine grade structural epoxy resin.
- Acquire high-density closed-cell polyurethane expansion foam.
- Clean the work area with trisodium phosphate (TSP).
- Decontaminate the fracture with 99 percent isopropyl alcohol.
- Carve a V-shaped channel into the crack using a rotary tool.
- Drill injection ports for foam stabilization if voids are present.
- Embed fiberglass mesh into the initial epoxy layer.
- Execute a wet-sanding progression from 400 to 2000 grit.
- Apply a UV-stable color-matched topcoat for aesthetic blending.
Maintaining the integrity of the repaired unit
Maintaining a repaired shower base requires the use of non-abrasive cleaners and the avoidance of harsh chemicals that can break down the epoxy bond. Regular inspection of the repair site ensures that any new stress fractures are identified before they compromise the subfloor.
You fixed it, but you didn’t turn it into steel. It is still a plastic pan. Stop using those abrasive scrubbing powders. They create micro-scratches that hold onto dirt and bacteria. Use a mild soap. If you want to keep the whole bathroom in top shape, check out tile cleaning tips for a sparkling bathroom in 2025 for the right way to maintain these surfaces. Also, keep an eye on your sealant. The caulk where the pan meets the wall is often the first place to leak. If that fails, water gets behind the pan and undermines your repair from the back. If you are looking for more sustainable ways to keep your home in order, eco-friendly tile solutions for sustainable homes in 2025 offers some great insights into materials that last longer and require less chemical intervention. This repair is about extending the life of your home. It is about being smarter than the guy who installed the pan. You are an architect of your own floor now. Treat it with the respect a structural element deserves. If you run into trouble or the crack is just too large, you might need professional help. You can always contact us for advice on serious structural flooring issues. The goal is a dry house and a solid floor. Anything less is just a disaster waiting to happen.