
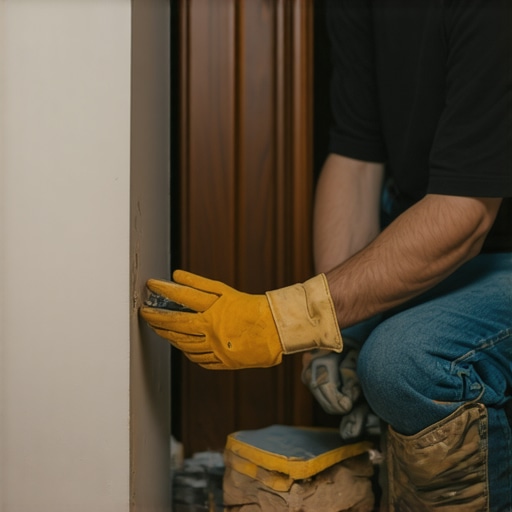
The engineering of invisible baseboard repair for door stop impact craters
Most homeowners and low-bid contractors look at a hole in a baseboard and see a cosmetic nuisance. I see a failure of kinetic energy absorption and a structural void that demands a chemical bond stronger than the surrounding wood fibers. If you have spent twenty five years on your knees with a chisel and a moisture meter, you know that a baseboard is more than a trim piece. It is the protective perimeter of your flooring system. When a spring-loaded door stop or a solid brass bumper punches through that surface, it creates a compression fracture that standard spackle cannot fix. Most guys skip the leveling compound and the structural fillers. They think a bit of white paste will hide the dip. It won’t. I spent three days grinding concrete on a job last month just so the floor wouldn’t click, and the same logic applies to trim. You do not just fill a hole. You reconstruct the substrate. To understand the best way to patch a hole in a baseboard from a door stop, we must look at the density of the material, the moisture content of the wood, and the shear strength of our patching compound. This is not about paint. This is about physics.
The structural failure of standard wall spackle in wood trim
Wall spackle and lightweight joint compounds are designed for gypsum-based drywall, which has a completely different expansion coefficient than wood or MDF. Using spackle on a baseboard leads to adhesion failure because the wood fibers swell and contract with seasonal humidity changes, causing the brittle filler to crack and eventually fall out of the impact site. I once walked into a house where a custom trim job was ruined because the installer used a water-based filler in a high-humidity environment. Within six months, every single patch had popped out like a cork from a bottle. Wood is a living, breathing material. Even after it is milled and primed, it reacts to the atmosphere. When you have a hole from a door stop, you are dealing with a localized area of crushed cellular structure. If you just smear drywall mud over it, you are inviting a callback. You need a material that can bite into the wood grain and stay there while the house moves around it. For those looking to upgrade their entire look after a repair, exploring chic baseboard designs that transform rooms in 2025 can provide a roadmap for a more durable and modern aesthetic.
“A floor is only as good as the subfloor beneath it; deflection is the enemy of every joint.” – Master Flooring Axiom
The molecular chemistry of two part epoxy wood fillers
Two part wood epoxies and high-performance resin fillers offer the only permanent solution for deep impact holes because they create a cross-linked chemical bond. Unlike water-based fillers that dry through evaporation, these resins cure through a chemical reaction, meaning they do not shrink as they harden and they maintain structural integrity throughout the repair. When you mix a resin with its hardener, you are triggering a process that creates a polymer chain. This is the same logic we use when we have to repair a subfloor before laying down expensive tile. If the foundation is weak, the finish will fail. For deep craters caused by heavy solid-core doors, I always reach for a polyester-based filler. These materials are much harder than the surrounding wood, which is why your sanding technique has to be perfect. You are essentially creating a synthetic wood plug that will never move. This is the level of detail required if you want to eventually look at baseboards makeover ideas to elevate your space without seeing the ghosts of old repairs staring back at you.
Preparing the crater for a structural bond
Surface preparation for a baseboard repair requires the mechanical removal of loose wood fibers and the stabilization of the impact site to ensure the patch does not delaminate. Use a sharp utility knife to bevel the edges of the hole, creating more surface area for the adhesive to grab onto. If you leave loose, crushed wood inside the hole, your patch is sitting on a bed of sand. It will fail. I use a small vacuum to pull out every microscopic speck of sawdust before I even think about opening a can of filler. If the baseboard is made of MDF, you have to be even more careful. MDF is essentially compressed paper and glue. When it gets hit, it mushrooms. You have to cut that mushroomed edge away so the surface is flush or slightly recessed. If you do not, you will have a hump in your baseboard that no amount of sanding can hide. This is the same discipline required for grout restoration secrets for long lasting results, where prep work determines the lifespan of the finish.
| Filler Type | Shrinkage Rate | Cure Time | Best Use Case |
|---|---|---|---|
| Spackle | High | 30 Minutes | Drywall pinholes only |
| Wood Putty | Medium | 2 Hours | Small nail holes in trim |
| Two-Part Epoxy | Zero | 15 Minutes | Deep door stop craters |
| PVA Wood Glue and Sawdust | Low | 24 Hours | Natural wood grain repairs |
Sanding protocols for a zero visibility finish
Sequential sanding grits ranging from 80-grit for bulk removal to 220-grit for final polishing are necessary to blend the repair into the factory finish of the baseboard. You cannot just rub a piece of sandpaper over the hole with your thumb and expect a flat surface. Your thumb is soft and will create a dip in the patch. You must use a hard sanding block. This keeps the abrasive surface perfectly flat against the trim, ensuring you only take down the high spots. I start with 100 grit to knock down the excess epoxy, then move to 150, and finish with 220. If you are working on a high-gloss finish, you might even go up to 320. The goal is to make the transition between the wood and the filler completely undetectable to the touch. Once the sanding is done, you need to use a tack cloth. A single speck of dust under your primer will look like a boulder once the topcoat dries. This attention to detail is why my floors and trim look like they were grown in place, not installed. If you are dealing with moisture in the area, perhaps near a bathroom, make sure to check out tile cleaning tips for a sparkling bathroom in 2025 to keep the entire room at a professional standard.
The seasonal movement of baseboards
Hygroscopic expansion and thermal contraction are the primary reasons why inferior patches fail over time as the home’s interior climate fluctuates. Wood is always seeking equilibrium with the air around it. In the winter, when the furnace is running and the air is dry, your baseboards will shrink. In the summer, they swell. If your patch is too rigid and has no bond strength, it will pop. This is why we leave expansion gaps at the edge of hardwood floors. The floor needs to breathe. While the baseboard is nailed to the wall, it still experiences internal stress. A proper repair involves using a filler that has a similar density to the wood itself. If I am repairing a solid oak baseboard, I might use a different approach than I would for cheap pine. Understanding the species of wood is part of being a master. You have to know the Janka hardness of the material you are working on. A soft pine baseboard will dent if you look at it wrong, while an oak board will fight back. If you are planning a more extensive renovation, consider eco-friendly tile solutions for sustainable homes in 2025 to complement your restored woodwork.
- Remove the door stop and clean the impact area thoroughly.
- Cut away loose wood fibers and flared edges with a utility blade.
- Mix a two-part polyester wood filler according to the manufacturer’s ratio.
- Apply the filler slightly higher than the surface to allow for sanding.
- Use a hard sanding block to level the patch once it is fully cured.
- Apply a high-quality primer before the final paint match.
- Reinstall the door stop, preferably in a slightly different location if possible.
The chemistry of adhesion and primer selection
Bonding primers are specifically formulated to bridge the surface energy gap between a synthetic resin patch and the organic cellulose of the wood. You cannot just slap paint on an epoxy patch. Most paints will not adhere properly to the slick surface of a cured resin. You need a primer that is designed to bite. I prefer an oil-based primer for wood repairs because it seals the grain and prevents any tannins from bleeding through the paint. If you are working with MDF, a water-based primer can actually cause the fibers to swell, ruining your perfectly sanded patch. It is these small technicalities that separate the masters from the amateurs. It is like knowing how to refresh grout without replacing it. It requires an understanding of the existing materials before you add anything new. If you don’t respect the chemistry, the chemistry won’t respect you.
“Wood moves. Science doesn’t care about your aesthetic preferences; it only cares about moisture and temperature.” – Master Flooring Axiom
Why your subfloor is lying to you
Subfloor deflection and joist vibration can travel up through the wall studs and affect the stability of baseboard patches in high-traffic areas. People think the floor and the wall are separate entities, but they are mechanically linked. If your subfloor has too much flex, every time someone walks past that door, the baseboard vibrates. Over thousands of cycles, that vibration can loosen a poor patch. This is why I am so obsessed with subfloor prep. I have seen floors that were beautiful on top but were rotting underneath because of a moisture issue in the crawlspace. That moisture eventually hits the baseboards. If your baseboard is absorbing water from the bottom, no patch in the world will stay in the middle. You have to solve the moisture problem first. This is a core tenet of professional installation. Whether you are looking at showers that wow modern designs for 2025 or fixing a door stop hole, the foundation is everything. If you have questions about your specific structural needs, you should contact us for a professional consultation. Protecting the integrity of the home starts at the floor and moves up.