
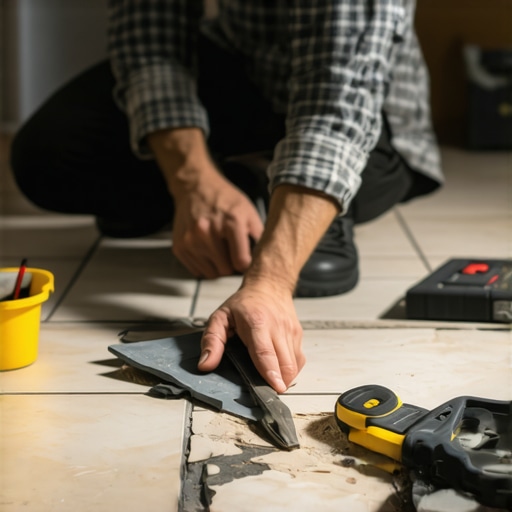
The hidden physics of hollow floor tiles and how to save them
Most guys skip the leveling compound. They think the underlayment will hide the dip. It won’t. I spent three days grinding concrete on a job last month just so the floor wouldn’t click like a castanet because the original installer thought a few extra globs of thin-set would bridge a half-inch valley. It never does. When you walk across a floor and hear that distinctive, empty thud, you are hearing the sound of a failed mechanical bond. It is the sound of an air pocket where there should be a solid, monolithic structure. This phenomenon, often called delamination, happens when the adhesive pulls away from the substrate or the back of the tile, usually because of poor transfer, improper trowel size, or a dusty subfloor that sucked the moisture right out of the mortar before it could hydrate. You do not always have to rip the whole thing out. If the tile is not cracked, we can perform a surgical injection that restores the structural integrity of the assembly without the dust and chaos of a full tear-out.
The ghost in the thin-set void
A hollow floor tile sounds empty because the bond between the tile and the substrate has failed, creating an air pocket that resonates when struck. This delamination occurs due to improper trowel techniques, moisture evaporation, or structural deflection. Fixing it involves injecting specialized low-viscosity resins through the grout lines to fill the cavity and re-establish a permanent bond.
When we talk about the physics of a hollow tile, we are looking at the failure of the interface. Ceramic and porcelain are rigid materials. Concrete and plywood subfloors are also relatively rigid, though they have different coefficients of thermal expansion. In a perfect world, the thin-set mortar acts as a bridge, interlocked into the microscopic pores of both surfaces. If an installer uses the spot-bonding method, also known as the five-dot method, they create massive air gaps. These gaps are structural weaknesses. Over time, the movement of the house or the simple weight of footsteps causes the tile to flex into those gaps. Eventually, the bond snaps. The sound you hear is the tile vibrating against the substrate, a phenomenon that can eventually lead to grout cracking or the tile itself snapping under a point load.
“A floor is only as good as the subfloor beneath it; deflection is the enemy of every joint.” – Master Flooring Axiom
The surgical injection protocol
To fix a hollow tile without lifting it, you must first map the void using a percussion tool and then drill small injection ports into the surrounding grout. A high-strength, low-viscosity adhesive is then pumped into these holes until the void is completely displaced. This method preserves the original layout while restoring the solid feel of the floor.
You need to start with a diagnostic sweep. I use a heavy plastic mallet or a dedicated sounding rod. Drag it across the floor. The tone will shift from a solid, high-frequency tap to a low, bassy thud when you hit the air pocket. Mark the edges of the hollow area with blue painter tape. This is your surgery zone. Do not just drill randomly. You want to hit the perimeter of the void to ensure the adhesive flows inward and outward to fill the space entirely. The tools for this are specific. You need a 1/8 inch or 3/16 inch carbide-tipped masonry bit. A standard bit will chatter and potentially chip the glazed surface of your tile. I always drill into the grout lines, never the tile itself. If you mess up a grout line, it is an easy fix with grout restoration secrets. If you crack a tile, you are back to square one.
| Adhesive Type | Viscosity Rating | Cure Duration | Structural Strength |
|---|---|---|---|
| Epoxy Resin | 500 cps | 24 Hours | Extreme |
| Acrylic Latex | 200 cps | 12 Hours | Moderate |
| Polyurethane Glue | 1200 cps | 6 Hours | High |
Physics of low viscosity resins
Low-viscosity resins are engineered to flow into microscopic gaps where traditional mortar cannot reach. These adhesives use capillary action to spread across the subfloor, filling the 1mm to 3mm air pockets that cause hollow sounds. Once cured, they create a bridge that is often stronger than the original cementitious bond.
The chemistry here is what makes the repair possible. We are usually looking for a water-based acrylic or a two-part epoxy. The material must have a surface tension low enough to allow it to spread across the dusty surface of the old thin-set. If the resin is too thick, it will just pool around the injection hole and create a new high spot, which is even worse. I prefer resins that remain slightly flexible. Floors move. Houses breathe. In humid environments like Florida or coastal regions, the subfloor might expand significantly. A brittle adhesive will just snap again in two years. You want something that can handle the microscopic shifts without losing its grip on the porcelain. While you are working on the floor, it is also a good time to check the chic baseboard designs at the perimeter, as gaps there often signal larger subfloor movement issues.
The drill and fill checklist
- Identify the hollow zone using a percussion test and mark with tape.
- Select a masonry bit that is slightly smaller than the width of the grout joint.
- Drill at least two holes on opposite sides of the tile to allow air to escape.
- Vacuum the holes thoroughly to remove all dust and loose mortar.
- Inject the adhesive slowly to avoid pressure build-up that could lift the tile further.
- Place heavy weights, such as five-gallon buckets of water, over the tile for 24 hours.
- Clean excess adhesive immediately with a damp cloth before it hardens on the surface.
Structural reality of the bond
A successful repair depends entirely on the cleanliness of the void and the type of substrate. If the subfloor is oil-contaminated or has high moisture vapor transmission, no adhesive will stick long-term. You must ensure the area is dry and free of pulverized mortar dust before beginning the injection process.
I have seen guys try to fix floors that were laid over old linoleum or adhesive residue. That is a fool’s errand. If the original bond failed because the substrate was contaminated, your injection resin will also fail. It is like trying to tape a dusty box. In showers, the situation is even more precarious. A hollow tile in a shower might mean the waterproofing membrane has delaminated from the mud bed. If you start drilling holes in modern shower designs, you risk puncturing the pan liner or the topical membrane. That turns a hollow sound into a thousand-dollar leak. Only use the injection method on dry-area floors unless you are 100 percent certain of the waterproofing depth.
“The bonding of ceramic tile to a concrete substrate relies on the mechanical interlocking of the cement paste into the pores of the surface.” – Substrate Engineering Manual
Why baseboards hide the truth
Baseboards often mask the structural deflection that causes hollow tiles at the perimeter of a room. If the subfloor is sagging near the walls, the tile will pull away from the thin-set, creating a hollow sound that starts at the edge. Proper perimeter expansion joints are required to prevent this stress from cracking the field tile.
Many homeowners ignore the importance of the expansion gap. The TCNA guidelines are clear. You need a gap at the perimeter of every room. If the tile is jammed tight against the wall, and the house settles, the tile has nowhere to go but up. This creates a tenting effect or a massive hollow spot. When you are performing your repair, take a look at the baseboard makeover ideas you might have planned. Ensure there is a proper 1/4 inch gap behind those boards. If there isn’t, you might need to undercut the drywall or the plate to give the floor room to breathe. Without that relief, your hollow tile repair will be a temporary fix. The pressure will eventually find the weakest link again.
Maintaining the cured assembly
Once the adhesive has cured and the grout is replaced, the floor must be maintained with pH-neutral cleaners to avoid degrading the new bond. Acidic cleaners can seep into grout pores and eventually weaken the acrylic resins used in the repair. Regular inspection of the grout joints will prevent moisture from re-entering the subsurface.
After the repair, you will need to match the grout. This is the part where most DIY attempts look like a hack job. You need to scrape out the old grout around the injection holes to a depth of at least 1/8 inch. Use a matching color-matched caulk or a small batch of the original grout. For long-term aesthetics, following tile cleaning tips is vital. Avoid saturated mopping. Water is the enemy of a repaired bond. If water gets under the tile again, it can emulsify certain types of injection glues or promote mold growth in the remaining air pockets. Keep it dry and keep it clean. A well-injected tile can last another twenty years if the house stays stable. It is about working with the physics of the building rather than against them. Hardwood and tile both require respect for moisture and movement. If you treat your floor like a structural element, it will perform like one. Stop looking at it as just a pretty surface and start treating it like the engineering challenge it is.